Cutscenes Part 1: Cameras
NOTE: This article is under construction until this NOTE goes away.
The Scene
In the scene we'll be creating, a City Watch guard is meeting an informant to hear about an upcoming bank heist. The script is simple: the two actors walk onstage, talk, and depart. The map is called Snitch.
Download the file snitch1.zip.txt, remove the ".txt" from the filename, and extract it into your darkmod folder. This includes a map with a dressed set, the two actors, a player start near some handy buttons, and a script to run the scene.
Camera creation
Open the map snitch1.map in Dark Radiant. In this map, center stage is the bulletin board on the north wall (+Y direction) of the courtyard. The two actors wait offstage, the guard at the end of a hallway to the NE, the informant on a porch to the West.
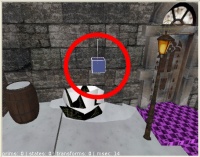
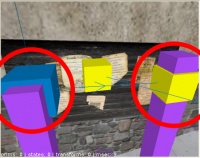
Let's add the first of four cameras. Create a camera entity (darkmod/func/func_cameraview) and move it so its origin is 32 units over the top of the bush in the SE corner. Give it the following Property/Value pairs:
- "name" "Camera1"
- "trigger" "1" (this camera will work when triggered)
When setting up any scene, you should first present a Master Shot to give the player a sense of where the scene is taking place. Is it in a dining room, in an alley, on the roof of a Builder cathedral? Camera1 will be our Master Shot camera, pulled back enough to present the courtyard and show where our scene is taking place.
Point the camera
Camera1 needs to be told where to look. To give it a focal point, create a target entity (darkmod/base/target_null) and place it near the center of the bulletin board. Give it the following Property/Value pair:
- "name" "target_null_1"
It's a good idea to use matching numbers in your camera/target pairs if you'll be using multiple cameras in a scene. There'll be less confusion as you develop your scene.
To point the camera at its target, give Camera1 the following Property/Value pair:
- "target" "target_null_1"
For a standing shot, this is all you need to do.
Camera control
Camera control is done through scripting. Let's look at the script that controls Camera1. Open snitch1.script, which sits alongside snitch1.map in the snitch folder.
If you haven't worked with scripts before, here's an overview of the file:
#ifndef __SNITCH_SCRIPT__
#define __SNITCH_SCRIPT__

void Roll1()
{
   ...
}

void Roll2()
{
   ...
}

...

void main()
{
}

#endif /* __SNITCH_SCRIPT__ */
Script parts:
- The #ifndef, #define, and #endif directives prevent this script from being included more than once.
- main() is a function (program, routine) executed once at the start of your map. Use it to initialize script-based activities.
- Each RollN() is a function to be executed at some point as the player plays your map.
Let's look at the function Roll1():
void Roll1()
{
   sys.println("Roll1 running"); // debug

   $Camera1.activate($player1);  // Switch view
   sys.wait(13);		 // duration of view

   $Camera1.activate($player1);  // Return control to player
}
What does each line do?
- sys.println() prints a text line to the console. This is useful when you're unsure whether a particular function is executing or not.
- $Camera1.activate($player1) triggers Camera1. $Camera1 is the name of the entitiy, activate is what you want it to do (in this case, trigger), and $player1 is the name of the entity triggering it. Triggering a camera removes control from the player and paints the screen with whatever the camera is looking at.
- sys.wait(13) says to wait 13 seconds. So our shot is 13 seconds long.
- The second $Camera1.activate($player1) deactivates the camera and returns control to the player.
Now, how do we run this function? Find the info_player_start in the SW corner of the map. Next to it you'll see three buttons with three yellow cubes above them. Each cube is a darkmod/targets/atdm:target_callscriptfunction entity. Each button is targeted to activate one of these entities, which, in turn, calls a function in the script file.
The leftmost target_callscriptfunction has these Property/Value pairs:
- "name" "Roll1"
- "call" "Roll1"
So when you push the leftmost button, it triggers Roll1, which calls the function Roll1(). When you design your own scenes, you don't have to use buttons to get the cameras started. You can use any type of trigger targeted at a target_callscriptfunction, or even a call from another script function, to get things moving.
Roll Camera 1
Let's run what we have so far.
Save the map, build it, and run it:
- dmap snitch/snitch1
- map snitch/snitch1
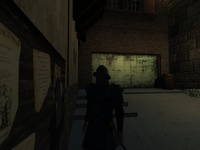
When the map starts, both actors will begin walking toward the bulletin board. (Don't worry about them attacking you; they're both on Team 0.) Once they've reached it, press the leftmost button on the wall to your right. Camera1 takes over and paints your Master Shot on the screen for 13 seconds. When it's finished, control returns to you.
Add a second camera
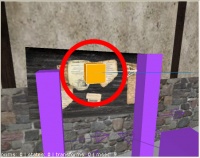
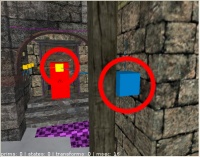
There are two path_corners in front of the bulletin board. Create another func_cameraview and place it between the bulletin board and the top of the leftmost path_corner. Give it the following Property/Value pairs:
- "name" "Camera2"
- "trigger" "1"
Create another target_null and place it near the top of the rightmost path_corner. Give it the following Property/Value pair:
- "name" "target_null_2"
Now point Camera2 at its target by giving it the following Property/Value pair:
- "target" "target_null_2"
Camera2 will give us a closeup shot of the guard.
Take a look at the middle button near the player start. It targets the middle target_callscriptfunction, which calls the Roll2() script function:
void Roll2()
{
   sys.println("Roll2 running"); // debug

   $Camera1.activate($player1);  // Switch view
   sys.wait(5);			 // duration of view

   $Camera2.activate($player1);  // Switch view
   sys.wait(5);			 // duration of view

   $Camera2.activate($player1);  // Return control to player
}
Roll2() rolls Camera1 for 5 seconds, rolls Camera2 for 5 seconds, then returns control to the player. Though there's no explicit request that Camera1 turn itself off, it's turned off when Camera2 takes over.
Roll Cameras 1 and 2
Save, build, and run the map. Once the actors are in place, press the middle button. A 5-second Master Shot will be followed by a 5-second closeup of the guard. Note that the guard is backlit, so his face is dark. We'll take care of that later when we talk about lighting.
Add the third and fourth cameras
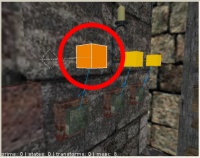
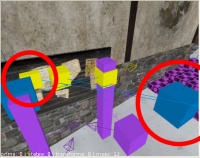
Let's add a closeup shot of the informant by placing Camera3 just behind the guard's shoulder and target_null_3 near the top of the leftmost path_corner.
And place a final camera, Camera4, near the western porch and place its target_null_4 near the player start.
The third target_callscriptfunction near the player start calls Roll3() in the script file. Looking at Roll3(), we see that it rolls Camera1 for 3 seconds, Camera2 for 7 seconds, Camera3 for 4 seconds, and Camera4 for 5 seconds.
What's the purpose of Camera4? When Camera4's view comes on the screen, you'll see that the player is invisible. You know you're on that porch, because you just pushed the third button. This invisibility allows the mapper to place the player anywhere in the scene. We'll see why this is important when we discuss sound later.
Save, build, run, and press button 3.
Wrapup
In Part 1, we've taken a look at placing stationary cameras in a scene, pointing them, passing control to them, and switching cameras.
Alongside snitch1.map and snitch1.script, which we've been using above, you'll find snitch1a.map and snitch1a.script, which include the cameras and targets we've discussed. You can build and run snitch1a.map and compare it to your own work.
Of course, you can go on and add more cameras to your map. Don't forget to change the *.script file!
In Part 2, we'll investigate splines and how they're used for camera movement.
