Light Textures and Falloff Images: Difference between revisions
Nbohr1more (talk | contribs) |
Nbohr1more (talk | contribs) |
||
| Line 322: | Line 322: | ||
To apply this texture to the Ambient_World you will need to follow these steps from [[A - Z Beginner Full Guide Page 2]] | To apply this texture to the Ambient_World you will need to follow these steps from [[A - Z Beginner Full Guide Page 2]] | ||
* In the Entity Inspector select the 'name' line | |||
* In the input at the bottom change it to ambient_world. Click the check button | |||
* Esc to DEselect it | |||
* Press J to list entities. | |||
* Click the map in the list and the whole list will open up | |||
* You should see ambient_world in there. | |||
* Click it and your light is selected and its radius reveals it clearly | |||
In this way you can name anything you want for your own convenience both so you can identify and find them easily. The list is in ASCII order so capitals first then lower case,thereafter in alphabetical order. | |||
* with the light selected, press L for the Light Inspector | |||
* Click the white rectangle Colour button and reduce the brightness (Value) to 8 or 10 and click OK. | |||
* Also in the Light Inspector you will see a list headed 'Texture' with 'fog' and 'lights' in the list; click the + sign against 'lights' to open up its list | |||
* In the 'lights' list select 'lights/ambientLightnfo'; this immediately goes in the properties of the light. | |||
* (modify this step to select your custom ambient texture definition) | |||
* L to close the Light Inspector | |||
=== Step 5 Resize the Light === | === Step 5 Resize the Light === | ||
Revision as of 01:08, 8 September 2010
Credits
While I am still getting this article in shape. Whatever notion I have on this topic was conveyed to me by the following members:
- plasticman
- Rich_is_Bored
Introduction
While The Dark Mod comes with a rich library of Light Shaders and Textures there are times when mappers may wish to customize the look of lighting further. Light Textures can be used for basic light painting tricks like projecting window-pane light on a floor to advanced uses like simulating the look of a baked light-map.
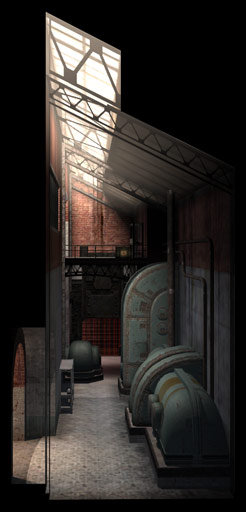
Lunaran (Matthew Breit) did an in depth look at the performance aspects of Light Shaders in Id Tech 4 and found that there is no performance loss for applying falloff Images and light textures to all the lights in your map. He used this new-found insight to develop a technique for making the most of light textures. Essentially he took screen-shots from specific views of his map (where light volumes affected the geometry in a predictable way) and then painted light textures that conform to the contours of the space and surfaces shown in the screen-shots.
Lunaran's method involves not only shaped projected and omni lights but also a shaped ambient (that is the deluxe method). Even without shaping the ambient a couple of custom-textured point lights can give you much richer lighting that the standard squares and circles that are commonly used.
To help you understand how these textures work you should imagine the silly flashlight mods for Doom 3 that cause your flashlight to show a pattern (like Bart Simpson's face or a Heart) on the surface that you shine the light on. Instead of shining these types of silly images, we are going to shine images that make the lighting look better by pretending to do stuff that real light does like bouncing of the ground or a wall.
As you have probably guessed, since this is a real light it DOES affect the Light Gem.
The Light Gem impact may be reduced via a falloff Image that confines the light close to the surface (mostly black with a small strip of illumination).
If someone has advanced knowledge, they could bake light-bounces to a UV mapped texture of a Model created from exported brush-work and then unwrap the texture and copy a portion of it into an image editor to be saved as a light texture as well. This tutorial is just for an artistic-style "winging-it" approach.
(Light Map creation tools outside the scope of this article)
- http://www.mahalo.com/how-to-learn-texture-baking-in-blender
- http://www.ambiera.com/irredit/index.html
- http://irrlicht.sourceforge.net/
Example from Rich_is_Bored
Just plop the file into the root of your Dark Mod installation, rename it to pk4, and then type "map test" at the console.
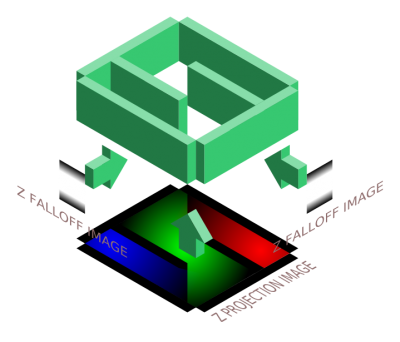

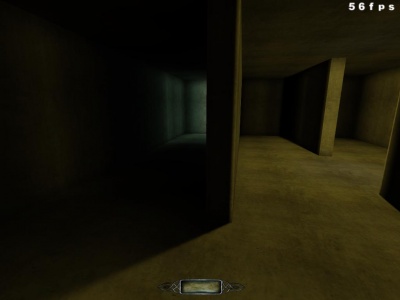
From Rich_is_Bored's forum post:
A light shader is constructed with two images. A projection image and a falloff image. The projection image is what is projected. The falloff image specifies the intensity of the projection as it passes through the light volume.
The reason this works is because an ambient light is not directional and bleeds through walls illuminating all faces equally.
The trick, and it's not employed in the example I posted but it is used in the custom Quake 4 level Strombine, is that you can rotate the light and change the direction of projection.
So in cases where the geometry in a space runs in a common direction you can paint a custom light image to fake radiosity, soft shadows, or even consolidate lights into a single entity.
In theory it's also possible to break a room into several light volumes to accommodate geometry that doesn't run the length of a room. I haven't tried this yet and I imagine it gets complicated.
Step 1 Planning
Once you have your map or map section built you will need to decide what lights will be direct and where you might want bounced light or moonlight to hit your geometry. If you have placed lights all over the place to approximate these bounced effects then you will need to pare-down some lights.
Layers.
To help with the Ortho-View method, it may be advisable to create Dark Radiant Layers that only contain geometry that runs parallel to the direction of the projected light volume.
- 1) CTRL + L open the Layers inspector then click "New" and label your new layer
- 2) Zoom to the desired are in Top Orthoview
- 5) CTRL + L to open the Layer Inspector
- 6) Un-check default so that only the new layer is in view
- 7) CTRL + TAB the Orthoview such that you are viewing the edge of the geometry as if it were projecting out towards you
- 8) Print Screen
Step 2 Screen-Shots and Texture Creation
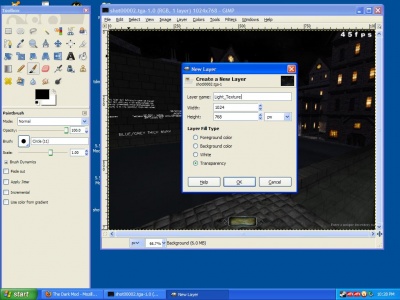
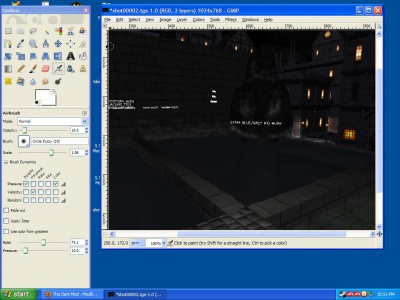
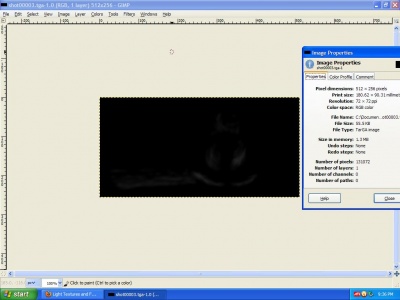
Whether you decide to use the deluxe method with a shaped ambient or just a couple of custom lights (here and there) unless you have a perfect memory for proportions, screen-shots will help you design the light texture and falloff texture.
If you decide to use the deluxe version shaped ambient, a bottom-view orthographic view of your map would probably be the best option (see Rich_is_Bored's example) but this depends on where the light origin is located (Strombine, for example, has several lights that are side-view or even angled).
For Lunaran's Projected light example, he shows a side-view screen that has an easy to predict light pattern (like a light waterfall).
If you have a good eye and want to create a show-piece look for some building (etc) you could use a straight view shot and use that to make a very detailed light texture that would be projected straight at the front view surface. I would caution, however, against using sharp contrast and instead make sure that every adjustment is a smooth gradient. The normal maps and geometry will do the rest of the work to create the details.
Load your screen-shot into your preferred image editor Photoshop, Gimp (etc) and create a new layer. Paint the lighting as desired to the new layer. Merge this layer with a black layer and save this merged image as a TGA texture.
Tools
GIMP Steps
(Continued from above)
- 9) Open GIMP
- 10) Edit > Paste
- 11) Tools > Selection Tools > Rectangle Select
- 12) Check "Fixed Aspect Ratio"
- 14) Image > Crop to selection
- 15) Image > Scale Image > Set the smallest linked XY value to 512 > Scale
- 16) Image > Canvas Size >
 the "Link" graphic so that it appears "broken" then change the higher XY value to 512
- 18) (Ensure that the Layers Dock is visible) Windows > Dockable Dialogs > Layers
- (Practice making each layer visible (eye) and selecting layers (far right of each labeled item) )
- 19) Select the new layer
( The bottom graphic icon in the Toolbox dockable is the Foreground\Background color tool )
- 20) Click the top rectangle in the "Change Foreground Color" icon
- 21) Change the HTML Notation to 666666 to select a gray value
- 22) Select the "Pencil" icon then change the brush to a smaller value like Circle 03
- 24) Hold SHIFT and a line should follow your pointer
- (Steps 20 through 25 should get you familiar with GIMP basic draw operations, a full GIMP drawing tutorial is outside the scope of this text)
Gradient Techniques
1) Choose the "Free Select" tool
(Lasso Icon, 3rd to the right in the upper-left of the Toolbox Dockable)
2) ![]() click for each point around the shape that you want the gradient to occur
click for each point around the shape that you want the gradient to occur
3) Click the "Blend" Icon (4th item down, 2nd over)
4) Ensure that the Foreground color is the light source color and the Background color is Shadow
5) Choose the "Shape" a free standing light might be "Radial" while a light close to a wall could be "Conical (Asym)"
6) Move the pointer into the selection area and ![]() then drag diagonally across the span of the selection area
then drag diagonally across the span of the selection area
SECTION INCOMPLETE: ALPHA CHANNEL ADJUSTMENT, and BOUNCE PREDICTION ARE PENDING
- Note: For Ambient lights to pass through geometry you must include an alpha channel. The alpha cannot be pure black "0" but instead must be at least "1".
A Z-Axis (direction of the light projecting from the source)... falloffImage texture will represent how bright the light is at a distance from the source. (I believe that you can defy the normal light physics by having a banded image that becomes dark and bright again with distance...)
The XY-Axis is what your custom light texture will draw.
I will recommend that you include "Z" and "XY" in the names of the textures so that you can easily distinguish them for the light definition.
Example Z-Direction Texture: My_Custom_Light1_Z.tga
Example XY-Direction Texture: My_Custom_Light1_XY.tga
Step 3 Material Definitions
If you haven't already done so, please create a separate folder for your map files. In this folder, create the following sub-directories:
- Materials
- Lights
Place your new textures into the Lights directory.
Open a text editor like Notepad++ or Wordpad and create document using this as a template:
lights/My_Custom_Light1
{

  lightFalloffImage makeIntensity( lights/My_Custom_Light1_Z.tga )

  {
  forceHighQuality
  map lights/My_Custom_Light1_XY.tga
  zeroClamp
  }

}
Save this document and change the extension from ".txt" to ".mtr" and copy it to your new Materials directory.
Since I'm not the sharpest knife about the proper TDM method I will use what I've gathered from Doom3world.
Take your light texture and material definition and pack them into a pk4 named zzz_custom_lights.pk4 and place this into your darkmod directory before launching Dark Radiant.
(I will cleanup the example with the proper TDM path and naming conventions soon).
Step 4 Dark Radiant Light Definitions
1) Select an existing light or create a new light
2) The Light Inspector should list the new Light Texture based on it's specification in the Materials directory
3) Apply the Light Texture and review it's properties in the Entity Inspector pane
To apply this texture to the Ambient_World you will need to follow these steps from A - Z Beginner Full Guide Page 2
- In the Entity Inspector select the 'name' line
- In the input at the bottom change it to ambient_world. Click the check button
- Esc to DEselect it
- Press J to list entities.
- Click the map in the list and the whole list will open up
- You should see ambient_world in there.
- Click it and your light is selected and its radius reveals it clearly
In this way you can name anything you want for your own convenience both so you can identify and find them easily. The list is in ASCII order so capitals first then lower case,thereafter in alphabetical order.
- with the light selected, press L for the Light Inspector
- Click the white rectangle Colour button and reduce the brightness (Value) to 8 or 10 and click OK.
- Also in the Light Inspector you will see a list headed 'Texture' with 'fog' and 'lights' in the list; click the + sign against 'lights' to open up its list
- In the 'lights' list select 'lights/ambientLightnfo'; this immediately goes in the properties of the light.
- (modify this step to select your custom ambient texture definition)
- L to close the Light Inspector
Step 5 Resize the Light
Try to maneuver to where you created your original screen-shot.
Position the light and light texture so that it matches the orientation that you used in your screen-shot plan image.
Envshot Method
Rather than having to plan angles and approximate bounces by eye this method may save some time (depending on the light positioning considerations)
1) Illuminate your scene with as many point and projected lights needed to achieve your look (dont worry about FPS)
2) Remove the primary light sources
3) Set your resolution to 640x480
4) Position Point Lights to hit 6 direction surfaces (matching an envshot)
(Note: A prefab with 6 projected lights would speed this process...)
5) Create an envshot from the origin position for step 4
6) Modify the resulting tga's to exclude details that are not created via the remaining lights
7) Blur any weak bounce lights
8) Create projected Ambient Lights using as many of the modified envshot's as needed for the light Z-projection textures
9) (Create a Falloff Image that reduces the beam intensity closer to the origin)
Example Light Shader
(from Strombine)
lights/aa_1_sky1
{
  lightFalloffImage makeIntensity( gfx/lights/1_sky1_z.tga )
  {
  forceHighQuality
  map gfx/lights/1_sky1_xy.tga
  red Parm0 * 2
  green Parm1 * 2
  blue Parm2 * 2
  zeroClamp
  }
}
Example Ambient Light Shader
(from Strombine)
lights/aa_1_amb1
{
  ambientLight
  lightFalloffImage makeIntensity( gfx/lights/xrampup.tga )
  {
  forceHighQuality
  map gfx/lights/1_amb1_xy.tga
  colored
  // zeroClamp
  }
}
TDM Examples
Look in tdm_textures_base01
tdm_light_shadows
tdm_light_textures
See also
- Light Baking Thread: http://modetwo.net/darkmod/index.php?/topic/11416-light-baking/
- Another Light Baking Thread: http://modetwo.net/darkmod/index.php?/topic/4751-lightmaps-in-doom-3-engine-a-hybrid-approach-to-real-time-lighting
- Strombine: http://www.lunaran.com/page.php?id=165
- Strombine at Quake3world: http://www.quake3world.com/forum/viewtopic.php?t=29872
- Kabits Outdoor lighting (references a similar approach) http://www.katsbits.com/tutorials/idtech/dynamic-outdoor-lighting-techniques.php
- Doom3world Projected Lights Part II http://www.doom3world.org/phpbb2/viewtopic.php?t=6314
