Layers: Difference between revisions
Lostbuthappy (talk | contribs) Rewrote the article, explained new features and changed/resized the screenshots (wuxga is a bit heavy) |
→Alternatives: added "selection focus" because I think it's related |
||
| (5 intermediate revisions by 2 users not shown) | |||
| Line 12: | Line 12: | ||
* By clicking on the checkbox to the left of the layer name you can show/hide a layer respectively it's elements | * By clicking on the checkbox to the left of the layer name you can show/hide a layer respectively it's elements | ||
* Clicking the layer name itself will select/deselect all members of that layer. | * Clicking the layer name itself will select/deselect all members of that layer. | ||
* The two buttons to the right of the | * The two buttons to the right of the layer name allow you to change it's name and to delete a layer (in that order). If you delete a layer, it's elements will not be removed from the map, but assigned to the Default layer instead. | ||
* Click on ''New'' to create a new layer. You'll be prompted to give it a unique and - preferably - meaningful name. | * Click on ''New'' to create a new layer. You'll be prompted to give it a unique and - preferably - meaningful name. | ||
| Line 20: | Line 20: | ||
Select one or more elements and then right click anywhere in the orthogonal view. At the bottom of the context menu you should see the following items: | Select one or more elements and then right click anywhere in the orthogonal view. At the bottom of the context menu you should see the following items: | ||
* '''Create Layer...''': Same as ''New'' in the layer inspector. | * '''Create Layer...''': Same as ''New'' in the layer inspector. | ||
* '''Add to Layer...''': If you add something to a layer, it will become a member of this layer but also remains in the layers it | * '''Add to Layer...''': If you add something to a layer, it will become a member of this layer but also remains in the layers it already belongs to. | ||
* '''Move to Layer...''': Same as above, but the element will exclusively be a member of the newly assigned layer. | * '''Move to Layer...''': Same as above, but the element will exclusively be a member of the newly assigned layer. | ||
* '''Remove from Layer...''': Removes an element from a layer. Note that the shows all layers, not only those that the selected element is a member of. | * '''Remove from Layer...''': Removes an element from a layer. Note that the list shows all layers, not only those that the selected element is a member of. | ||
== Alternatives == | == Alternatives == | ||
There are no real alternatives to layers but | There are no real alternatives to layers but three very convenient companions that you may use alongside: | ||
* Select anything you don't want to see and press {{Key|H}} to hide it from view. Press {{Key|Shift+H}} to show it again. | * Select anything you don't want to see and press {{Key|H}} to hide it from view. Press {{Key|Shift+H}} to show it again. If you hide a selection then all the elements you hid previously will remain invisible. | ||
* With [[Defining custom Filters in DarkRadiant|filters]] you can hide specific kinds of entities or textures. | * With [[Defining custom Filters in DarkRadiant|filters]] you can hide specific kinds of entities or textures by using [http://en.wikipedia.org/wiki/Regex regular expressions]. | ||
{{editing}}{{darkradiant}} | |||
* With "Selection Focus" you can select some things, go into "Selection Focus" mode (Default key Ctrl-F, if you want to modify the key, it's named "ToggleSelectionFocus") and then you can modify those things without being able to select and modify surrounding elements in the map, but the surroundings are still visible when "Selection focus" is active, while with filters and layers other things get hidden in order to focus on specific things. | |||
Latest revision as of 23:50, 1 December 2025
Overview

The idea of layers to organize and simplify the users experience in editing media is not a new one. Most image editing software like Photoshop or The Gimp have this feature as well as several 3D modeling/mapping programs, including Dark Radiant, of course. If you are new to the concept of layers, just imagine them as a convenient way to hide elements that are currently in the way. Please note that layers are only a tool to organize your map, they have no effect in the game.

The Layer Inspector
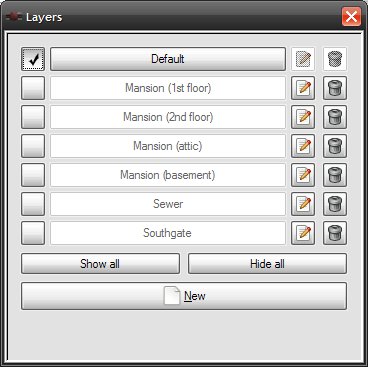
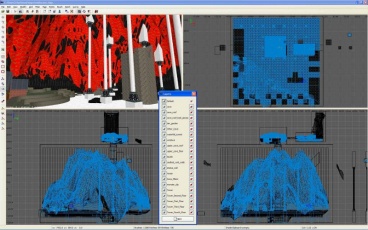
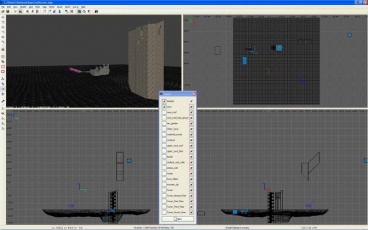
To use Dark Radiant's layer feature, open the layer inspector with the default shortcut Ctrl+L or via the View->Layers menu entry. If you haven't tinkered with layers yet you should see a list with exactly one entry called Default (unlike in the screenshot to the right). This is the layer that Dark Radiant automatically creates for you when you begin a new map and that every element belongs to unless you reassign it. It is in every map and can not be removed.
In the layer inspector window you can do the following things:
- By clicking on the checkbox to the left of the layer name you can show/hide a layer respectively it's elements
- Clicking the layer name itself will select/deselect all members of that layer.
- The two buttons to the right of the layer name allow you to change it's name and to delete a layer (in that order). If you delete a layer, it's elements will not be removed from the map, but assigned to the Default layer instead.
- Click on New to create a new layer. You'll be prompted to give it a unique and - preferably - meaningful name.

How to Assign Elements to Layers
Select one or more elements and then right click anywhere in the orthogonal view. At the bottom of the context menu you should see the following items:
- Create Layer...: Same as New in the layer inspector.
- Add to Layer...: If you add something to a layer, it will become a member of this layer but also remains in the layers it already belongs to.
- Move to Layer...: Same as above, but the element will exclusively be a member of the newly assigned layer.
- Remove from Layer...: Removes an element from a layer. Note that the list shows all layers, not only those that the selected element is a member of.
Alternatives
There are no real alternatives to layers but three very convenient companions that you may use alongside:
- Select anything you don't want to see and press H to hide it from view. Press Shift+H to show it again. If you hide a selection then all the elements you hid previously will remain invisible.
- With filters you can hide specific kinds of entities or textures by using regular expressions.
- With "Selection Focus" you can select some things, go into "Selection Focus" mode (Default key Ctrl-F, if you want to modify the key, it's named "ToggleSelectionFocus") and then you can modify those things without being able to select and modify surrounding elements in the map, but the surroundings are still visible when "Selection focus" is active, while with filters and layers other things get hidden in order to focus on specific things.