Cutscenes Part 2: Splines and Camera Movement: Difference between revisions
No edit summary |
No edit summary |
||
| Line 7: | Line 7: | ||
Download the file [snitch2.zip.txt], remove the ".txt" from the filename, | Download the file [snitch2.zip.txt], remove the ".txt" from the filename, | ||
and extract it into your ''darkmod'' folder. This includes | and extract it into your ''darkmod'' folder. This includes our ''Snitch'' set with all the cameras we created in Part 1. | ||
The first shot we want to create is to have the camera slowly rise from the porch to the south of the bulletin board while pointed in the direction of the bulletin board. To accomplish this, we'll need to add a spline (NURBS curve), a ''func_mover'', a ''func_cameraview'', and a ''target_null''. | |||
In Dark Radiant, open ''snitch2.map''. In the XY view, shift the view so the porch south of the bulletin board (in front of the tall door) is near the center of the view. From the main menu, select ''Curve->Create NURBS Curve''. This creates a spline curve with its origin over the porch. | In Dark Radiant, open ''snitch2.map''. In the XY view, shift the view so the porch south of the bulletin board (in front of the tall door) is near the center of the view. From the main menu, select ''Curve->Create NURBS Curve''. This creates a spline curve with its origin over the porch. | ||
Give this spline the following key/value pair: | |||
* "name" "Spline5" | |||
[[Image:Spline1.jpg|200px|thumb|left|Spline5 in XY View]] [[Image:Spline1a.jpg|200px|thumb|center|Spline5 in Camera View]] | |||
{{clear}} | |||
Movement along this spline will begin at its origin and follow its path. At the moment, the path curves away from the origin, and lies in the XY plane. Since we want the camera to rise straight up, we need to change the control points of the spline to create a straight rising path. | |||
With Spline5 selected, press the V key to enter Vector mode. Two green dots will appear along the path. These are control points, and we're going to adjust them. In the YZ view, drag the leftmost control point so it's 16 units directly above the spline's origin. You might need to set the grid size to 1 to do this. | |||
Now drag the rightmost control point so it's 48 units above the spline's origin.[[Image:Spline5b.jpg|200px|thumb|right|Spline5 Halfway There]] | |||
In the camera view, the spline's path has changed, but it's still a curve, so we have to make two more adjustments. | |||
Switch to the XY view and drag both control points so they're directly over the origin. | |||
[[Image:Spline5c.jpg|200px|thumb|left|Spline5 Finished]] | |||
==Camera Movement== | ==Camera Movement== | ||
{{Template: Cutscenes}} | {{Template: Cutscenes}} | ||
Revision as of 19:40, 2 September 2010
NOTE: This article is under construction until this NOTE goes away.
Splines
Moving cameras can add a nice touch to a scene if not overused. Splines provide a path a camera can follow.
Download the file [snitch2.zip.txt], remove the ".txt" from the filename, and extract it into your darkmod folder. This includes our Snitch set with all the cameras we created in Part 1.
The first shot we want to create is to have the camera slowly rise from the porch to the south of the bulletin board while pointed in the direction of the bulletin board. To accomplish this, we'll need to add a spline (NURBS curve), a func_mover, a func_cameraview, and a target_null.
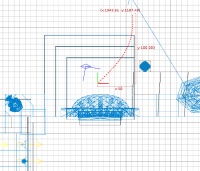
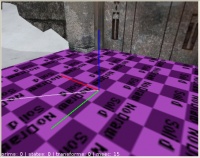
In Dark Radiant, open snitch2.map. In the XY view, shift the view so the porch south of the bulletin board (in front of the tall door) is near the center of the view. From the main menu, select Curve->Create NURBS Curve. This creates a spline curve with its origin over the porch.
Give this spline the following key/value pair:
- "name" "Spline5"
Movement along this spline will begin at its origin and follow its path. At the moment, the path curves away from the origin, and lies in the XY plane. Since we want the camera to rise straight up, we need to change the control points of the spline to create a straight rising path.
With Spline5 selected, press the V key to enter Vector mode. Two green dots will appear along the path. These are control points, and we're going to adjust them. In the YZ view, drag the leftmost control point so it's 16 units directly above the spline's origin. You might need to set the grid size to 1 to do this.
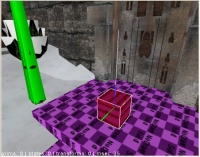
Now drag the rightmost control point so it's 48 units above the spline's origin.
In the camera view, the spline's path has changed, but it's still a curve, so we have to make two more adjustments.
Switch to the XY view and drag both control points so they're directly over the origin.


