Layers
From The DarkMod Wiki
- Brief Overview:
- The idea of layers to organize and simplify the users experience in editing media is not a new one. Photoshop has it as well as several 3D programs, and now DarkRadiant joins the list of programs to feature this powerful tool.
- Usage:
- In 2D applications in which you edit images such as in photoshop, the layers are used to turn off/on certain parts of the image, and/or add special effects to that layer. Things work a bit differently in 3D applications as a layer can consist of anything you want in a 3D space, whether the parts of the layer are in front, below, above, behind it doesn't matter.
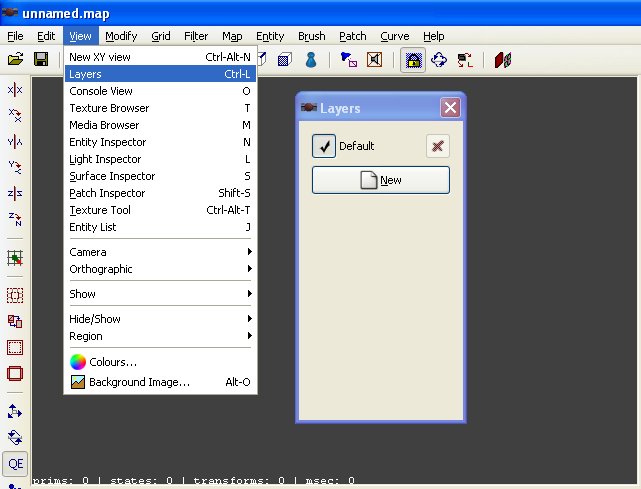
- To use the layers inspector, first we have to open it. This is done by using either the menu or the keyboard shortcut. The default shortcut is Ctrl+L, otherwise use the menu to open it (View->Layers) as shown in the screenshot below. As you can see their is already a layer created for you called Default. When creating a map, everything will be created in this layer which is fine for a small test map, but as a map grows in complexity and size it is a good idea to try and segregate components of the map to make the mapping process easier.
- For example in my current map, it is almost impossible to continue to map without layers. Here is a screenshot of how things look when I open my map.
- Now I can turn hide an entire group of objects/brushes/etc. by clicking on the checkmark of the appropriate layer.
- For example when I need to add to the bottom cave I turn off almost all the layers that I don't need. Right now the tower is in the Default layer, but will be moved to it's own layer called Tower later when it's finished.


