Creating a walkcycle
From The DarkMod Wiki
This is a global description of how i create a basic walkcycle in general - Squill
- Once you've got your rig you can setup the scene. For a standard walkcycle I usually take 24 frames (2 steps in 1 second). For the darkmod guards i used 36 frames which is a more relaxed walk speed.
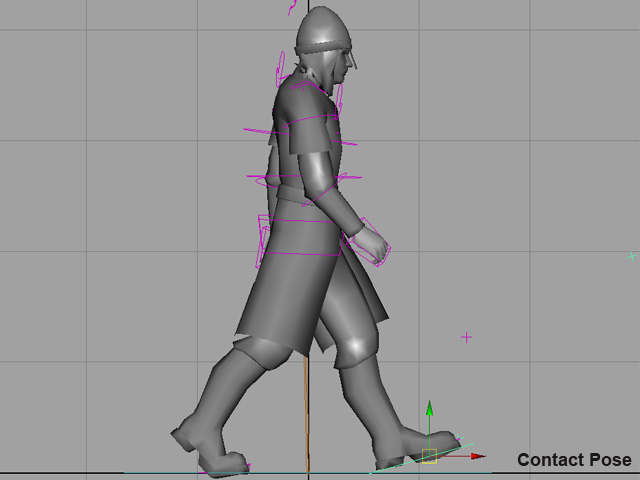
- Start with placing the feet in the "contact pose" at frame 0. Don't start at frame 1 because this creates uneven frames and will cause 1 of the feet to slide in the end.
- The foot behind is lifting the heel a bit so your character is standing on the ball of his foot. Use the lift heel option on the foot ctrl's (sometimes called roll) to do this.
- Copy the keys of frame 0 of the feet to the last frame (24) making it a loop.
- Do the same on frame 12 but with the feet posed reversed.
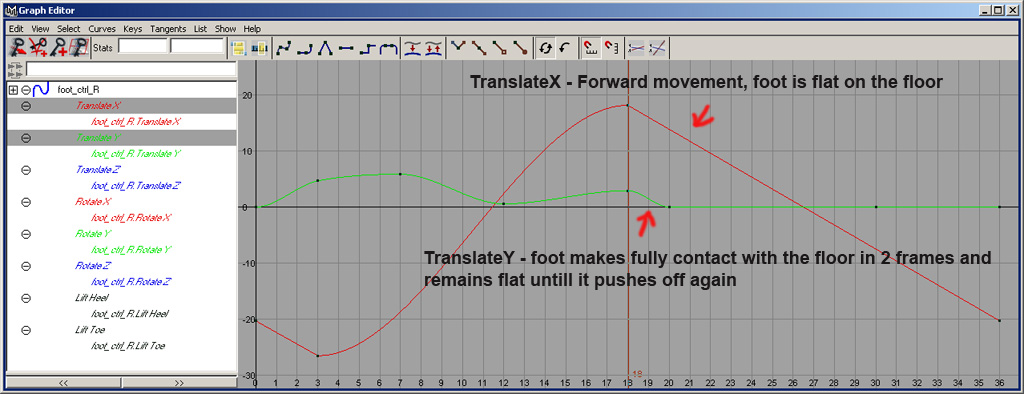
- At this point i'll check the Z-axis transform(your character is facing the Z-axis in this example) of the feet in the graph/curve editor.
- From the moment a foot first hits the ground until it lifts up again, the transform curve should be a linear curve because it's flat on the ground (frame 0-12 for left foot/12-24 for right foot).
- Same thing for the up axis(Y) which should be 0 and flat in the graph editor.
- You can take 1 or 2 frames for the foot to rotate flat on the ground after the contact pose.
- At frame 10 select the foot that's moving forward and move it up a bit and rotate the heel up with the toe's pointing down. That's your basic passing pose, you may have to lock the other foot on the ground if it's floating.
- About 3 or 4 frames after the contact pose i rotate the foot behind almost vertical and place it just above the ground which creates the illusion of the foot pushing itself off the ground. It takes lot of practice to get the roll of the foot right while it pushes of.
- You'll probably see the knees snap but that's something you can fix by watching the curves carefully and placing the right keys.
- Don't set to much keys on the feet but just the ones which define the movements and it's also easier to edit instead of having to tweak a whole bunch of keys.
- Now you have the basic movement of the feet and you can start working on the hips.
- First focus on the up & down movement. After the contact pose it moves slightly down, from the passing pose it goes back up.
- If you exaggerate the hip movement you can exactly see what it's doing. Observe and learn how people are walking, everyone walks different, adding weight to your animation makes it come alive and believable.
- I go back and forth between the legs and hips until i'm satisfied with the movements. Only after i've got the global movements of the hips and feet right i'll move on to the upper body.
- For more reference you can look into this animation file which is the standard walk on 36 frames: http://72.8.59.188/TheDarkMod/wiki/walk36.zip

