Creating LOD Models
Introduction
TDN v1.03 will have a LOD system, where the engine can replace models that are far away with simpler versions. The same technique can also be applied manually, by placing decals at some distance to create the illusion of more details.
This article details how to create models that can be used for such purposes and what the performance gains are.
The tutorial assumes you use Gimp, but a similiar technique will work with Photoshop or any other image editing program.
Creating the model
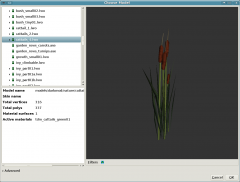
Start with a suitable model
I used the cattails4.low model, as I am using it in a map of my own, and it is a very detailed model that is still compact and thus promises a good speedup with a simple process:
Create screenshots from DR
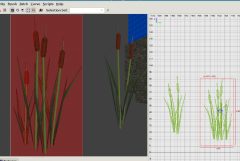
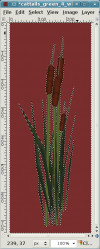
I put the model into a map, removing everything that was visible behind it, and then create a simple patch mesh behind it, and texture it with textures/sfx/white. When you select this patch in DR, it gives a nice uniform brown color, which we can later use to sep. the background from the model itself:
Note:' Make sure you draw the camera view from DR as big as possible to capture the highest quality possible.
Then I used the screen capture program from KDE to create screenshots and open them up in Gimp. One shot from the front, one from the side. Try to align the camera as level and at the center of the model as possible. The exact alignment isn't nec, but it simplifies things somewhat.
Make sure you put the patch completely behind the model. Then take a screenshot and load it into Gimp.
The texture
We now work in Gimp:
- Cut out the model, the size does not matter yet:
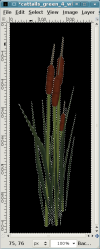
- Select "Select by similiar colors" and click on the brown, then fill the selection with black:
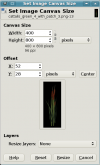
- Now "Resize the canvas". That means you change the dimensions of the image, but don't scale it! Select as a size that fits closely (but not pixel-perfect), and is either square, or in my case 2:1 or 1:2.
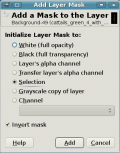
- Add a mask to the current layer.
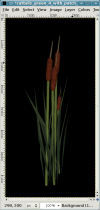
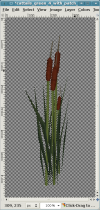
- You should end up with a view like this.
- Now scale the image so it is a power of 2. Don't go higher than 512, as this is a texture for a model far away. Even 256 pixels might be sufficient.
Done for now in Gimp.
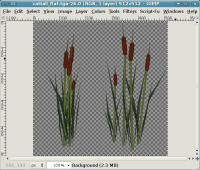
Note: To avoid having to redo some steps, create both views (side and front) in the same texture. This is called a "texture-atlas" and improves performance, see the section about Optimizing for more info:
The material definition
Create a material definition, here is an example:
textures/darkmod/decals/vegetation/cattails_green4_side
{
    qer_editorimage textures/darkmod/decals/vegetation/cattail_flat_side
    surftype15
    description "foliage"

    // twosided  // See later section about optimizing!
    nonsolid

    {
        blend diffusemap
        map textures/darkmod/decals/vegetation/cattail_flat_side
        alphatest 0.5
    }

    // TDM Ambient Method Related
    {
        if (global5 == 1)
        blend add
        map             textures/darkmod/decals/vegetation/cattail_flat_side
        scale           1, 1
        red         global2
        green           global3
        blue            global4
    }
    {
        if (global5 == 2)
        blend add
        program ambientEnvironment.vfp
        vertexParm      0       1, 1, 1, 1      // UV Scales for Diffuse and Bump
        vertexParm      1       1, 1, 1, 1  // (X,Y) UV Scale for specular, Z: ambient reflection scale
        vertexParm      2       global2, global3, global4, 1
        vertexParm      3       0
        fragmentMap     0       cubeMap env/gen1
        fragmentMap     1       _black                                              // Bump
        fragmentMap     2       textures/darkmod/decals/vegetation/cattail_flat_side  // Diffuse
        fragmentMap     3       _black          // Specular
    }
}
Note: If you make the material two-sided, then you can save creating the "backside" patch. However, D3 will do so when it loads any model using this material, and the "backside" is created as an extra surface. This means it will use up one extra drawcall. To avoid this, we create a one-sided material, and create the backside ourselfs:
Create the patches, export as ASE
The model in game
Optimizing
Texture atlas
One-sided material with duplicated patches
Result in game
- Comparisation
- Performance test with entities
See also
- The LOD system
- http://en.wikipedia.org/wiki/Texture_atlas
