Layers
From The DarkMod Wiki
Layers
- Brief Overview:
- The idea of layers to organize and simplify the users experience in editing media is not a new one. Photoshop has it as well as several 3D programs, and now DarkRadiant joins the list of programs to feature this powerful tool.
- Usage:
- In 2D applications in which you edit images such as in photoshop, the layers are used to turn off/on certain parts of the image, and/or add special effects to that layer. Things work a bit differently in 3D applications as a layer can consist of anything you want in a 3D space, whether the parts of the layer are in front, below, above, behind it doesn't matter.
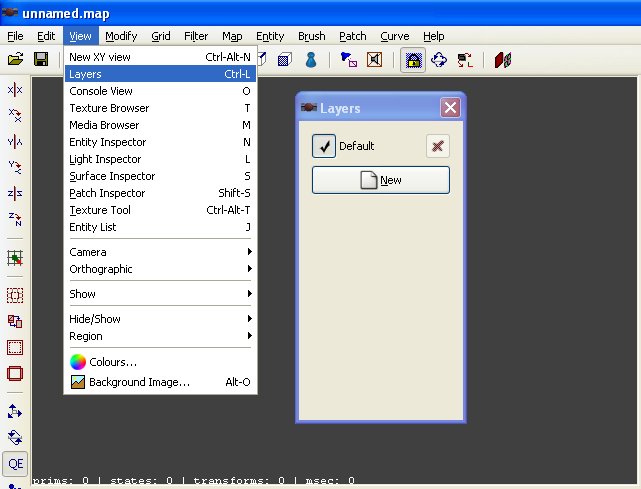
- To use the layers inspector, first we have to open it. This is done by using either the menu or the keyboard shortcut. The default shortcut is Ctrl+L, otherwise use the menu to open it (View->Layers) as shown in the screenshot below. As you can see their is already a layer created for you called Default. When creating a map, everything will be created in this layer which is fine for a small test map, but as a map grows in complexity and size it is a good idea to try and segregate components of the map to make the mapping process easier.
- A Short Layers Tutorial
- In order to help you understand the flexibility of the layer system, I have written this short tutorial. So on to step 1;
- First we are going to create a small test room. So create a box that is 512x512x256 and texture it with caulk. Now click on the Make Room button to hollow out the room. Now add the player starting point and texture the inside surfaces however you like. Your room should resemble the screenshot below.
