How to create a pond: Difference between revisions
This article describes how to setup a realistic looking pond using patches |
No edit summary |
||
| Line 12: | Line 12: | ||
This is very basic knowledge you can use in a lot of different situations. | This is very basic knowledge you can use in a lot of different situations. | ||
First of all, create a 3x9 patch. Select the view from which you can see it from above. What we are aiming for is to have it connected together so it ends up round. As the patch contains out of 9 vertices in one direction, we want to have three vertices each point towards another angle in 45° steps, so that the last vertices coincidents with the first. | First of all, create a 3x9 patch. Select the view from which you can see it from above. What we are aiming for is to have it connected together so it ends up round. As the patch contains out of 9 vertices in one direction, we want to have three vertices (the columns) each point towards another angle in 45° steps, so that the last vertices coincidents with the first. | ||
At next we bring them roughly into their target destinations, what should look as followed | At next we bring them roughly into their target destinations, what should look as followed | ||
[[File:patch1.png|600px| | [[File:patch1.png|thumb|600px|none]] | ||
Then turn the columns so they face into the right direction. Note that you can select multiple vertices and rotate them using "rotate and scale". | |||
[[File:patch2.png|600px|none]] | |||
Than get the vertices into their rough end-places (the connecting lines should stand parallel to each other) ... | |||
[[File:patch3.png|600px|none]] | |||
and select all vertices and snap them to grid (shortcut: ctrl+g). | |||
[[File:patch4.png|600px|none]] | |||
== How to create the pond == | |||
Here are the steps you have to follow to create a pond. | |||
1. Create your hole | |||
[[File:pond1.png|600px|none]] | |||
2. Create a patch (5x9 in this case) | |||
[[File:pond2.png|600px|none]] | |||
3. and give it a proper shape | |||
[[File:pond3.png|600px|none]] | |||
4. make it round (see above) | |||
[[File:pond5.png|600px|none]] | |||
5. and bulge it (patch -> bulge patch) | |||
[[File:pond6.png|600px|none]] | |||
Note that you may have to realign the end points afterwards. | |||
6. Create a 5x5 patch and drag the outer vertices upwards. Bulge it if you like to | |||
[[File:pond7.png|600px|none]] | |||
7. Than add your water. All the textures were paste projected. | |||
[[File:pond9.png|600px|none]] | |||
That's it. | |||
For pictures of the ingame results see [http://forums.thedarkmod.com/topic/14647-how-can-i-make-a-realistic-looking-pond/, here]. | |||
--[[User:Obsttorte|Obsttorte]] ([[User talk:Obsttorte|talk]]) 15:16, 8 April 2013 (EDT) | |||
Revision as of 19:16, 8 April 2013
Introduction
When mapping you may often want to create natural looking things like a pond for example. Natural means the same as organic, thus meaning uneven - non-blocky. The best way to achieve this goal is to use patches.
This article attempts to describe how to use them to create proper results with a low amount of time.
The content of this article is closely related to the patch street tutorial and the cave tutorial. For further information check the wiki and the forum.
How to create round patches
This is very basic knowledge you can use in a lot of different situations.
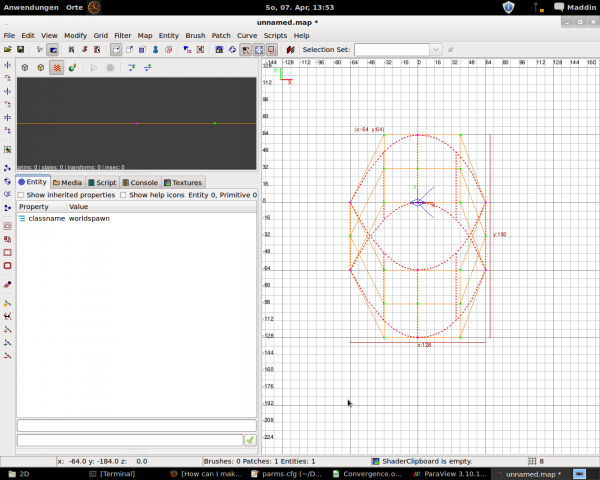
First of all, create a 3x9 patch. Select the view from which you can see it from above. What we are aiming for is to have it connected together so it ends up round. As the patch contains out of 9 vertices in one direction, we want to have three vertices (the columns) each point towards another angle in 45° steps, so that the last vertices coincidents with the first.
At next we bring them roughly into their target destinations, what should look as followed
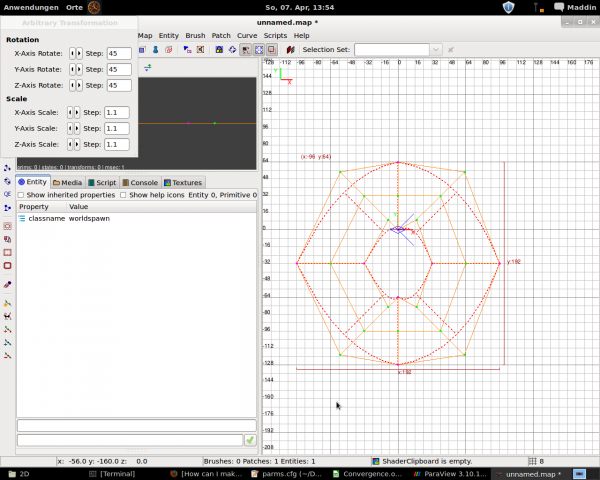
Then turn the columns so they face into the right direction. Note that you can select multiple vertices and rotate them using "rotate and scale".
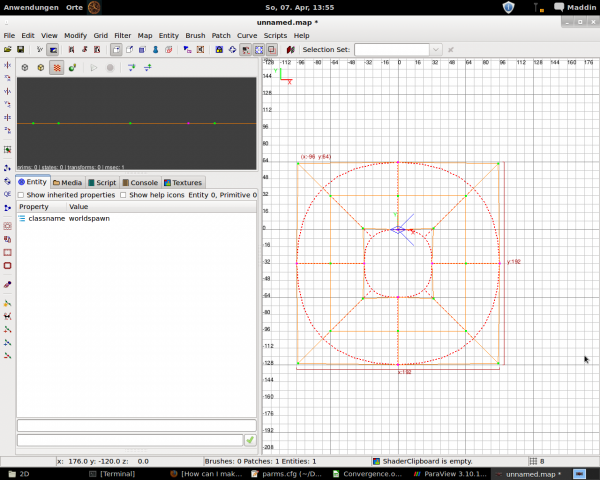
Than get the vertices into their rough end-places (the connecting lines should stand parallel to each other) ...
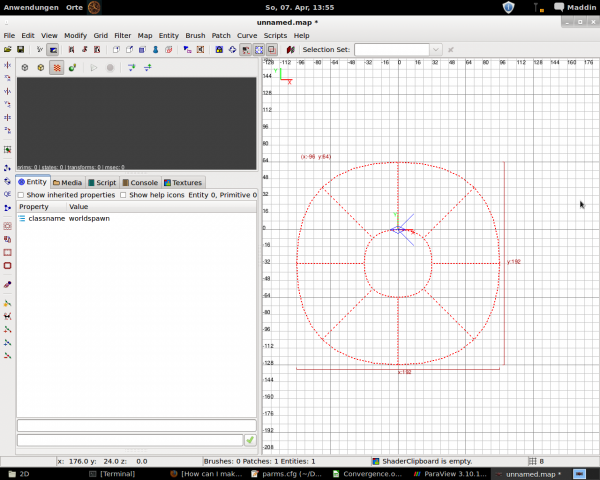
and select all vertices and snap them to grid (shortcut: ctrl+g).
How to create the pond
Here are the steps you have to follow to create a pond.
1. Create your hole
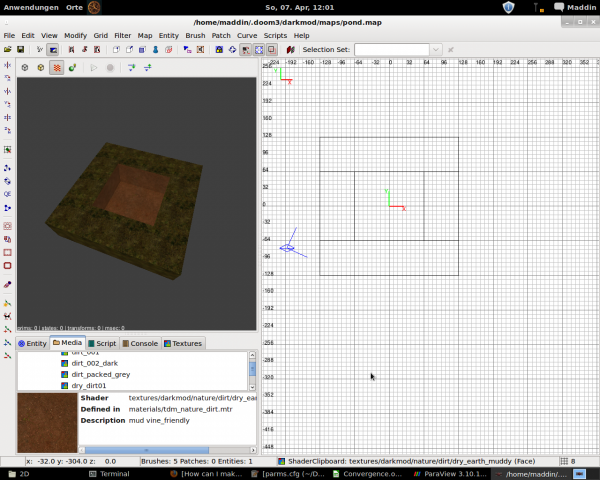
2. Create a patch (5x9 in this case)
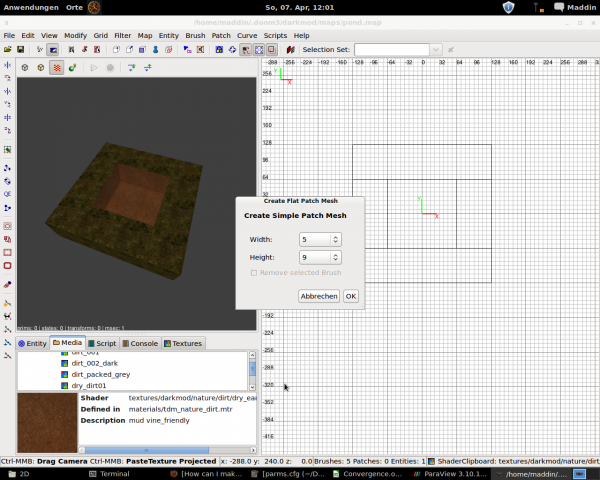
3. and give it a proper shape
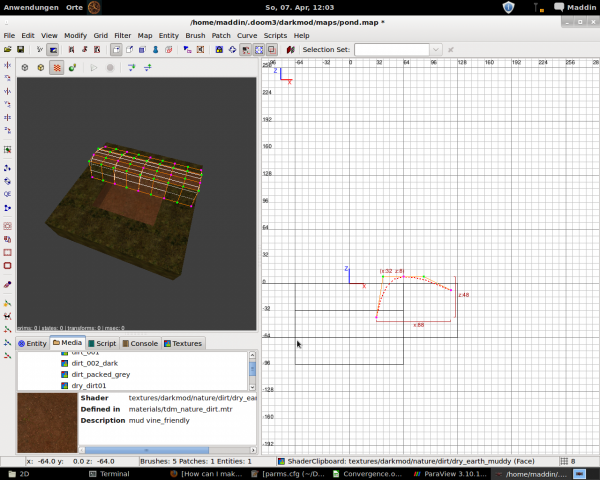
4. make it round (see above)
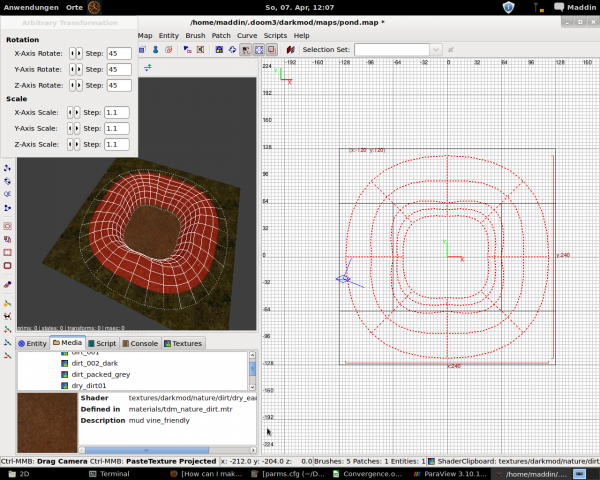
5. and bulge it (patch -> bulge patch)
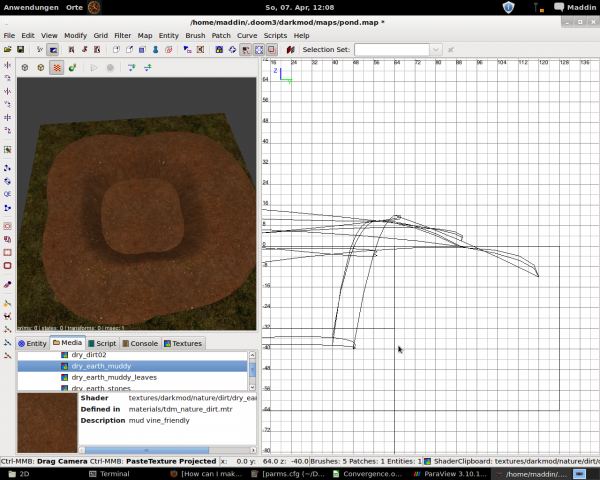
Note that you may have to realign the end points afterwards.
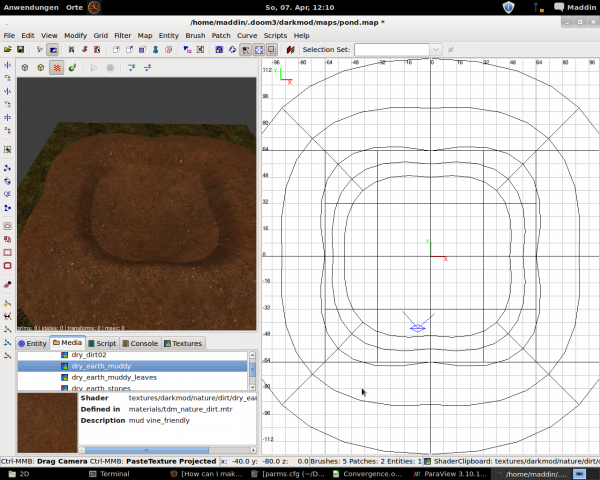
6. Create a 5x5 patch and drag the outer vertices upwards. Bulge it if you like to
7. Than add your water. All the textures were paste projected.
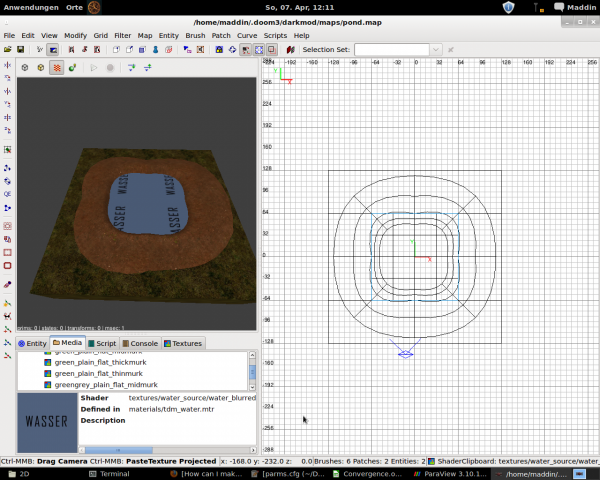
That's it.
For pictures of the ingame results see here.