Blender: The Tools and Their Uses: Difference between revisions
No edit summary |
|||
| Line 496: | Line 496: | ||
This is great for low poly architectural details, helping break up surfaces for mesh smoothing, restraints for when you get into subsurfing. You’ll find it has a ton of little uses the more you get into modelling. | This is great for low poly architectural details, helping break up surfaces for mesh smoothing, restraints for when you get into subsurfing. You’ll find it has a ton of little uses the more you get into modelling. | ||
But what if you don’t like that harsh low poly edge? What if you want to use it for something a little more high poly? No worries! | But what if you don’t like that harsh low poly edge? What if you want to use it for something a little more high poly? No worries! One day soon, the Blender foundation will get everything working properly, and add iterations back into the mix. When that happens, it’ll open up an entire world of adding details to your meshes. | ||
This is where I'll switch to Modo to show you the preview of things to come. | |||
Okay, this is a beveled box with a single iteration. | Okay, this is a beveled box with a single iteration. | ||
| Line 538: | Line 540: | ||
Hopefully, my small, simple examples have shown you just how handy this tool can be. Once you start getting used to modelling a bit, you’ll find yourself using this tool more and more. | Hopefully, my small, simple examples have shown you just how handy this tool can be. Once you start getting used to modelling a bit, you’ll find yourself using this tool more and more. | ||
===Inset Faces=== | ===Inset Faces=== | ||
Revision as of 05:39, 10 May 2012
Blender Basics
Disclaimer
This is a list of the most commonly used basic tools you'll find yourself using in Blender. The list below will cover what they do, and some of the scenarios you'll find yourself using them in. Keep in mind that most of the tools and techniques covered below will require a BMesh enabled build of Blender. Version 2.63 and above is required if you want to follow along.
Loop Cut And Slide & Loop Select
Ahh, good ole loop cuts. Probably the one tool you'll find yourself using the most when adding detail to your geometry. It's clean, easy to select only producing more quads, and contours to the rest of your geometry. When activated, it'll draw your loop based on the orientation of an edge you hover a mouse over.
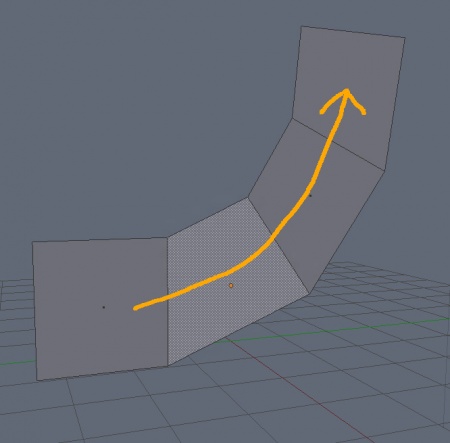
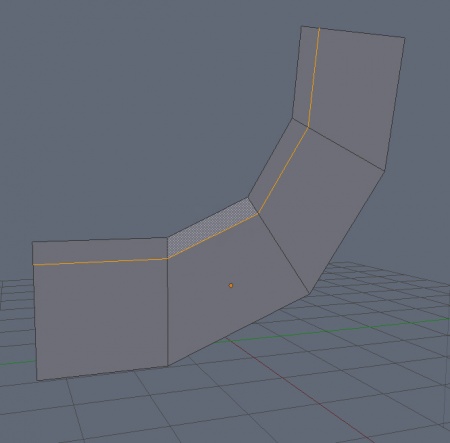
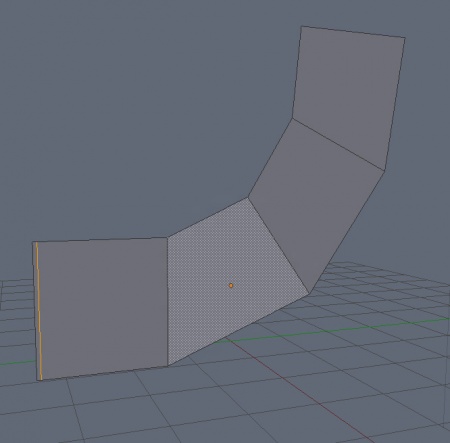
For example, say you want to cut a loop through the center length of the body of our little bendy example model, like so...
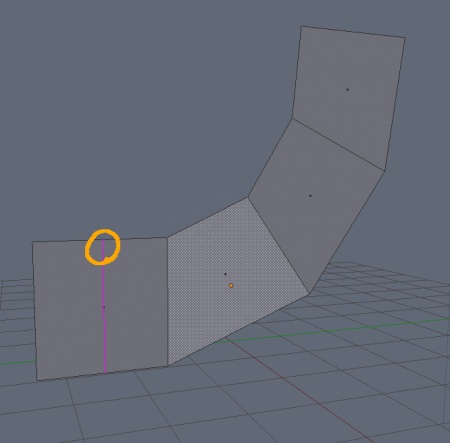
...you want to hover the mouse over one of the vertical edges when the tool is active. Basically telling it which edge you want it to cut the loop through.
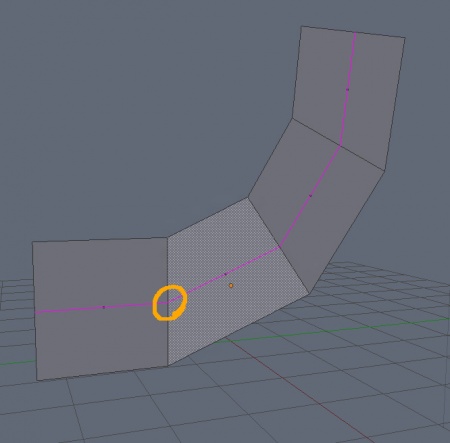
If you want to cut through one of the segments, you'll pick one of the horizontal lines along the top, you'll hover your mouse cursor over the edge you want to cut through, and it'll show you the purple cut guide, like so....
Easy.
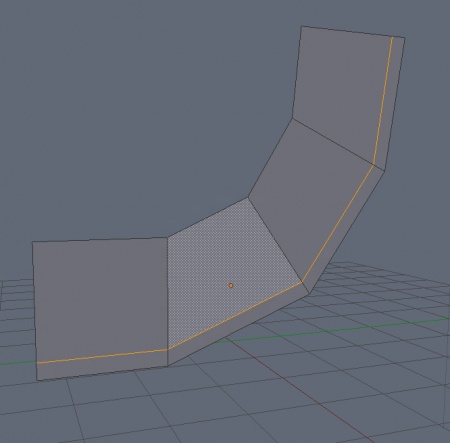
While the preview guide defaults to the center of the quads you're intending to cut, that doesn't mean it'll cut only there. When you decide on which edge you want to cut through, clicking the mouse button once activates the cut, and moves you on to the next stage of the Loop Cut and Slide tool. That's right, you're going to be sliding your loop cut. Once it's active, just move your mouse about to position your new edge loop to any position you want.
Once you've got it situated, click your mouse button yet again. You've now added your edge loop.
It's an incredibly simple tool, yet one that will prove it's value in a variety of situations. If you're confused at all by my explanation, all you have to do is spend a couple of minutes playing with it. You'll see exactly what it does.
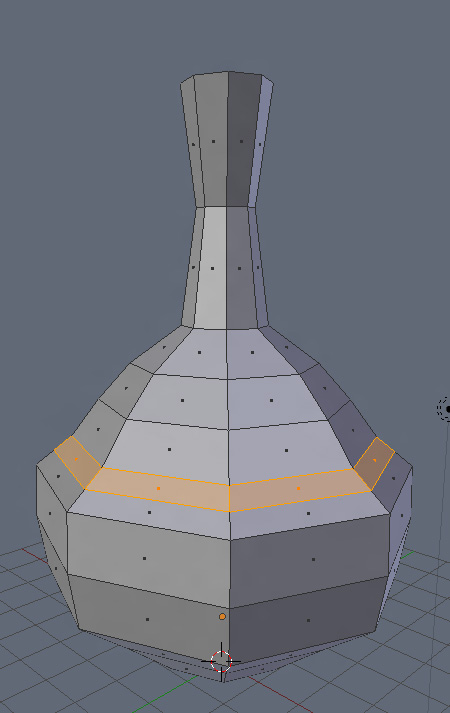
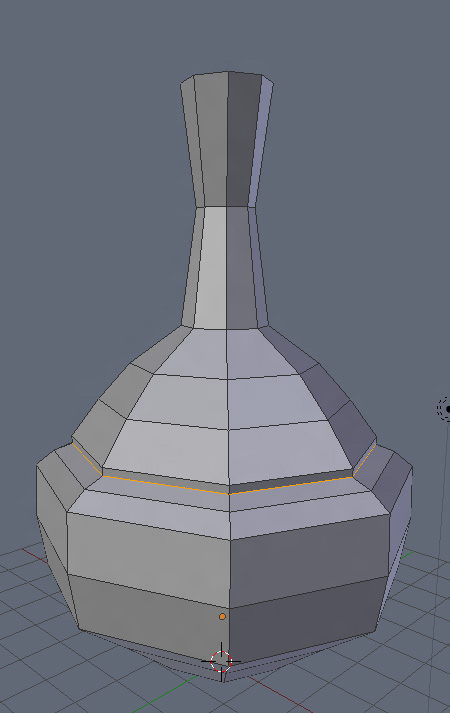
But what can it be used for? Well...everything. Say you're making a round jug (this is a pretty crappy jug, I admit)...
...and you want to add in a little more geomety in that highlighted section. Like a little hard lip there. Just add a loop cut and scale it about!
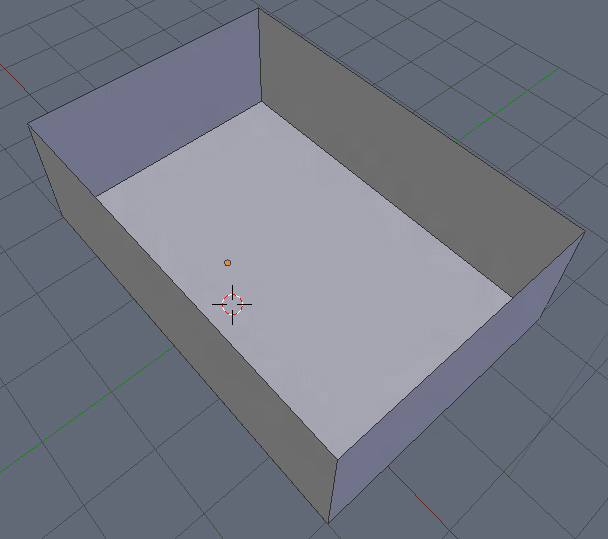
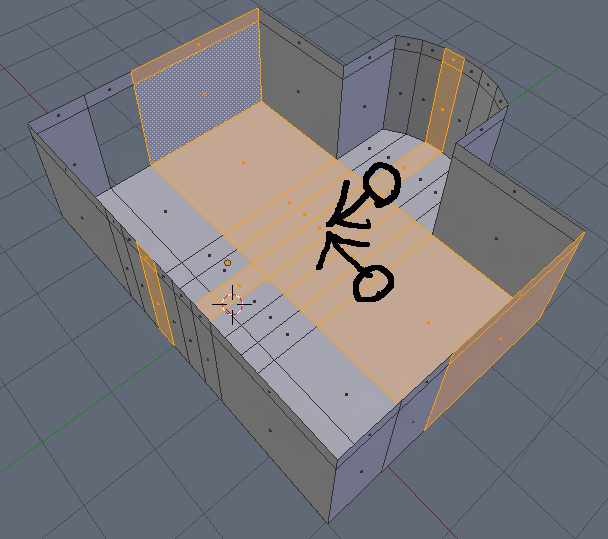
Or what if you're designing a room...
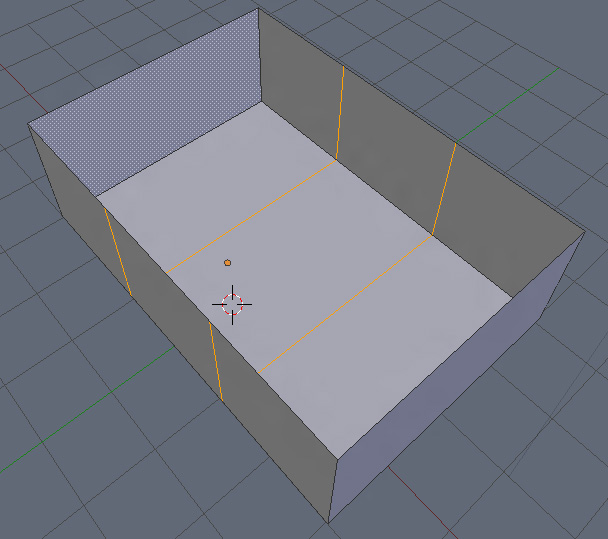
...and want to add a small alcove off the center wall? That's easy! First, make a couple new loop cuts...
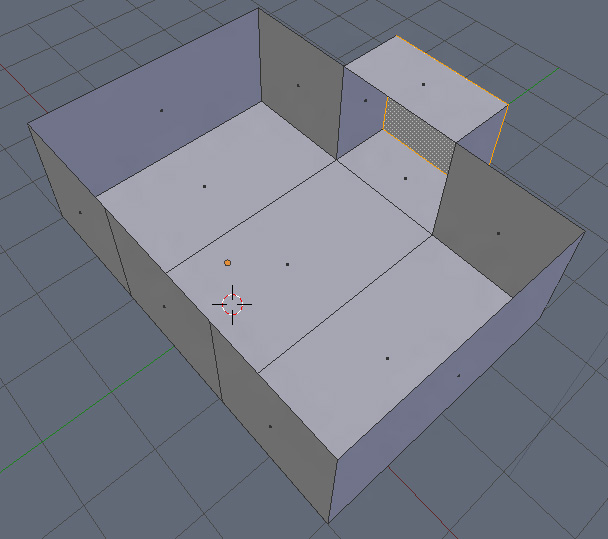
...and extrude the new quad you've created...
There you go! Alcove!
What about a door? Just as easy! 3 loop cuts, and a delete face.
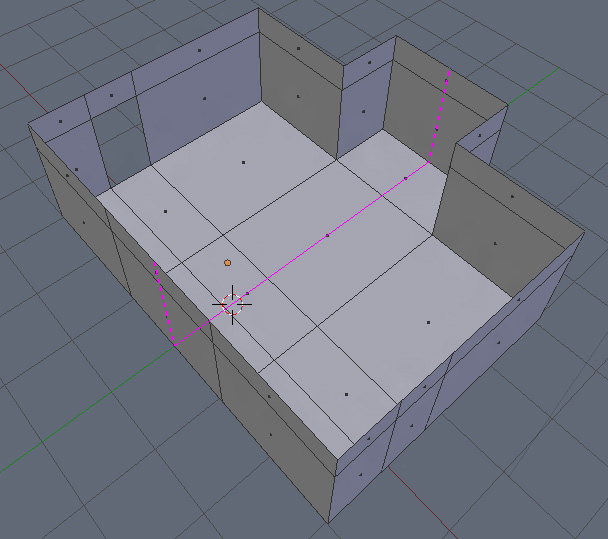
Literally 5 seconds of your time to carve out a door. For the final example, lets say you want to make your new alcove curved. You're going to need to make a few slices in your geometry to define the contours of your wall. We're going to use loop slices again, but this time, I'm gonna add one little step to the equation.
First, activate the tool, and align your mouse so you define a loop cut that runs through the center of your alcove (FYI, I went ahead and deleted the topmost face on the extruded section for the sake of the tutorial, in case you're wondering).
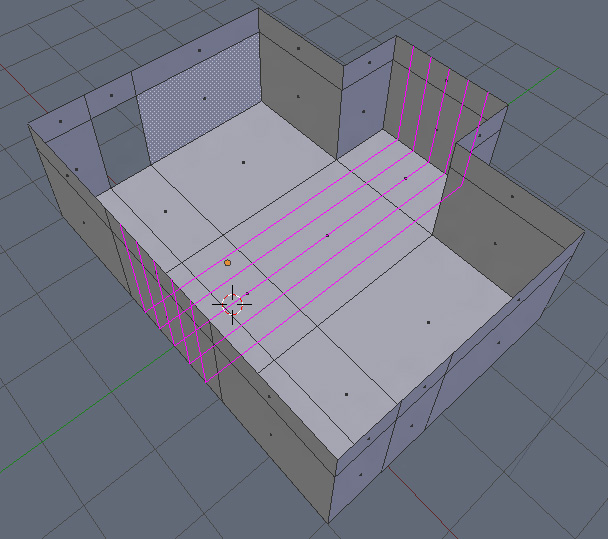
...but before you commit the cut, scroll your mouse wheel up. See that? You can add multiple equally sized cuts to your geometry.
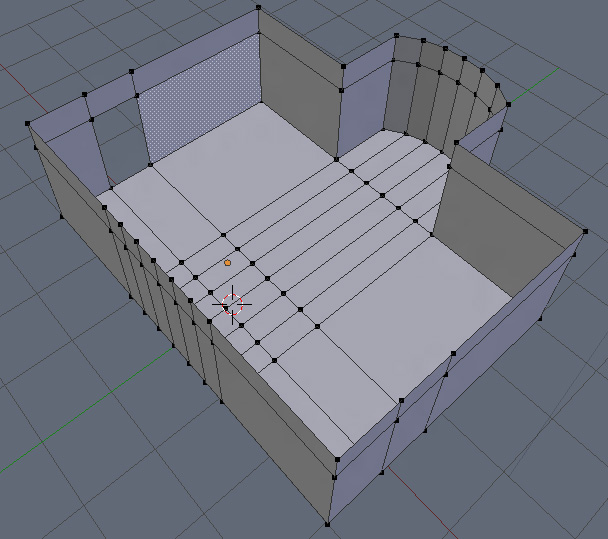
Since they're all equally spaced, you don't have to worry about your new curved wall being oddly shaped. Now just go to your overhead ortho view, switch to vertex selection mode, and mold out your shape. Voila...
You've got yourself a curved alcove. As you can see, loop cuts are very powerful things. It's added a goodly bit of unnecessary geometry, but it's clean. All quads. Easy to work with, and easy to clean up.
And what do I mean with easy to work with? All those loops you've made? They can be selected in a single click. Say you want to make your door a little taller. You've got two choices here. One, you can go in and edit the two corner vertices, or two, you can perform a select-loop, and transform the loop up to raise the height of the door.
That's all kinds of handy and convenient. And loop selects don't just work with edges alone. If you need a row of faces, you can do that as well. To grab your intended row of faces, just perform an action similar to defining the path of a loop cut. In Face Mode, hover the mouse over the edge you want the selection to run through, and click away.
You can select multiple loops with the shift key. For instance, I have loop selection bound to ALT+![]() . If I want to cycle through loops, I'll just use it. If I want to select mulitples, I'll hold down SHIFT+ALT+
. If I want to cycle through loops, I'll just use it. If I want to select mulitples, I'll hold down SHIFT+ALT+![]() .
.
Ahh, the wonder of loops. Keep in mind that, wonderful though they may be, they're not all powerful. Loop cuts won't cut through tris or ngons. It'll run the loop until it hits the offended geometry, then stop. From there, you'll have to use the knife tool (which I'll cover below) to cut through it into you get back into quads. And edge loop selections won't select any edges along a corner or one that borders an empty piece of geometry. You'll have to select those extra bits by hand. Still, despite the limitations, they'll make your modelling life oh so much easier.
Extrude
Extrudes. The most basic of basic tools of any 3D modeller, and the one tool you’ll find yourself using over and over again. I’m sure anyone with even the most remote interest in modelling knows about extrudes. In most tutorials, it’s usually the first tool taught after basic UI navigation. I’m bucking the trend by making it the second.
For the sake of completeness, I’ll go ahead and cover it, along with a few of it’s many uses.
First off, what are extrudes? It’s a way to grow geometry off of geometry. You select a face and extrude it, and it’ll “grow” that selection, extending the geometry, and transforming all selected edges into new faces. Or to put it simply...
In blender, hitting ALT+E while in face selection mode gives you two different ways to extrude your faces... 
-Extrude Region: Pulls multiple grouped faces out as a single object, ignoring all the edges that land inside the selection. Or simply, this...
Becomes this...
It’s an extension of your initial faces. If you were to delete those front faces, you’d see there’s no extra geometry created behind it. You’ve only extruded the edges outside the region you’ve selected. Like so....
But then you have...
-Individual Faces.
You run this extrusion, and at first glance, the end results look about like Extrude Region.
...oh, but there’s a difference. Each one of those faces is now 4 individual extrusions. Like you ran an extrude on each face individually. Delete the faces, and you’ll see the new geometry that’s been created behind your extruded faces...
...which means you can now move about those faces and make something like this...
That’s not an octopus! That’s a QUATROPUS! Our four legged friend from the sea!
And don’t think you’re stuck with just extruded faces. It also works on edges!
By this point, you should now have a good idea what extrudes do. But before we move on, let’s use extrudes in a practical situation.
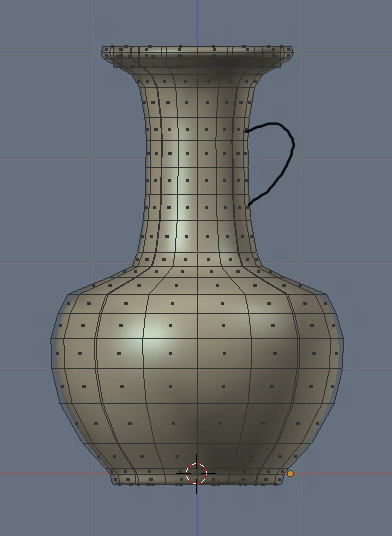
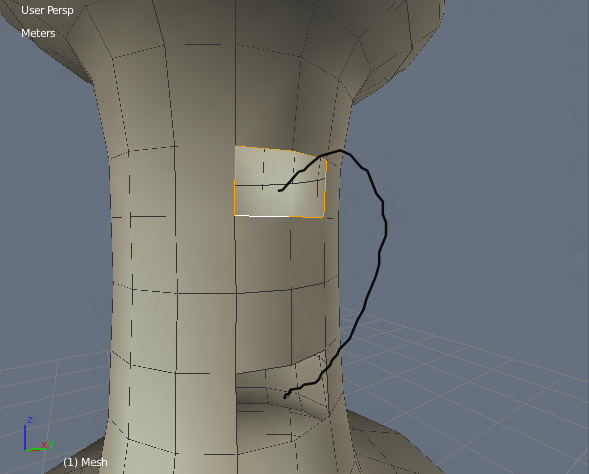
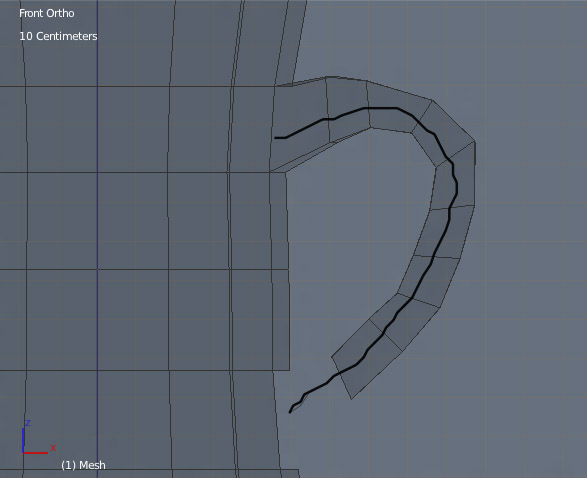
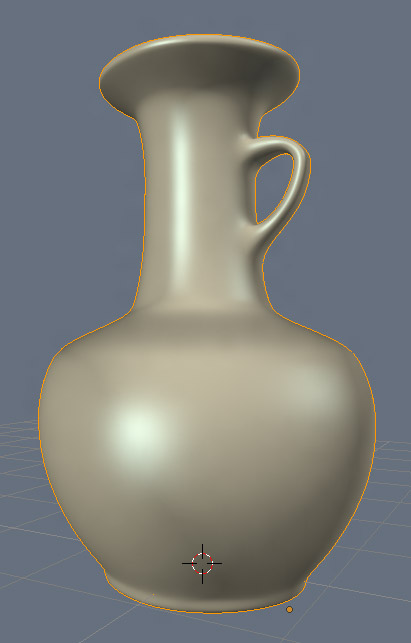
Say I’ve got this (slightly better modelled) vase/jug/thing. I want to add a little ring coming off of it, right where I’ve marked with the grease pencil.
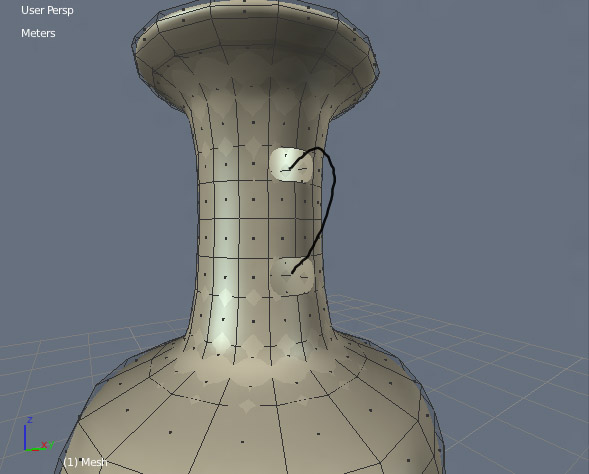
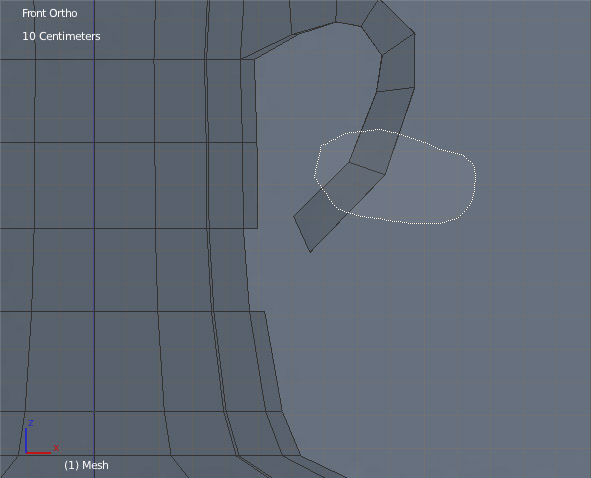
I’ll start by deleting the faces that mark the points I want the ring to connect to the body...
Next, I’ll do a loop select on the topmost hole...
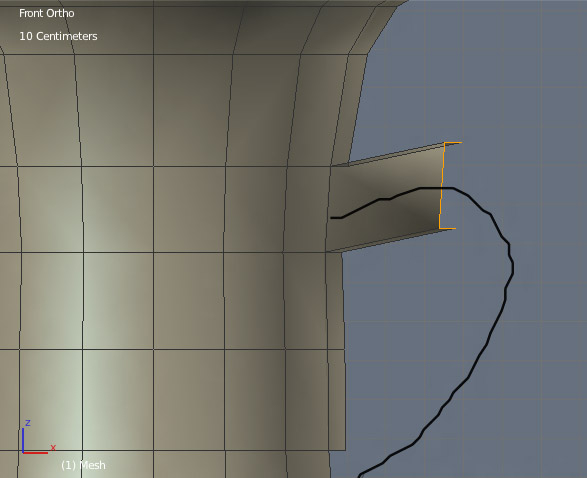
Go to the side view, and extrude.
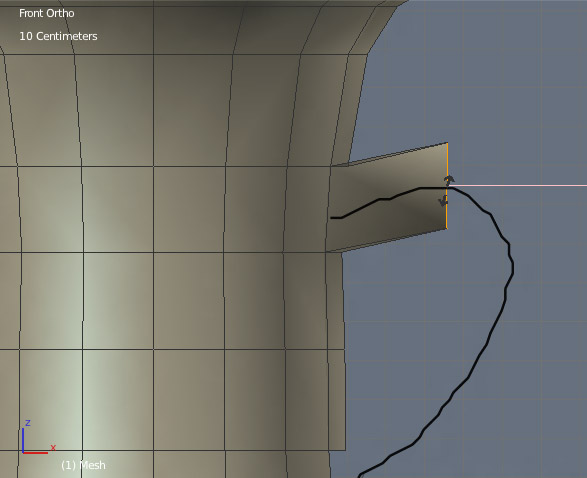
Next, we’ll use the X-axis handle on our scale tool to even out our edges...
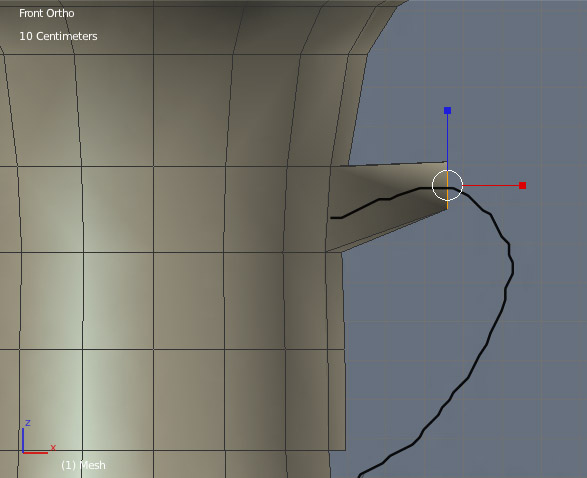
...then do a global scale to shrink it slightly...
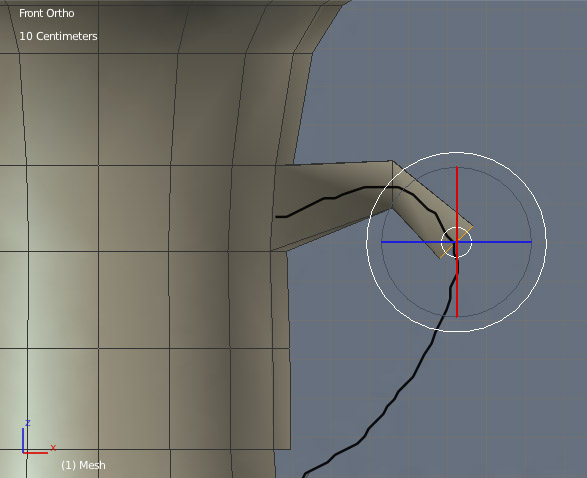
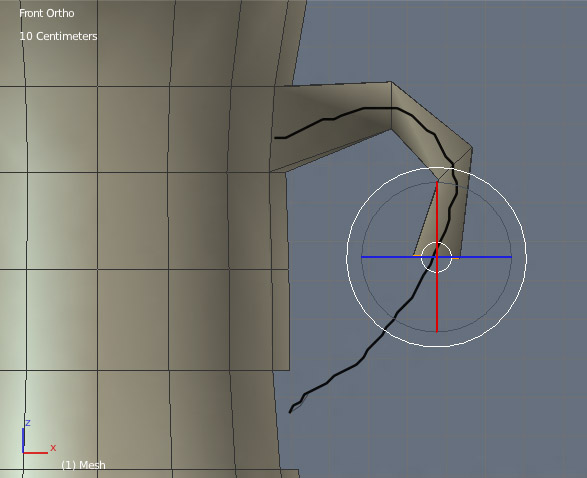
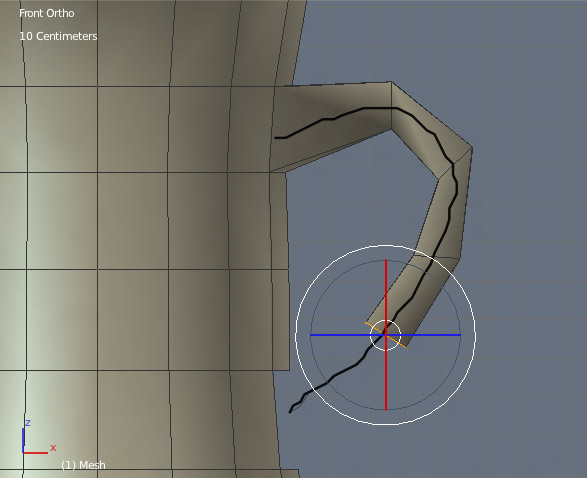
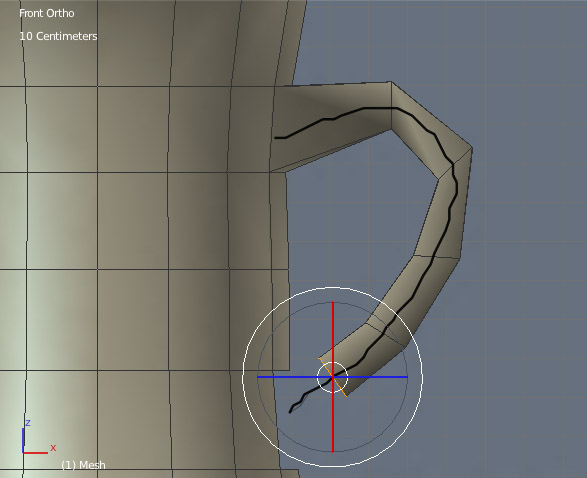
...then extrude and rotate...
...extrude and rotate...
...extrude and rotate...
...extrude and rotate...
...and extrude and rotate...
By this point, you can readjust the angle and position of your loops by hitting Z to switch to wireframe mode and holding down CTRL+![]() to activate your lasso to select them.
to activate your lasso to select them.
...then use your rotate and transform tools to do your thing. If you want to smooth out the shape a little more, then apply a few loop cuts to ADD MOAR GEO, then work them into position...
Lastly, use your bridge tool (which I’ll be covering next) to reconnect your handle to the jug/vase/thing. There you go. You’ve made yourself a dinky little finger ring!
Bridge Tool
...or in Blender parlance, Bridge Two Edge Loops. Unfortunately, it doesn’t seem to have it’s own hotkey, but you can easily find it by pulling up the search menu with SPACE and typing “bridge”
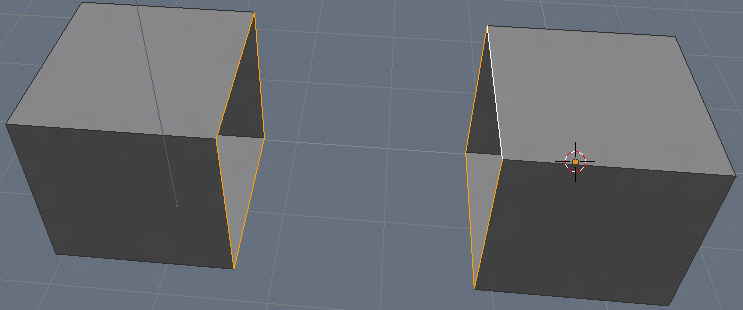
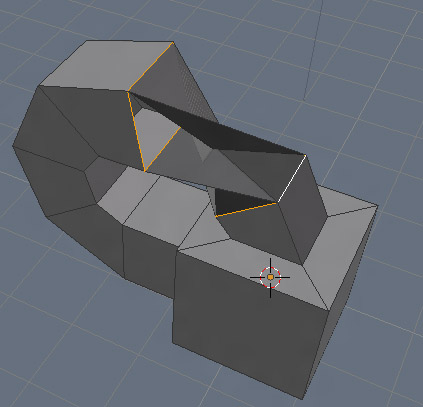
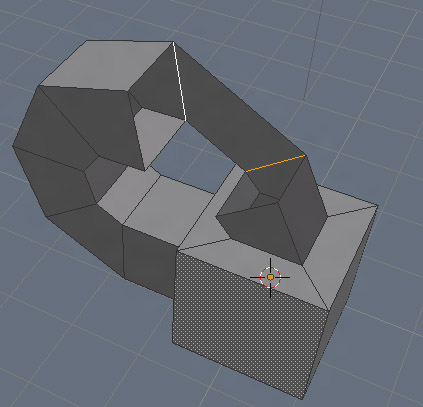
The bridge tool is rather simple in execution, and won’t take me too terribly long to explain. Say you have two meshes you want connect into one in a certain spot. Select the edges you want to connect, run the bridge tool, and it’ll create faces between the two. Or in picture-talk...
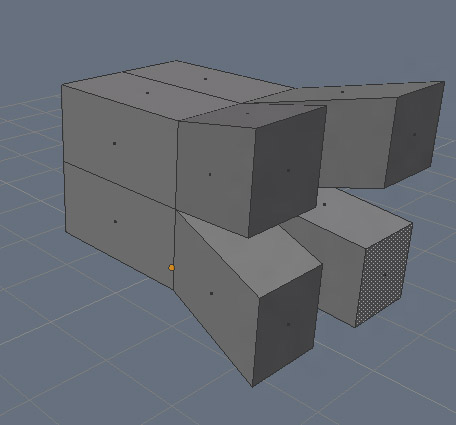
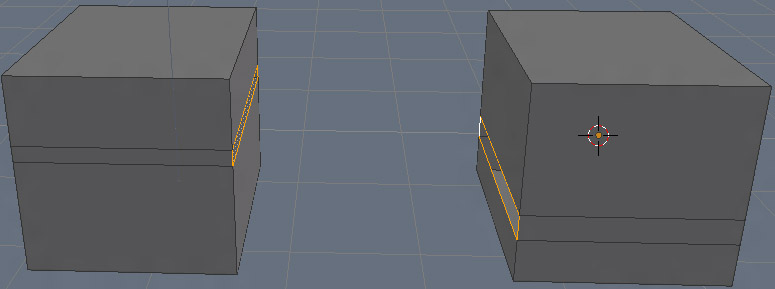
You’ve got two boxes you want to connect...
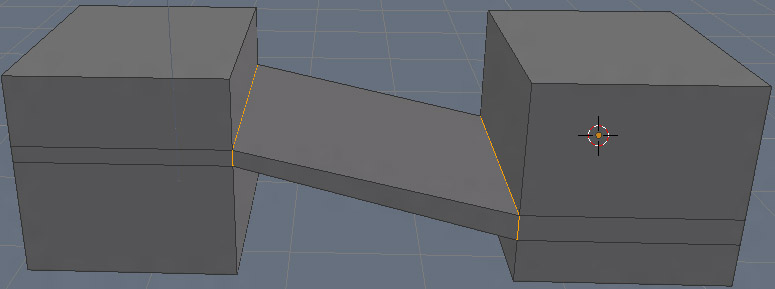
Select your edges, run the bridge tool, and...
BRIDGE TOOL! The only thing you need to keep in mind is that you should only connect edges. You can select two faces and bridge them, but it won’t delete the selected faces. The edges will be bridged, but you’ll have unwanted geometry inside your mesh. If you want to connect two boxes like that, delete the faces, select the edges, then bridge it. A little annoying, but it’s easily worked around.
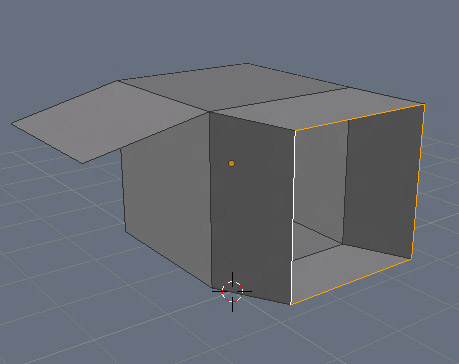
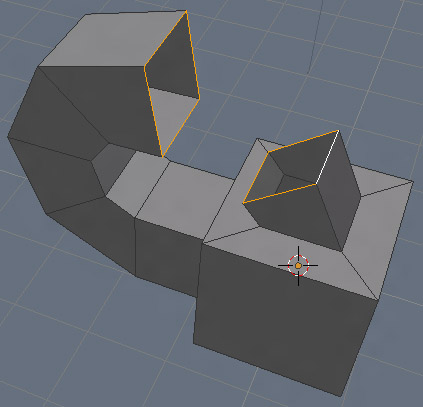
Now lets get a little more dramatic to illustrate the wonders of this tool...
BRIDGE TOOL!
BRIDGE...wuh? The hell?
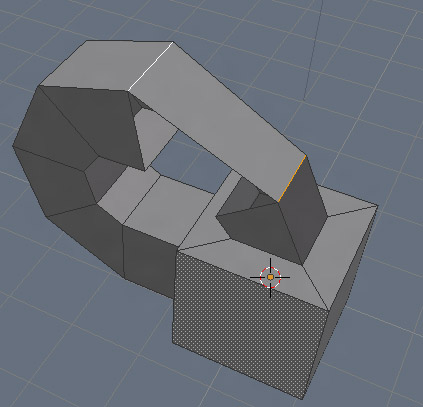
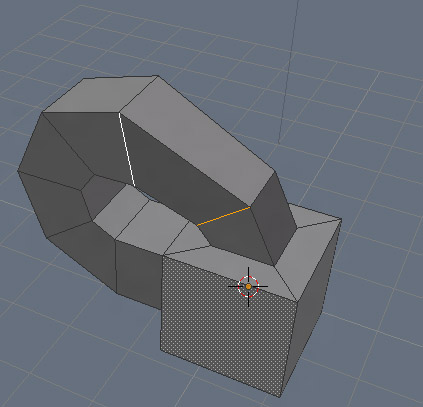
Okay, sometimes it can be a little finicky and easily confused. If you ever run into a situation where it is, you’ll have to bridge it edge by edge. Like so...
BRIDGE TOOL!
Despite it not always working exactly as intended, it is a very powerful tool. I deeply suggest learning it. Quirks and all.
Knife Topology Tool
This is yet another powerful cutting tool at your disposal. Unlike loop cuts, which are straight shot cuts across all quads in a row, the knife is a far more precise instrument. If you need to define odd shapes within your geometry, add cracks, make wrinkles, this is the tool to use.
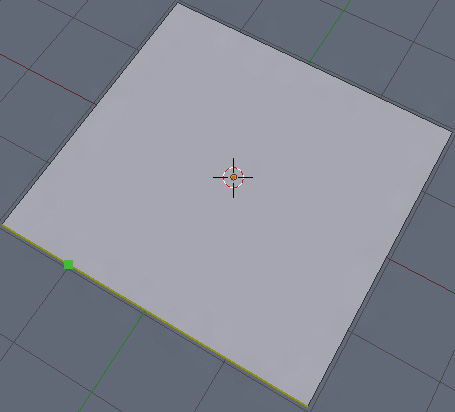
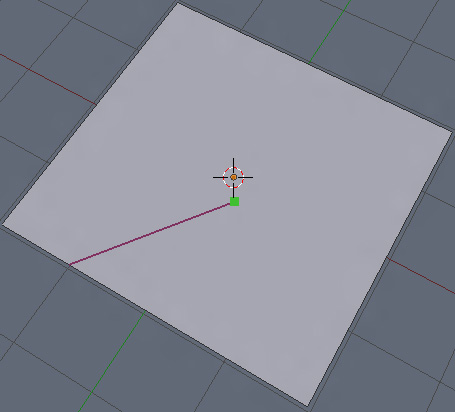
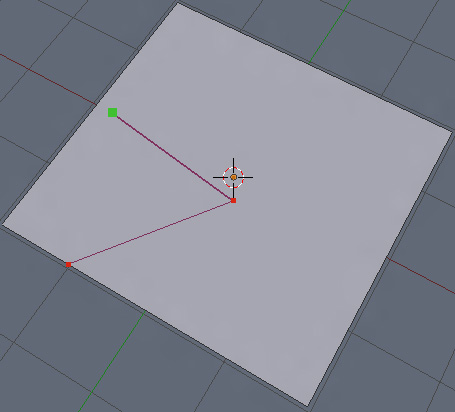
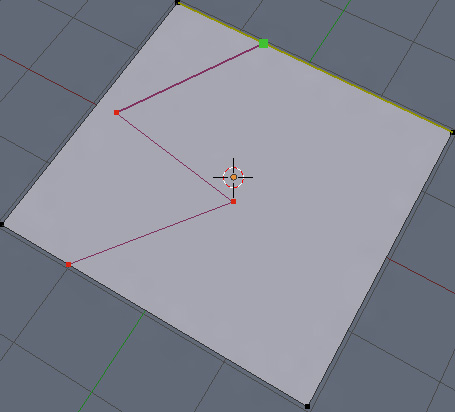
The most basic explanation of what the knife tool does is that it adds edges anywhere within your geometry. Each click of the mouse while the tool is active places a vertice to draw edges between.
Yeah. That's about as clear as mud. So much for the dry and clincal explanation. I think a few pictures illustrating the tool in action would serve us far better here. So...
YEAH! KNIFE TOOL!
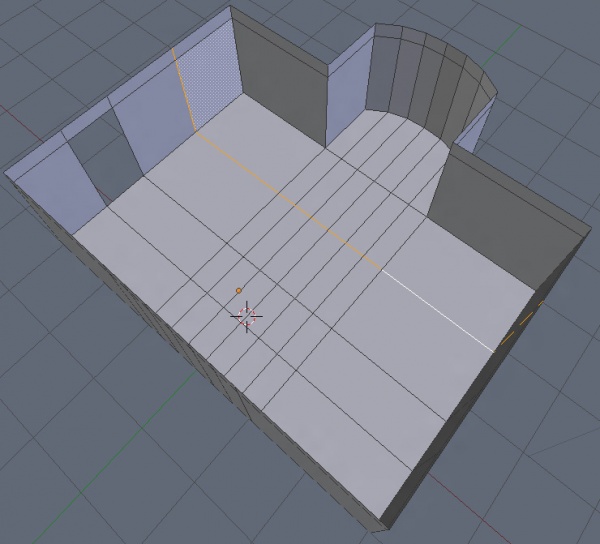
Simple enough to grasp in concept, but where is it best used? Just like the loop cuts, you'll be using it just about everywhere. You have a massive variety of situations where it'll come in useful. To illustrate one, I'll fall back on our old room and alcove we did earlier. I want to make a little sunken star shape in the center of the room. I'll start out by making a loop slice to mark the meridian of my shape.
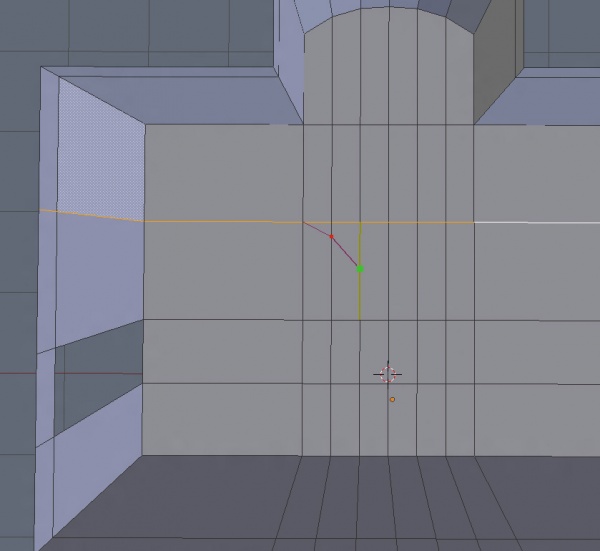
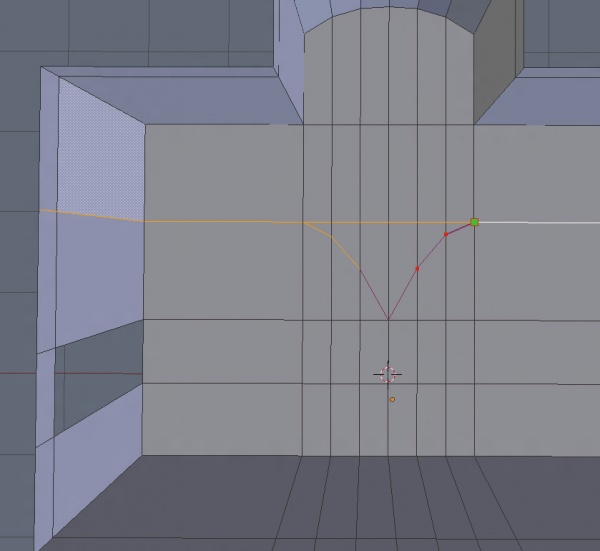
Next, I'll activate my knife tool, and start cutting away.
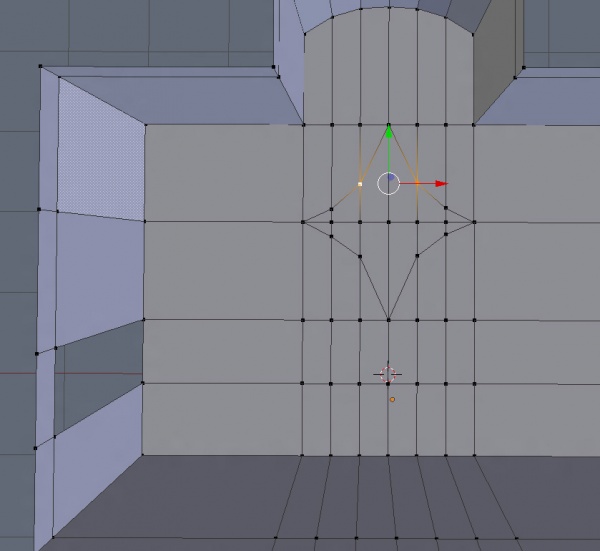
If you find you don't quite like the shape of your star after you're done cutting, just grab your vertices, and transform them into something a little more to your liking...
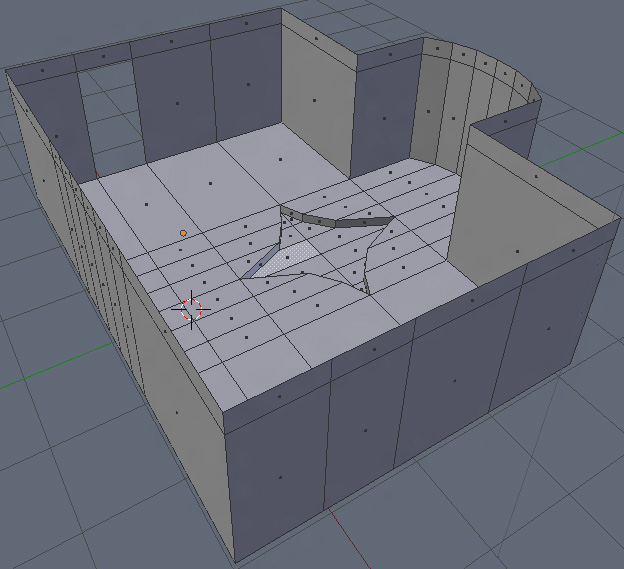
Hmm. Decent. Lets go ahead and use an extrude to recess it into our floor.
Alright! We've now got ourselves an...er...ugly and completely pointless architectural detail that serves no purpose other than to trip people up so they fall over and crack their skulls on the floor in the middle of the night. Way to go, sadist.
But what about more? Say you want to add some cracks to a rough piece of stone. That's easily done. Just activate your knife tool, and do your thing...
Next, select your new cuts, and run the bevel too to define the width of your new crack...
Select the faces inside your crack using a face loop select, and run the Inset Faces tool. Boom. There you go, a (rather sloppy looking) cracked stone.
By now, you should have you a good idea of the many uses of the Knife Topology Tool. You'll find yourself using it a rather hefty amount.
Edge Bevels
This is going to be a strange one since, at the time of writing, edge bevels haven’t yet been fully implemented into Blender. I’ll be using examples shot in Modo for the in depth explanation, but don’t think that, as an exclusive Blender user, it’ll be a moot point for you to read through. Blender will have full on iterative edge bevels in at some point in the near future.
So what exactly are edge bevels? We’ll start off with the usual the basic explanation.
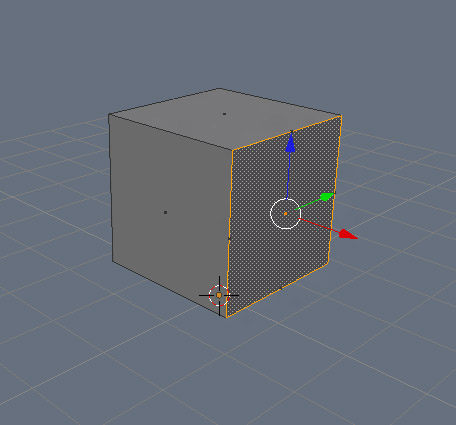
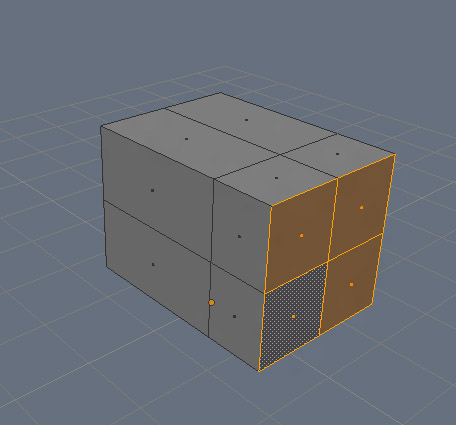
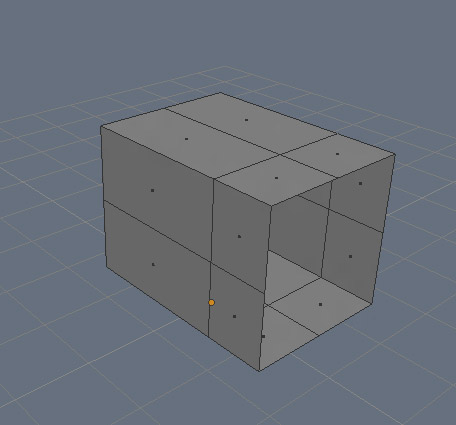
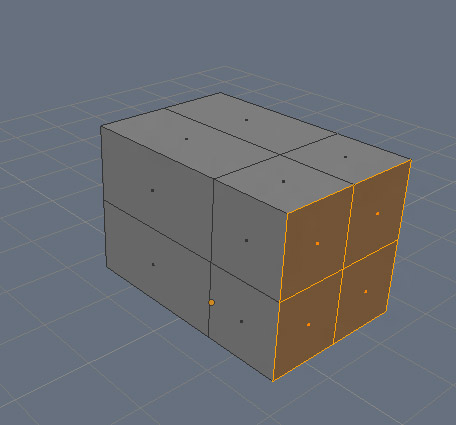
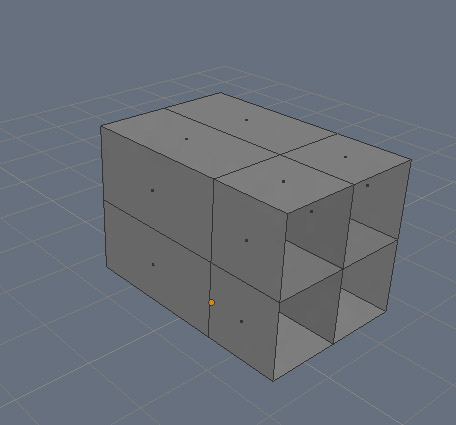
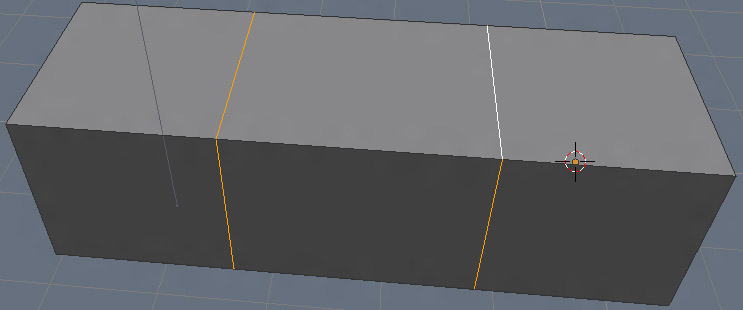
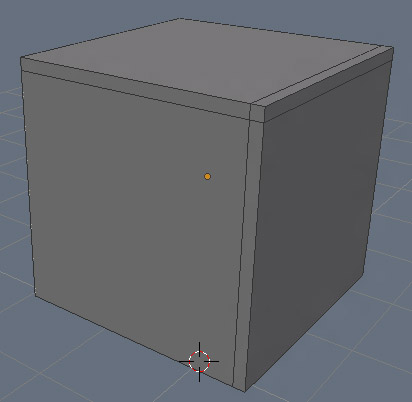
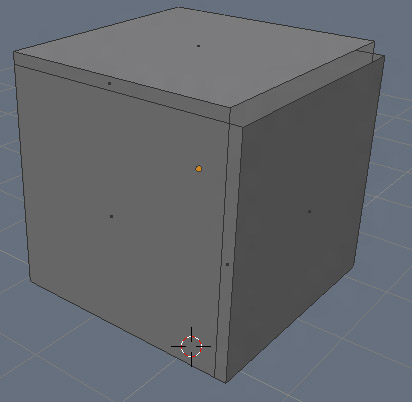
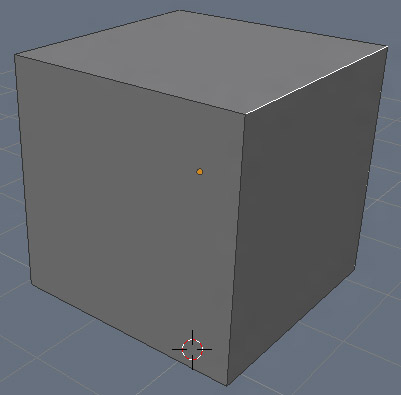
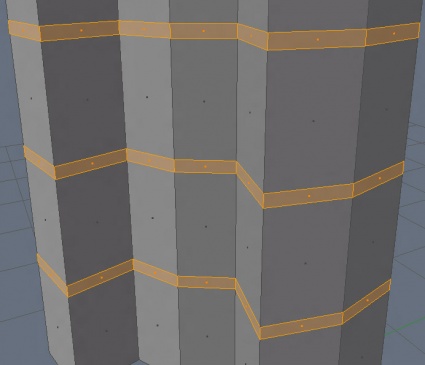
You’ve got this cube, right? But for some reason, you don’t want this cube to have perfect 90 degree edges. You want a nice, gentle slant for the edges. What you could do is make to loop slices along the sides...
...delete the geometry along the edge...
...then do a bridge along the two edges to get your slant (also filling in those empty spots on the end by selecting the three edges and using Fill Create Faces with ALT+F) to create a polygon there).
...but that’s a huge pain in the ass. Specially when you’ve got the edge bevel tool, which can do this exact same thing in about 1.87 seconds.
To do it, just select your edge...
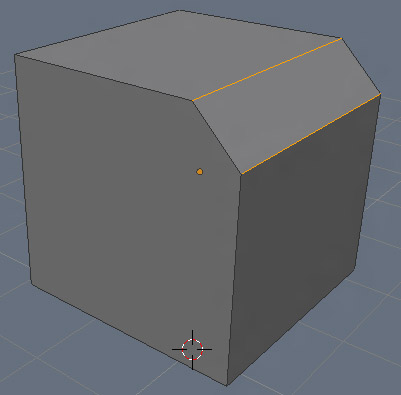
bring up your menu with SPACE, and type bevel. Hit enter, and BAM!
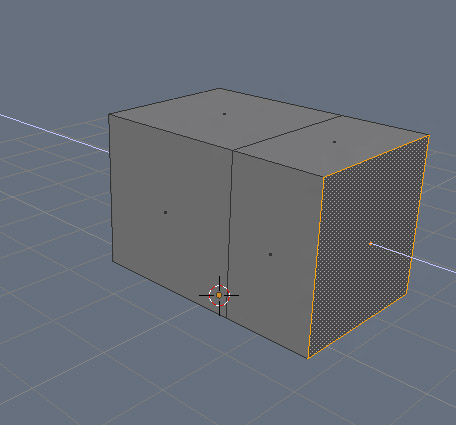
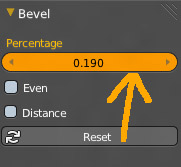
Instant slants. By playing with the percentage slider on your toolbar to the left...
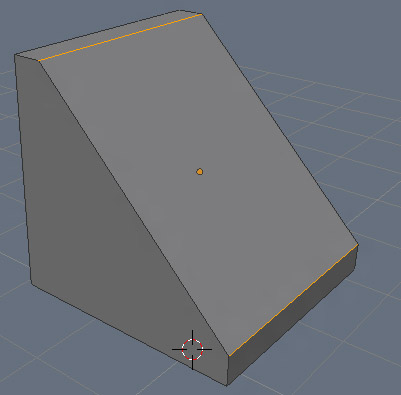
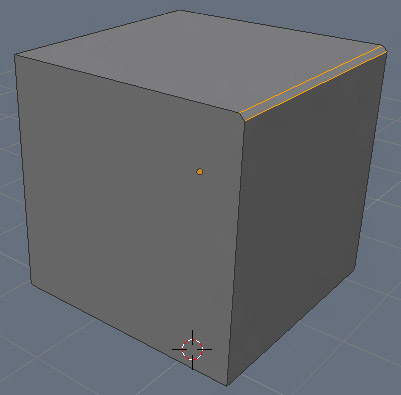
You can change the distance between the two edges, making the slant as large as...
...or as small as...
...you want.
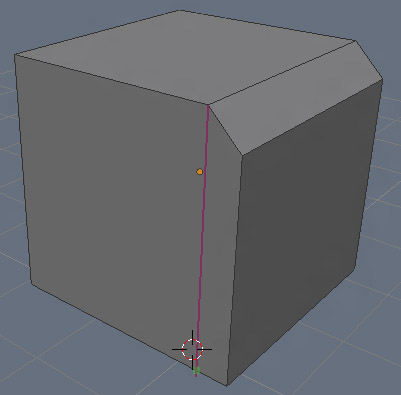
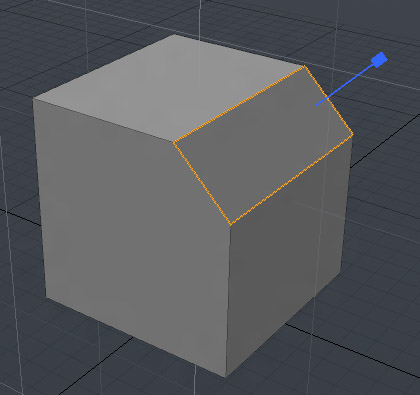
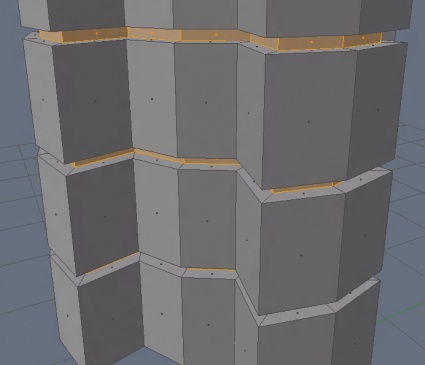
Easy and quick. Course running the tool on a single edge throws an ngon in you way, but you can fix that easily just by using the knife tool and cutting a loop around the cube...
This is great for low poly architectural details, helping break up surfaces for mesh smoothing, restraints for when you get into subsurfing. You’ll find it has a ton of little uses the more you get into modelling.
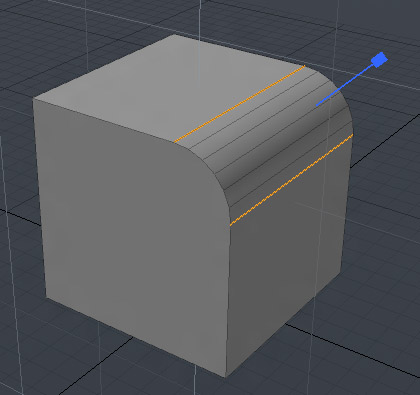
But what if you don’t like that harsh low poly edge? What if you want to use it for something a little more high poly? No worries! One day soon, the Blender foundation will get everything working properly, and add iterations back into the mix. When that happens, it’ll open up an entire world of adding details to your meshes.
This is where I'll switch to Modo to show you the preview of things to come.
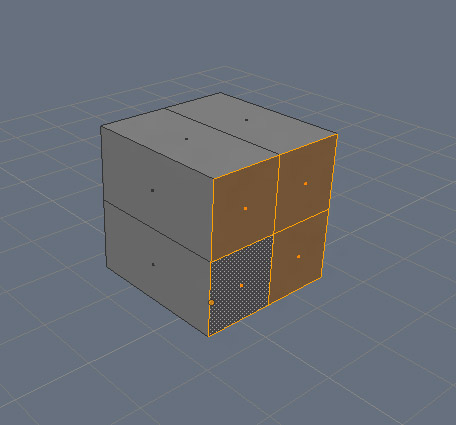
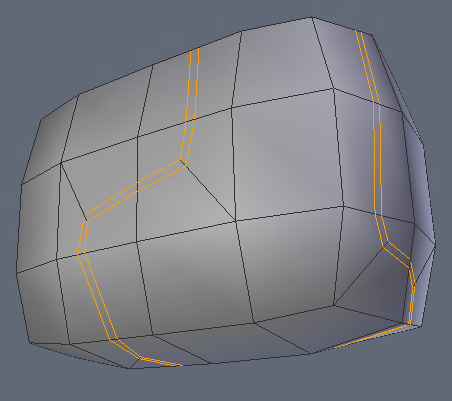
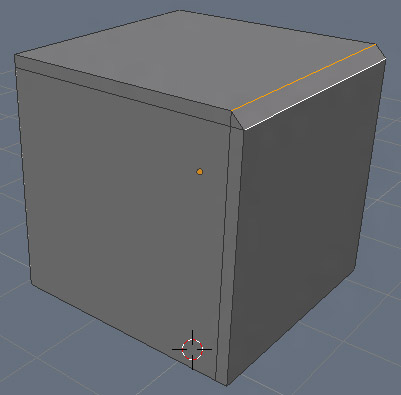
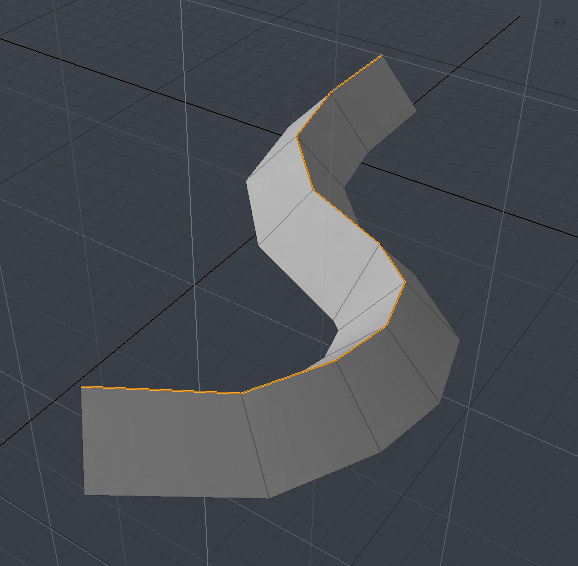
Okay, this is a beveled box with a single iteration.
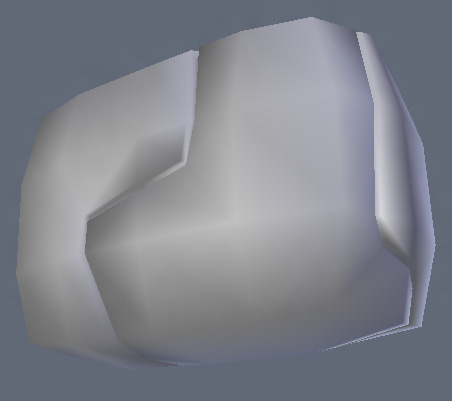
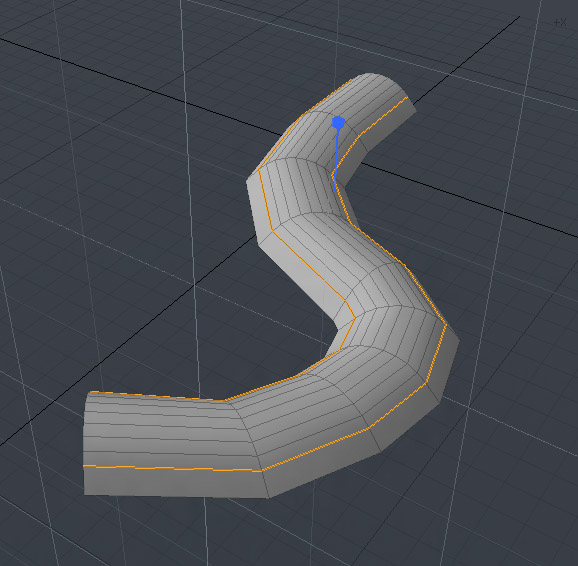
Doesn’t look any different, does it? Lets up the iterations a couple or three times (or as it’s more appropriately called in Modo, Round Level)...
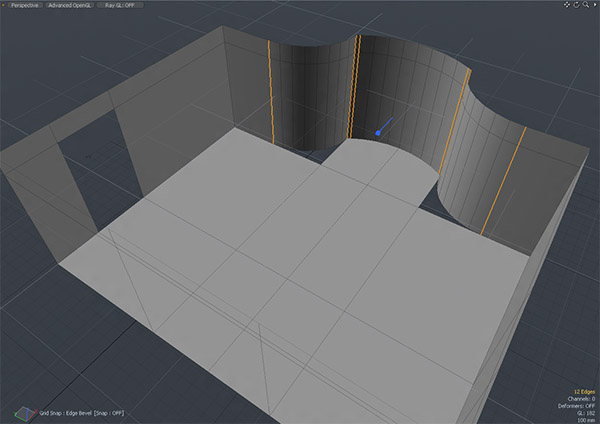
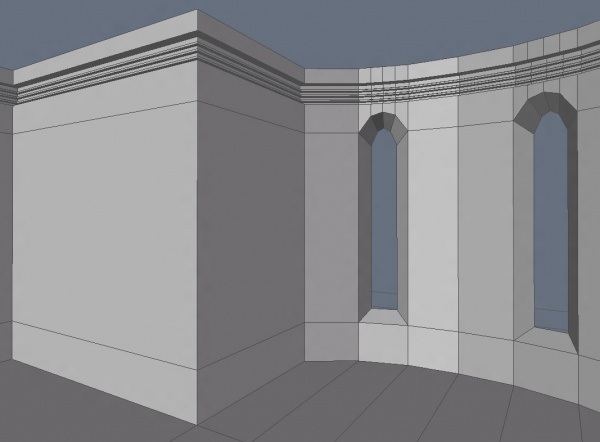
...ooh. As you can imagine, this is excellent for any number of things. Moulding? Yup. Adding curves to walls walls? Yup. Remember the work I did making the alcove rounded earlier on? I could’ve done it in 3 seconds flat by just cutting down the middle of the wall, transforming the middle edge back a bit to mark the depth,, and running an edge bevel with a couple of iterations.
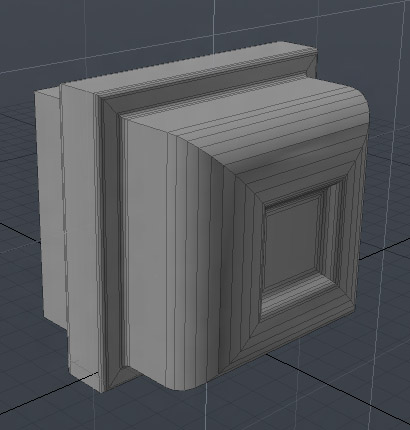
Instead of going on and on, I’ll give you a couple of shots to show you exactly what edge beveling can do.
This is a mixture of edge bevels and the Inset Face tool I cover below. Build time? Roughly 10 seconds. All the visible edges have a nice, smooth curve on them.
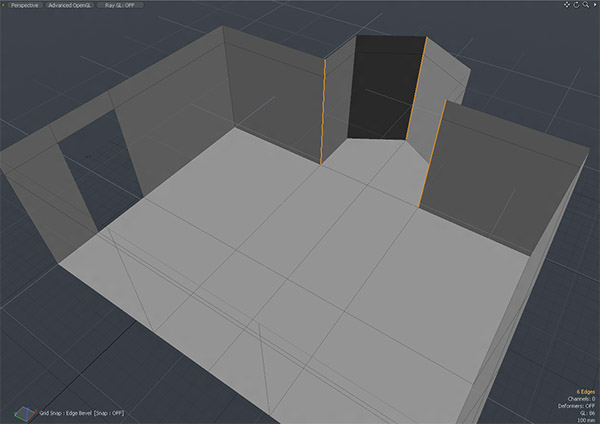
Go from plain room to funky curvy room, all with a single application of edge bevels!
Why spend tons of time working on ornate multipoly ironwork designs, when you can mock up the shape, add a single edge loop down the center, pull it up, and apply bevels to curve it up?
Hopefully, my small, simple examples have shown you just how handy this tool can be. Once you start getting used to modelling a bit, you’ll find yourself using this tool more and more.
Inset Faces
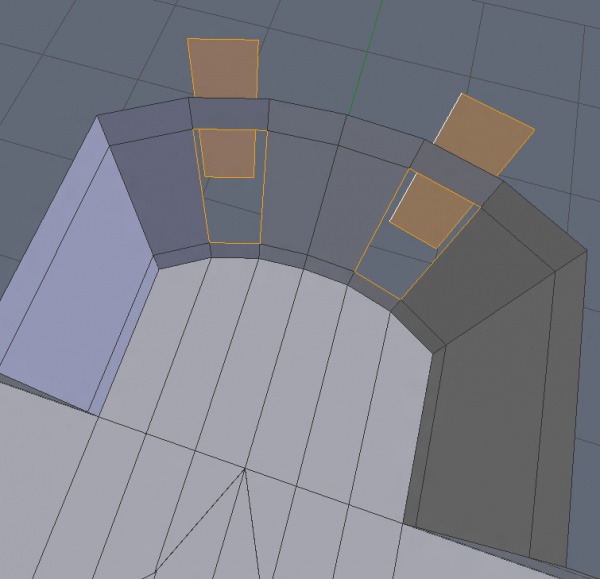
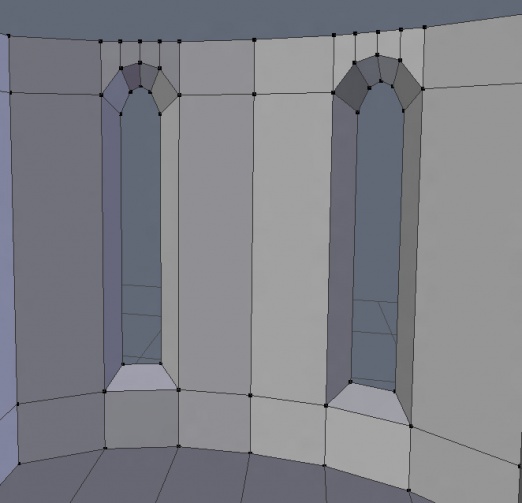
So there you are. You've modelled this somewhat complicated room, but it's missing something. The walls? Yeah, they're pretty bare. Know what'd look nice? A couple little windows with a nice inward slant inside that fancy curved alcove.
Go ahead and make a loop cut to define the bottom edge of your window. For my example, I'm going to put mine right here...
There are a few things you could do here. You could select those faces and extrude them backwards, and scale the back face til you've got your slanted windowsil. That would work, but it'd be a ton of extra work. An extrude on both of those faces would push your window straight back. You'd have to do a ton of scaling, rotating, and trasforming on each face to get it looking right. You want your window parallel to the face you're extruding from, and the extrude tool doesn't do that automatically.
Maybe you could duplicate the geometry, scale the new piece, delete the face from the orginal, scale the new piece of geometry and transform it into position, then bridge the edges together? That'd work too, but it isn't exactly any easier than the aforementioned technique. You'd still have to do work on each face separately.
Hmm. What could you use to make this rather difficult sounding job relatively painless? Simple! The Inset Faces tool!
So what does this tool do exactly? I'll start off with the dry, clincical explanation. An inset will extrude and bevel the geometry parallel to the surface normal of the originating face. Multiple faces will be extruded linerally from their originating point no matter where they lay on the model, but always parallel to that aforementioned originating surface normal.
...what? That's nerd talk! No one but math wizards and D&D dorks who understand the nuanced intricacies of THAC0 are gonna understand that nonsense!
Yup. I think it's time to break out some more pictures.
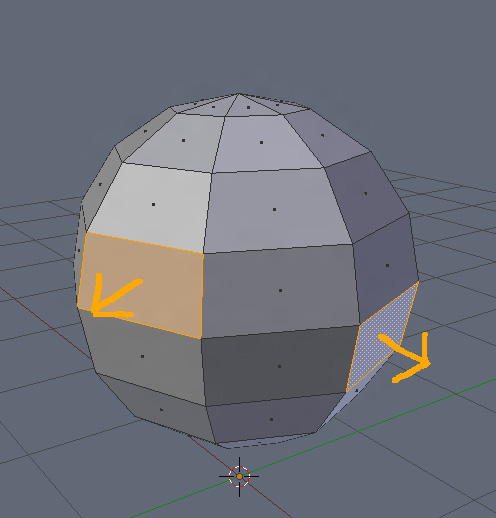
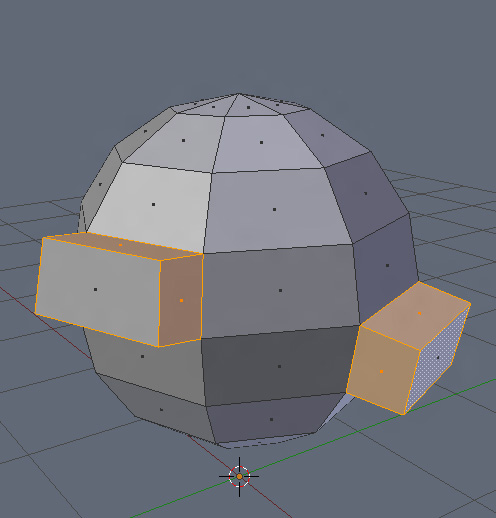
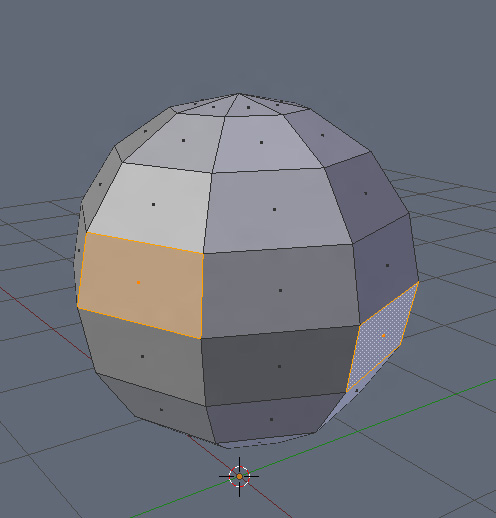
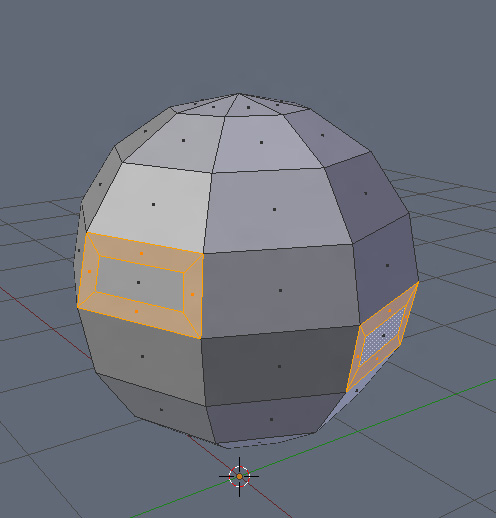
See this? This is a sphere. Those little orange arrows coming off the highlighted faces show the directions of your surface normals.
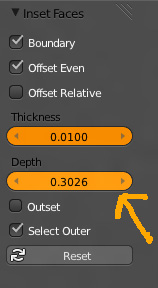
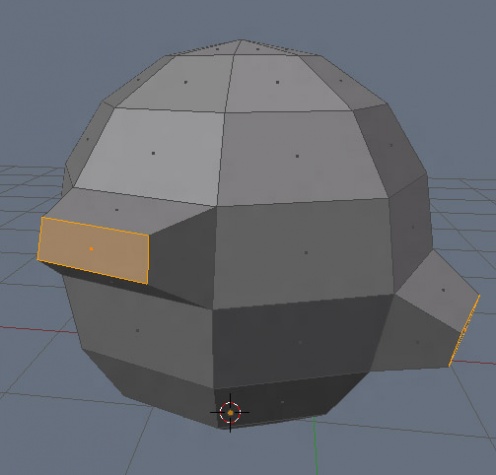
When you activate the Inset Face tool and tweak the depth slider on the toolbar...
you're going to extrude and scale those face along those lines...
Neat, huh? You can take multiple points of a mesh, and scale them out equally away from your mesh. As you can imagine, there are multiple places this tool comes in quite handy.
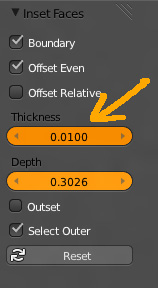
But wait! There's more! By playing with the thickness slider...
you can bevel out the slant on your new sphere-knobs...
Now you can see how this tool comes in handy for making our windows. But this isn't even the end of the wonders of the Inset Faces tool. Say you want to make holes within the faces of your sphere. Just select your faces...
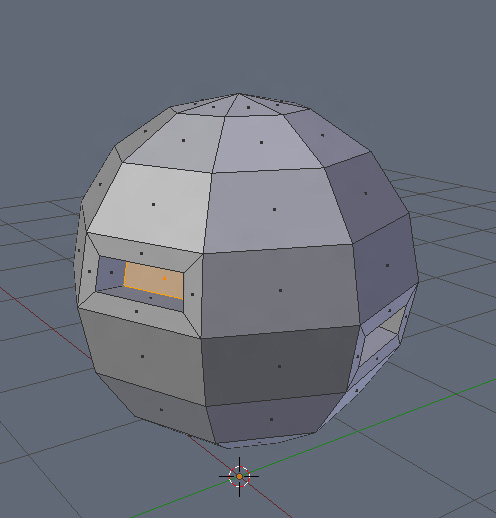
Run the Inset Faces tool, but this time, just play with the thickness slider...
Wow. Look at that. Now drop the tool, and select the faces within your new inset, and run the Inset Faces tool again, this time tweaking the depth slider.
That. Is. Nice.
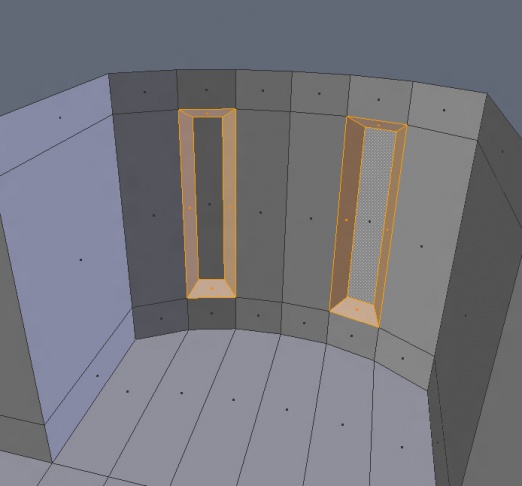
Handy, huh? You can also pop it out if you so desire, but I won't illustrate that, since I'm sure you've got a good idea of how it works. Now let's take what we've learned here, and apply it to our room. First, select your faces of your future windows, run the Inset Faces tool, then move the depth slider back to the appropriate depth
Oooh. But what about that slanted inward edge I kept going on about? :snap: Thickness slider...
Kind of looks like arrow slits in a medieval castle now. Neat. Go ahead and delete that back face. Make it look more open and windowish.
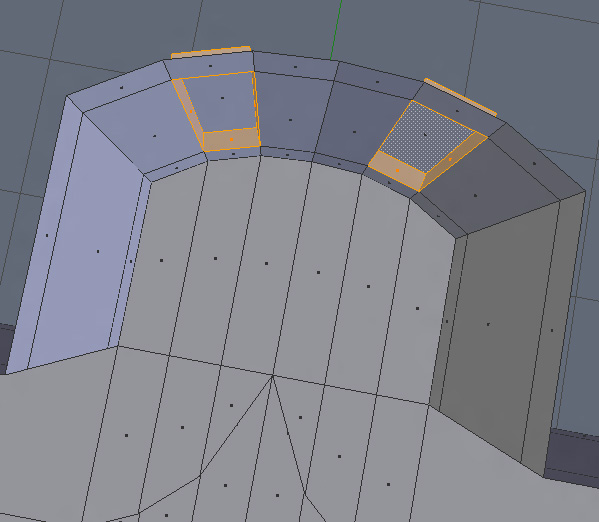
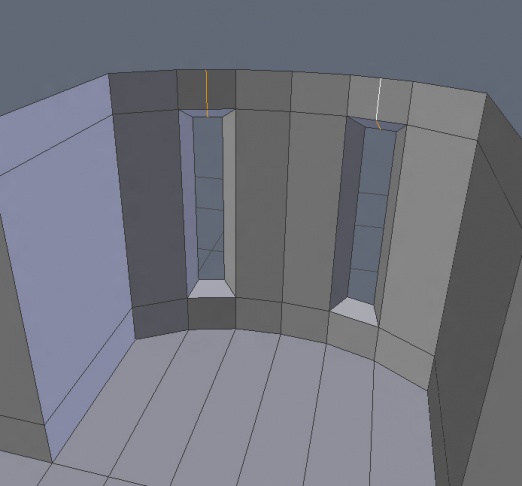
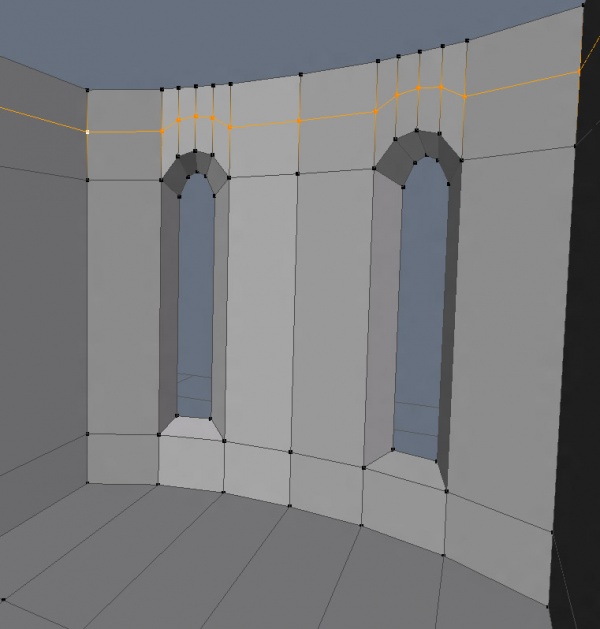
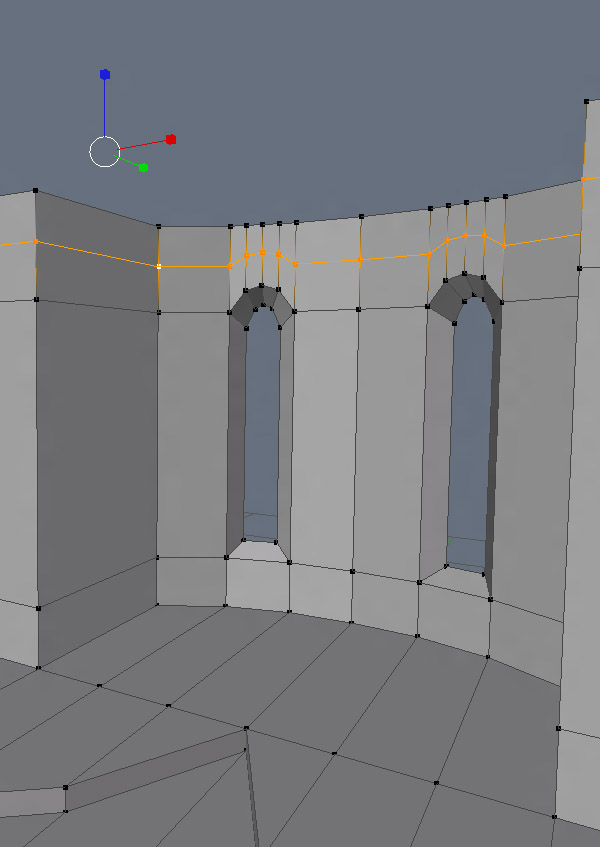
You know what? Rectangular windows are sort of boring. Lets make em rounded. First, add some vertical loop slices along the top sections of your windows...
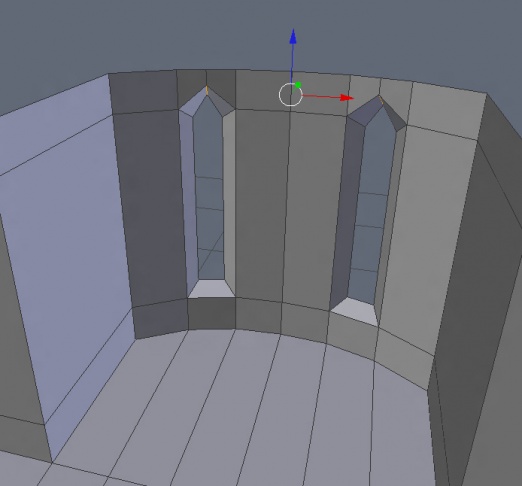
Now, select the edges on the topmost slants of your two windows, and pull them up...
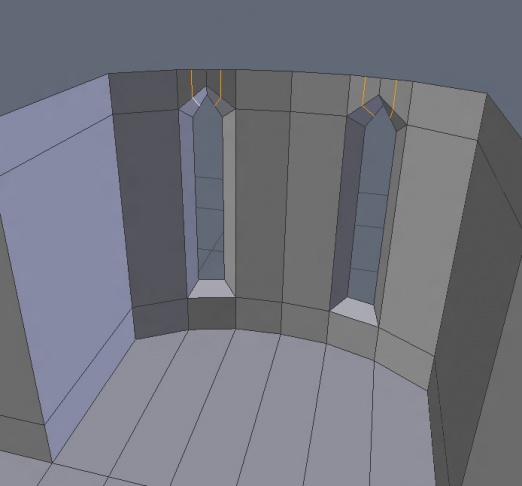
Next, make a loop cut on both sides of your initial loop cuts...
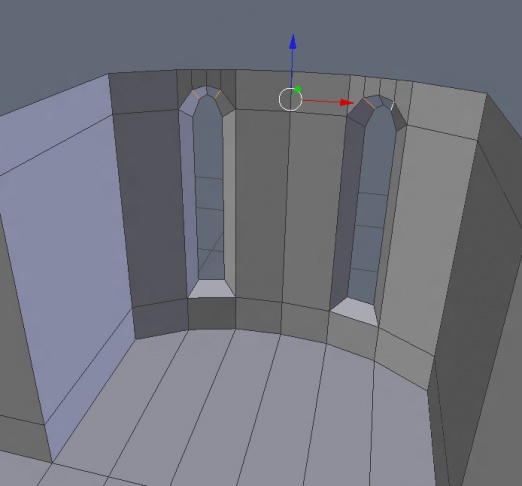
Select all the new edges running along the slant, and transform them straight up on Z...
To make the slant even again, you might need to play with the vertices at the bottom of your cut. Really, all you need to do is grab the one in the middle and drag it down a bit, then the verts next to it and do the same. Make sure you pick the corresponding verts on both windows at the same time, so they remain equal.
But is that all it can do? Extrude and make dimples ? Of course not! There's plenty more it can do.
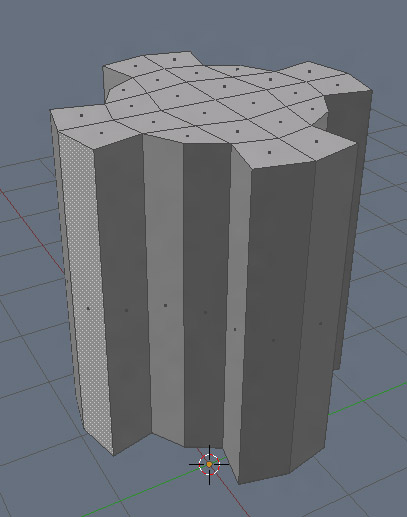
Like say we've got this odd little thing here...
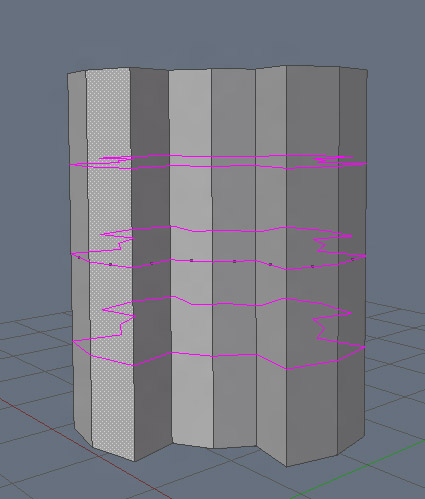
...and we want to run three grooves all the way around it. With the Inset Faces tool, this will be an absolute breeze. Lets start off by making three loop cuts along it.
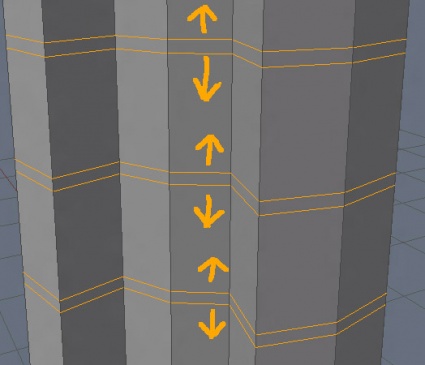
Grab your three new loops using loop select on your edges (make sure to hold down shift when selecting multiples), and run the Bevel tool to create the space that will eventually be your grooves.
Now, grab the new faces using loop select while in face selection mode...
...and inset! Scale the Depth slider up until you've got it where you want.
Much like the windows earlier, if you want it to go straight back, then set the Thickness to 0. A little bit of a bevel to your groove? Up the slider.
Roughly as simple as pie, isn't it? Now lets take what we've learned, and use it to add some more detail to the room.
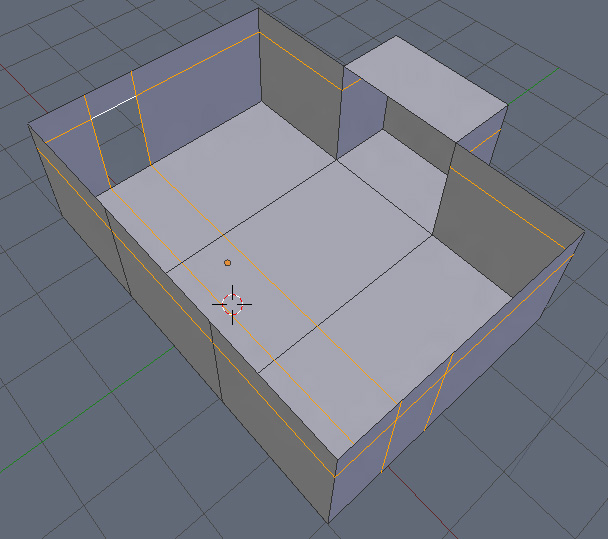
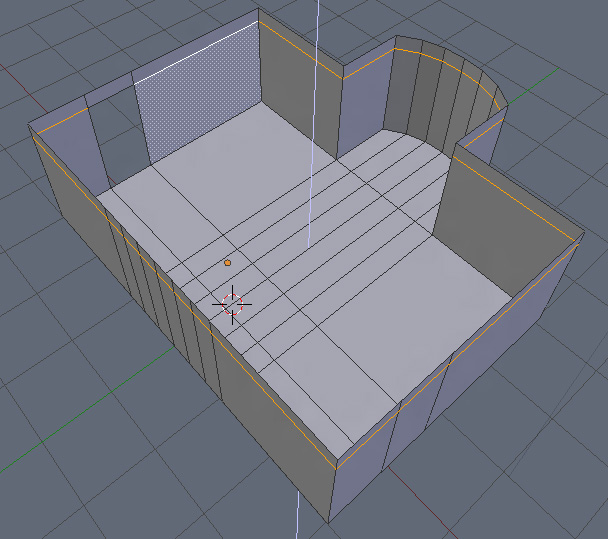
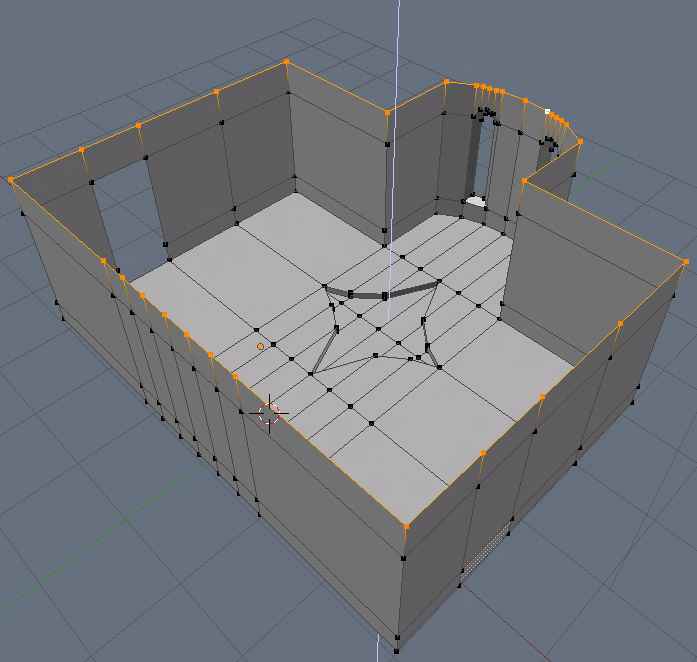
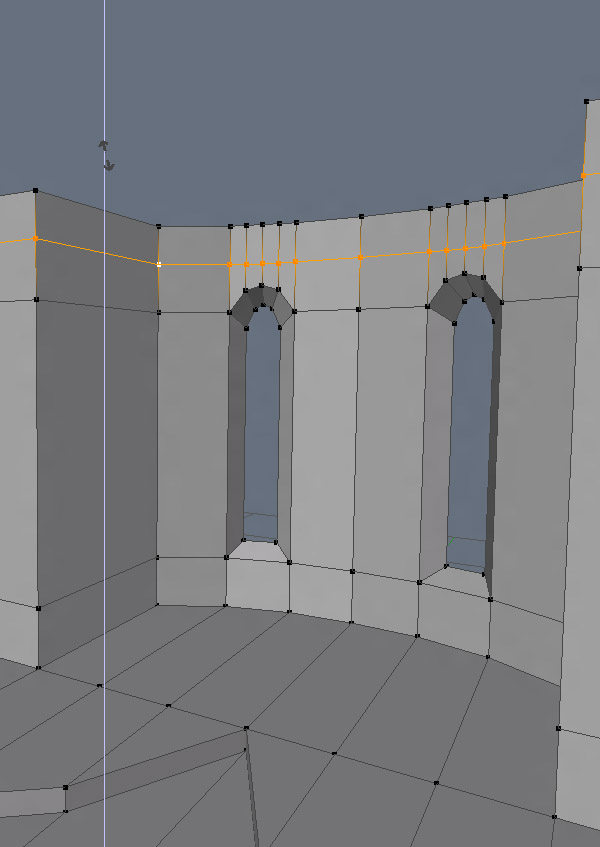
Lets start off by raising the loop that makes up the topmost edge of your room. Give yourself some space to work with.
Now, either run a loop slice across the top that'll mark the center of your future inset groove. Looks good, save for one thing...
Those little arches over your wall. If you want your future groove to arch over your windows like that, you're already good to go. Just run your Bevel tool, and move on with life. But what if you want it level all the way around the perimeter of your room? Having to move all those verts into a level line would be a huge, huge, HUGE pain in the ass.
Good thing we've got a trick here, huh? To level it out, simply select your loop there, and activate the scale tool, then simply scale it on Z to even out the entire thing.
This'll even out your vertices. Chances are good that this action moved the entire loop from it's original intneded position. To fix that, just select the loop, activate the transform tool, and move it up a little bit.
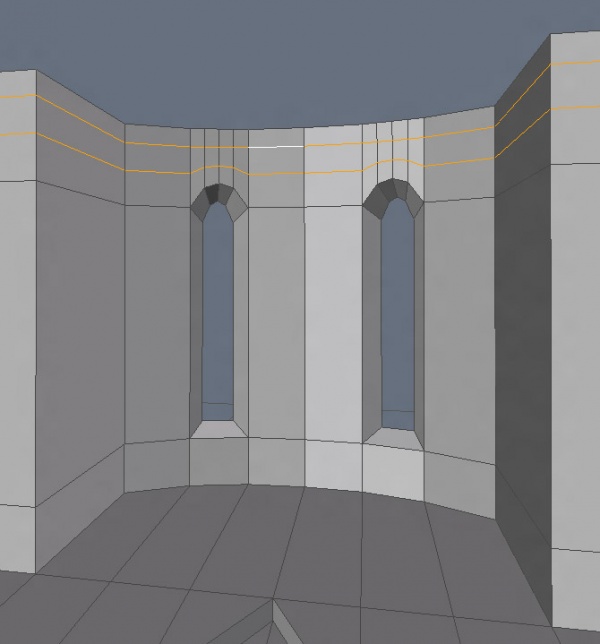
Now, lets select our loop AGAIN, and run the Bevel tool. Make it as thick as you'd like...
Aw, damn. It did it again! There's really no way to keep it from bending around that arch in your geometry. The plus side is it's now only bent on one side instead of two. Fixing it is just as easy here as it was before. If you like the way it looks, then continue on. If not, do your scale thing.
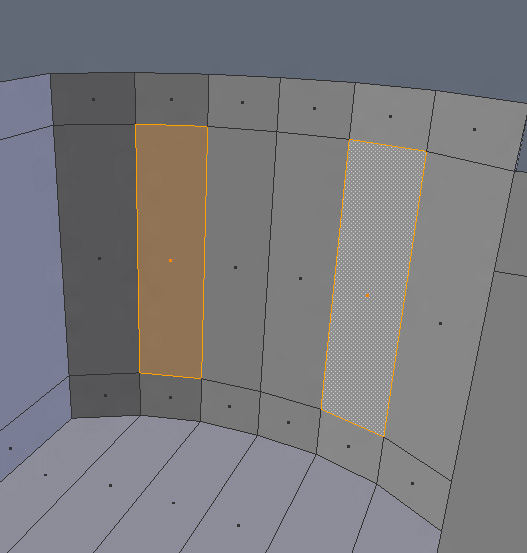
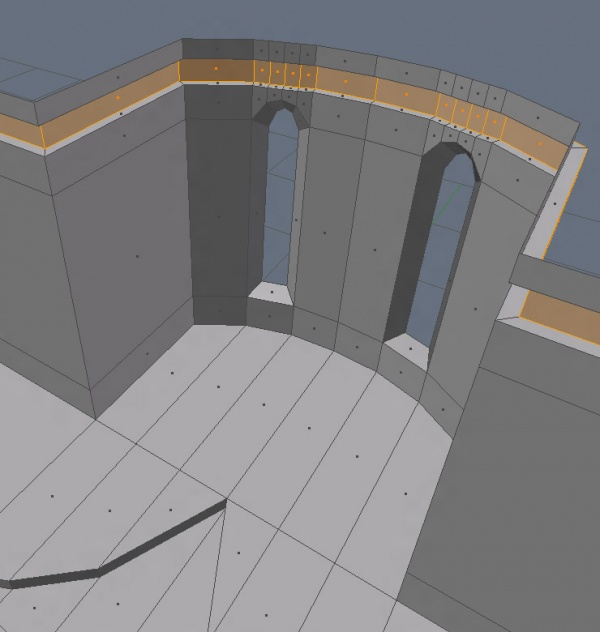
Next comes the Inset Faces part. From the previous examples, you should know exactly what to do by now. Loop Select while in Face Selection mode, run the tool, then change the depth and thickness to their desired positions.
Now lets add a little more detail by repeating the process inside our new groove. Make three loop cuts down the center, run the Bevel tool until they're as thick as you want, then loop select while in face selection, and Inset back outwards. This time, I'm going to apply a slight bevel, to give it a little more of a rounded look...
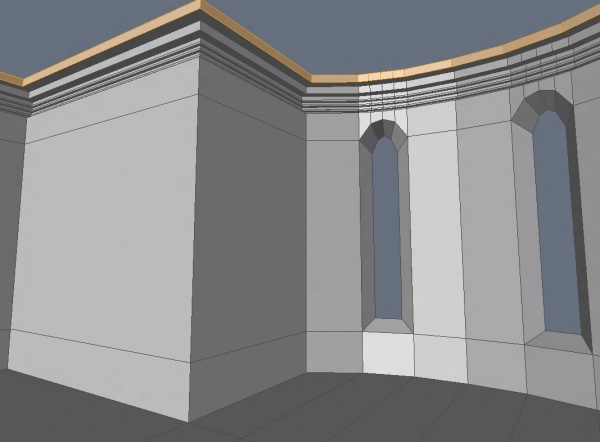
Lastly, lets make another cut towards the top. Have a bit of trim that overhangs our wall. You should have the process drilled into your head by now, so I'll just show the end results.
We've got ourselves some fancy trim now. All thanks to the wonders of Inset Faces. Who would've thought one tool would be so handy, huh?
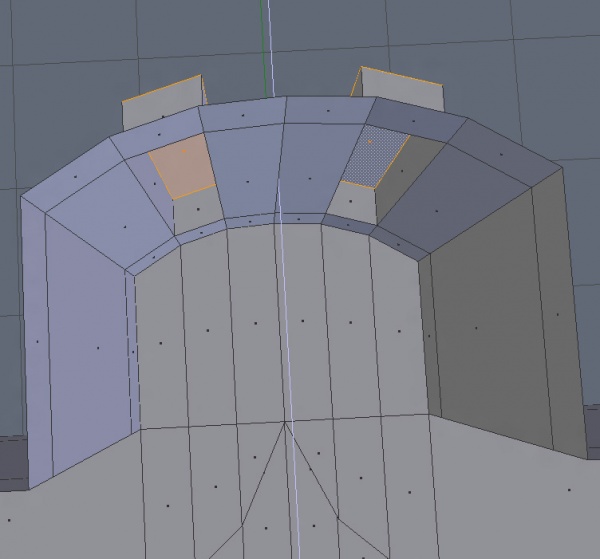
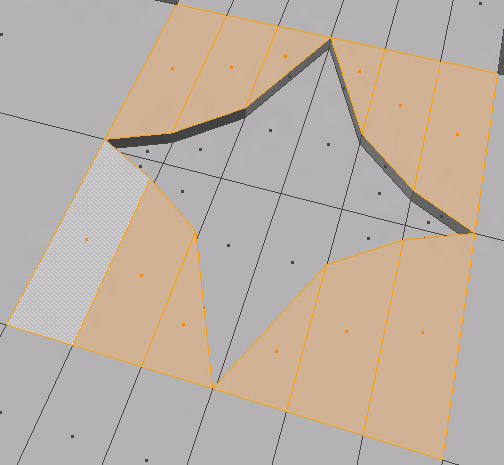
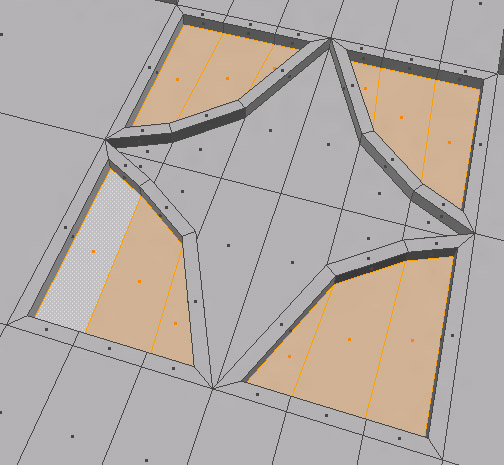
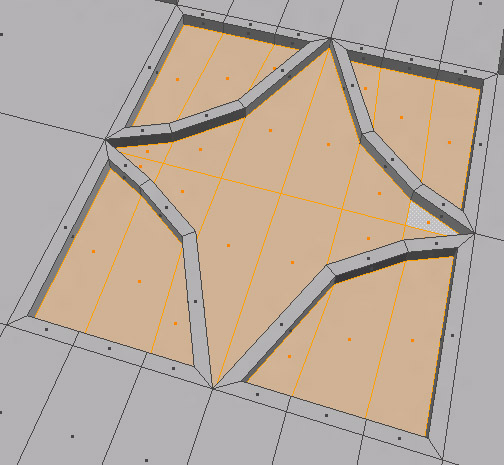
I think there's one last thing we can do with the inset faces tool before we move on. Lets deal up our star on the floor a bit. I want to add some more detail surrounding it. I'll do this by selecting the geometry that makes up the square it's built into, and run the Inset Faces tool once. Give it a lip that'll define the shape of the star a little more. I'll do this by defining the Thickness by itself.
Next, I'll grab the faces just inside our new lip, and inset them into the floor.
Alright! Now we've got even more unnecessary bits of architecture for the future inhabitants of our little room to break their asses on! You sick bastard. Lets make it a little easier on them.
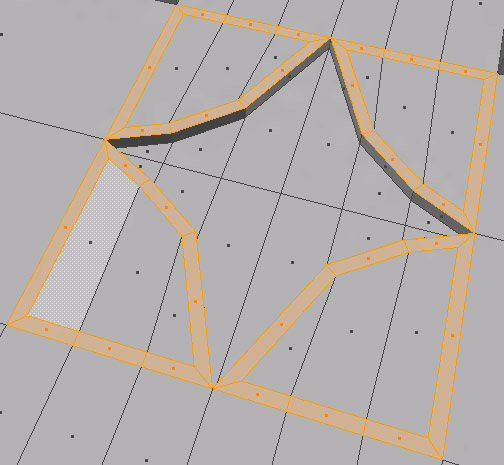
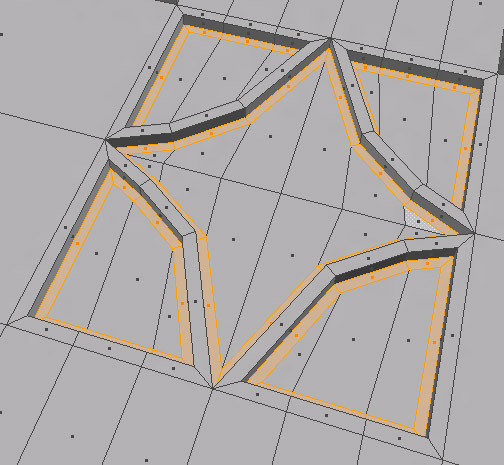
Make it so they're more grooves carved into the floor, rather than huge spaces. We'll start this process by selecting all the geometry in the cavities that make up the star design...
Make your future groove by running the inset tool, and just playing with the Thickness slider. Much like you did to define the outer shapes earlier on.
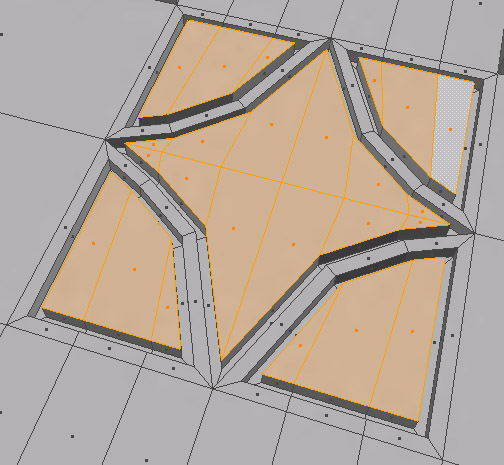
Finally, grab the faces that make up the center geometry, run inset yet again, and bring it all back up so it's roughly even with the rest of your floor...
Alright! Now our little future inhabitants are less likely to kill themselves tripping over a dip in the floor. They'll probably stick a foot in it and break an ankle instead. You're so thoughtful.
Lets go ahead and do one last thing. It's not completely necessary, but it's a good habit to get into.
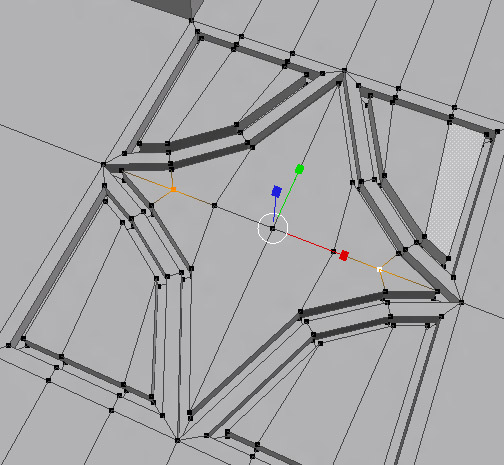
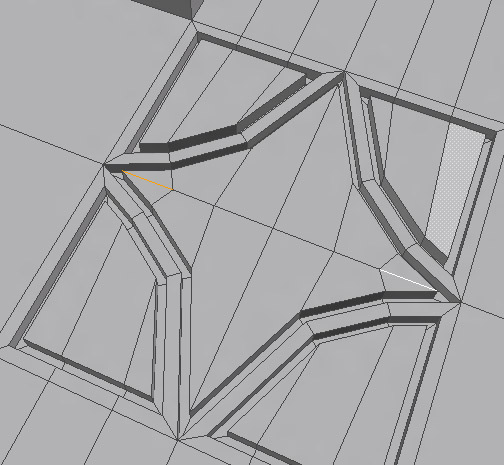
Those tris are bothering me. If I ever want to add detail in there later, I'll have to work around them. Lets make them quads right fast. Do this by selecting the two vertices that run along the center end of your tris, and scaling them in so you get a nice diamond shape on the end...
...then selecting the edges that make up the connecting center between your two tris...
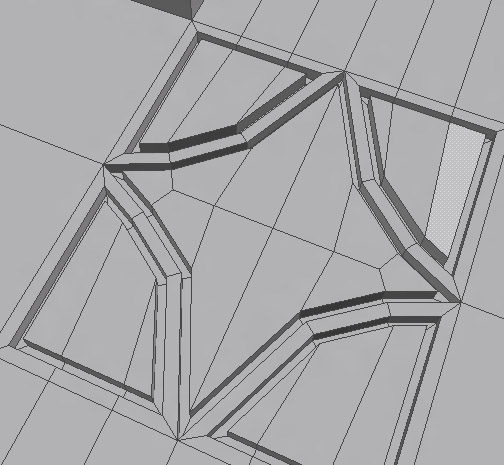
...then call up your menu, and type "limited dissolve". 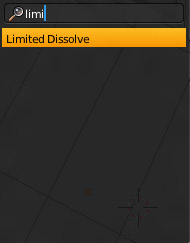
What this does is deletes any edges and/or vertices from your faces while still keeping the underlying polygon intact. Great for (you guessed it) a variety of situations. In this instance, it'll make our two tris one quad.
Specifically, what's called a diamond quad, which you'll once you start high poly modelling things like veins underneath skin, or wrinkles in fabric. I'll save all that for a later tutorial.
By now, you should have a pretty good idea of the various uses of the Inset Faces tool.

