Roads: Difference between revisions
Created page with "= Roads = This tutorial tells how to make organic roads fairly easily. It is recommended the mappers familiarizes himself with basics of patches before trying to do these. 0) As..." |
mNo edit summary |
||
| Line 70: | Line 70: | ||
*You get an ugly seam on the spot where two road module alphapatches meet? Put some decoration to hide it. Additional grass patch? Boulder, vegetation... | *You get an ugly seam on the spot where two road module alphapatches meet? Put some decoration to hide it. Additional grass patch? Boulder, vegetation... | ||
*Want a hill? Simply look at the side view orthoview, select all the patches, show the control points and move them. The alphapatches should move snugly with the other parts. If they do not, repeat the fine adjustment for the alphapatches. | *Want a hill? Simply look at the side view orthoview, select all the patches, show the control points and move them. The alphapatches should move snugly with the other parts. If they do not, repeat the fine adjustment for the alphapatches. | ||
{{editing}} | |||
Latest revision as of 17:51, 24 August 2012
Roads
This tutorial tells how to make organic roads fairly easily. It is recommended the mappers familiarizes himself with basics of patches before trying to do these.
0) As always, it is good to plan your work beforehand and try to build modular structures, ie structures you can easily copy out, duplicate and use elsewhere.
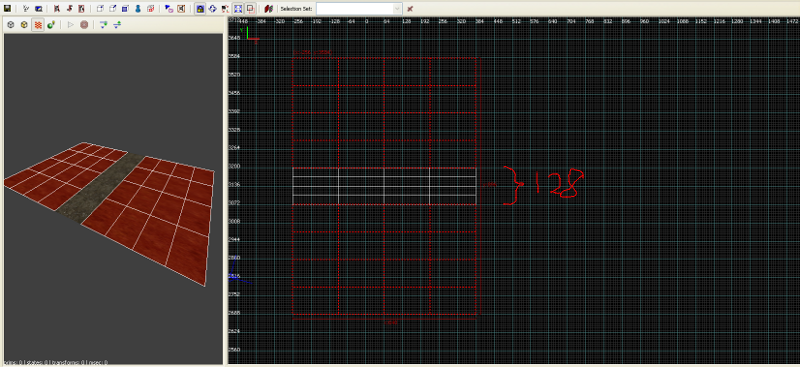
1) See figure 1. Create three patches, 5x5 size are fine. The more control points you have in your patch, the more you can add detail into the ground. On the other hand, too many nodes make the process error prone. 5x5 or 7x7 is good. Lay them out next to each other. The middle patch will be the road. The two patches on the sides will be wilderness/grass. Make the patches into the size category you want. A dirt path made for cart-traffic might be some 128 units wide. Texture the patches so you see which one are which. Open the surface inspector, select texture scale 0.5 for all patches and press the natural button. This gives you a good baseline texture scale.
Figure 1.
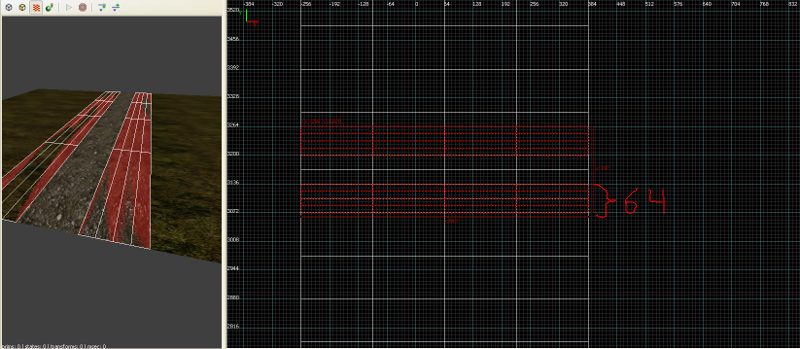
2) See figure 2. Clone one of the patches and resize it to 64 units width. Move it in the middle of the seam between the road patch and the grass patch. Good rule of the thumb would be that it overlaps 4x8 units over the grass and another 4x8 units over the road. Make another similar patch and place it on the other seam between the road and the grass. These two patches will later become the alpha patches to make a neat smooth transition from the grass into the road. They will now z-fight with the other patches, but don't worry about it. That is fixed soon.
Figure 2.
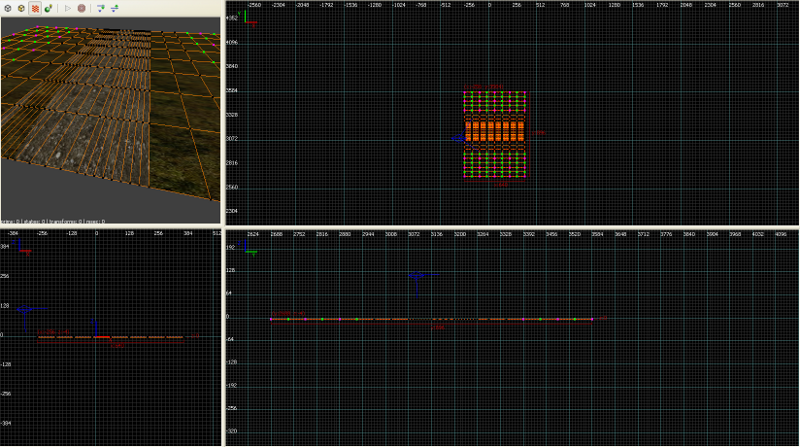
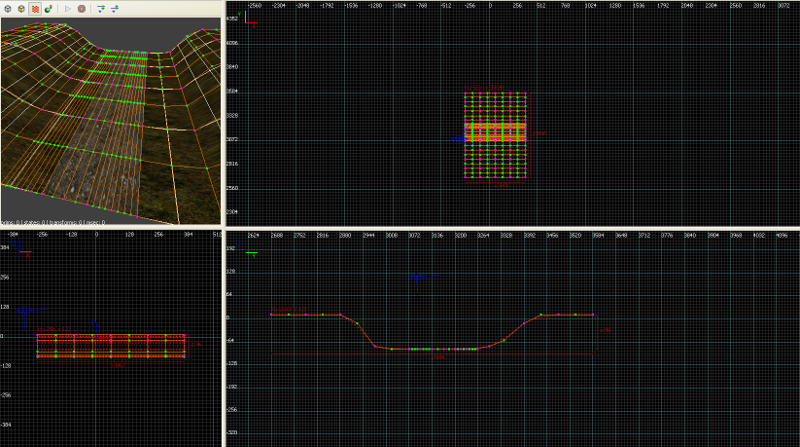
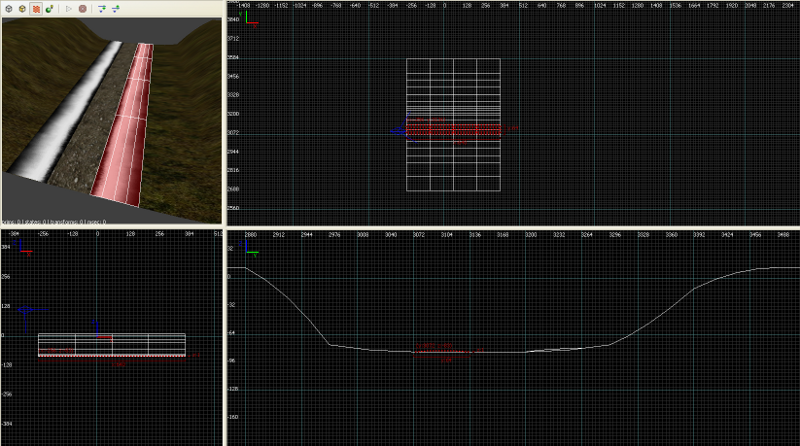
3) See figure 3. Select all the patches. Press the button that shows the control points (cube with a dot in the corner). Select the middlemost control points and create the depression in terrain where the road sits in. Be sure to grab also the two alphapatches and modify them exactly the same as the others. See figure 4.
Figure 3.
Figure 4.
4) See figure 5. Adjust the two alpha patches which were supposed to be the grass-road transition. Apply the desired texture from darkmod/nature/grass/grass_edge. Be sure to scale the texture so that it fills the whole patch as shown in the image. In my case, I used a patch that can accomodate 0.5x natural grass edge texture (the very same size scale as the road and the grass patches were!). Note how the coarse side points towards the interior of the road and the smooth towards the wilderness. Fine tune the patches so that they slightly bump out from the ground and touch the ground patches. Use the smallest grid for this task.
Figure 5.
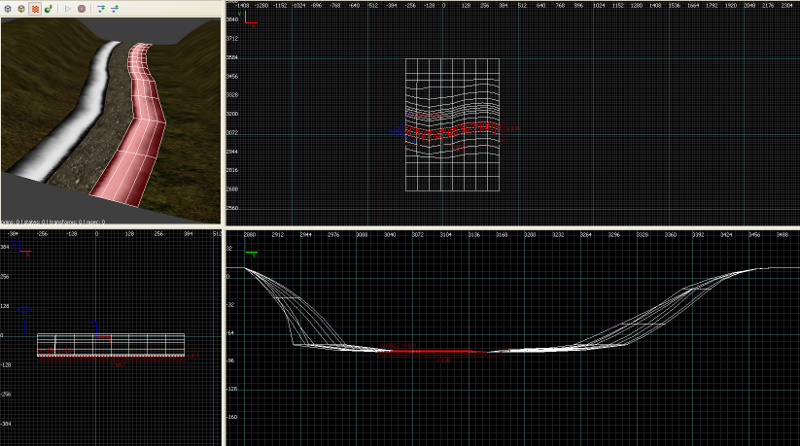
5) See figure 6. Select all the patches (road, grasses, alphapatches) with shift drag select. Show the control points. Shift drag select the patch control points from the middle (road + grass + alphapatches) and move them in the south/north direction top-down orthoview screen. Make the road wind a bit as per your desires. Tip: don't touch the edge vertices of the whole patch ensemble, if you move them, you'll have hard time mashing the road modules next to each other.
Figure 6.
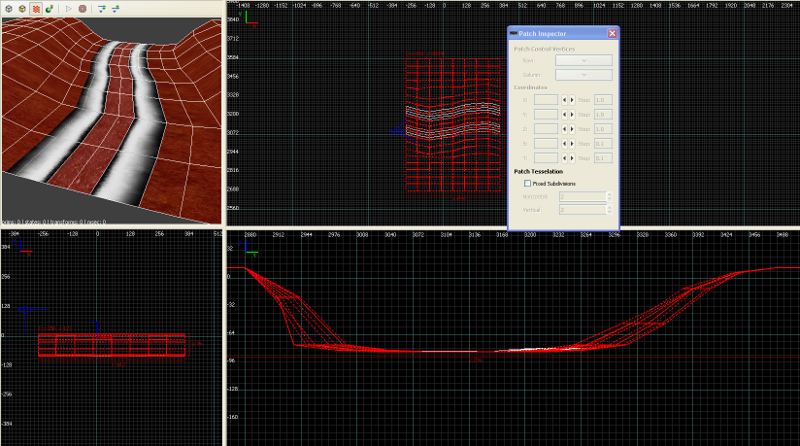
6) See figure 7. Select everything except the alphapatches. Open the patch inspector from the top menu. Select fixed subdivision. Play with the numbers. The idea is to make your terrain patch look as realistic and good as possible with as minimal amount of subdivisions as possible. Too many subdivisions increase the triscount of you terrain. Too few subdivisions make your terrain look blocky. Optimize between looks and simplicity.
Figure 7.
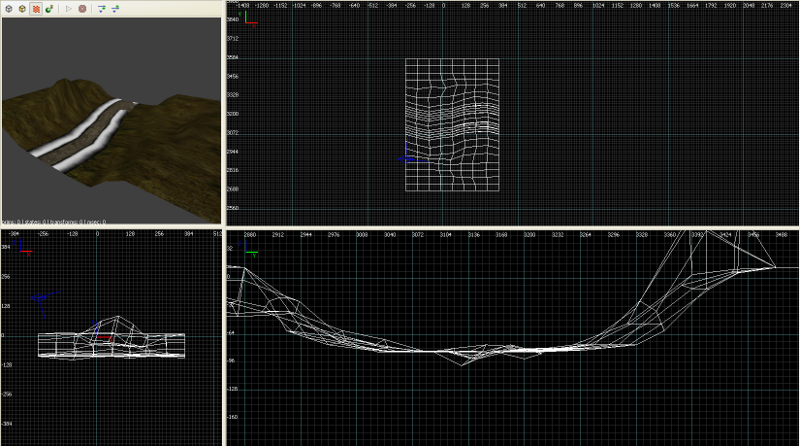
7) See figure 8. Make sure you all the road + grass patches selected. In the camera view, fly over your work and introduce bumps in the grass and the road by dragging the control points. Make the terrain realistic and interesting. I recommend you use a grid of 8 or 4 for this task.
Figure 8.
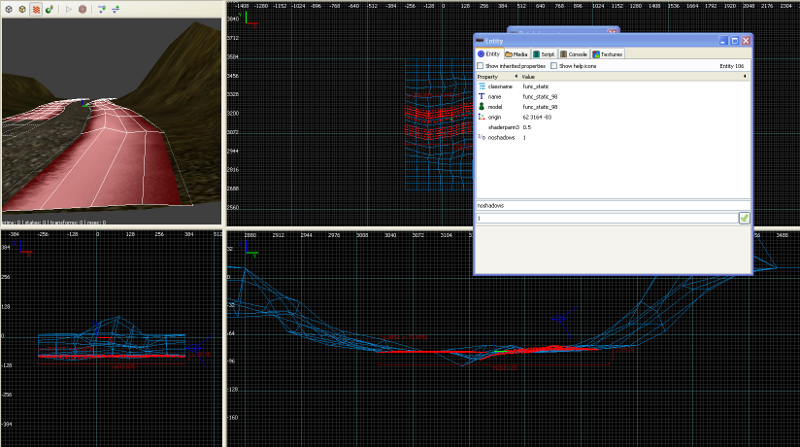
8) See figure 9. Select the alpha patches and do the same fixed subdivisions with the patch inspector you did previously to the road and the grass. Make the alphapatches as simple as possible so that they still look good. Select your alpha patch, enter the control point mode, select the smallest grid. Fly over both patches and make them like shown in the picture. The patch should bump out from the ground and sink very slightly into the ground at its edge. Note how the white area never sinks into the ground, but only the black areas. If you fail in this, your grass will hover uglily over the road/grass. If you have difficulties, insert more control nodes into the patch or increase the amount of subdivisions from the patch inspector. After you are done, make the alphapatches into a func_static. Give them properties "noshadows 1" and "shaderparm3 0.5" (noshadows is self-explanatory, shaderparm controls the amount of alpha in the patch)
Figure 9.
9) Select everything else (road + grass patches), make them into a func_static and give it the properties "noshadows 1". This should prevent ugly/unrealistic black sharp shadows originating from the patchwork.
10) You are done! Now you can clone the road set around or fill it with details.
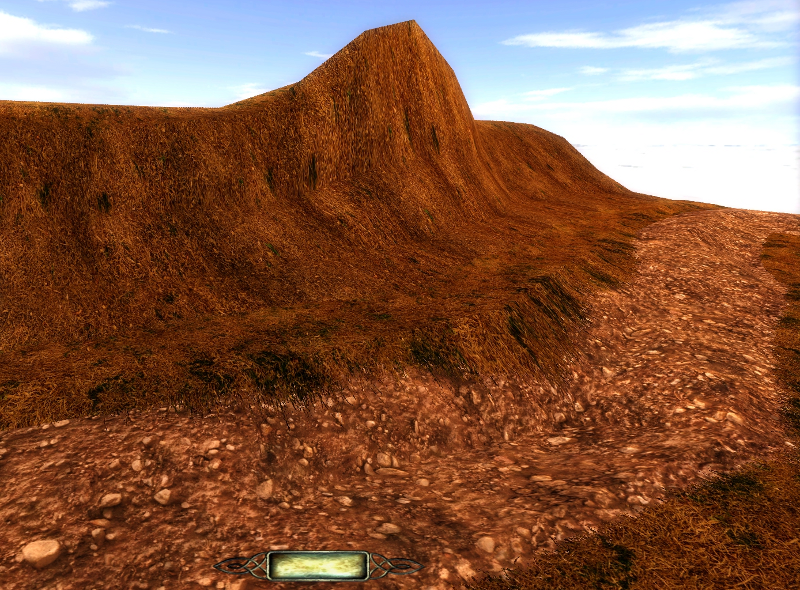
End result might look like this.
Tips&Tricks
- Difficulties with the patches? You can insert new control nodes into any patch from the patch menu. This may be required for getting the alpha-patches perfectly aligned onto a particularily bumpy road.
- If you used a patch with a lot of control nodes and simplified it a lot with the patch inspector (fixed subdivisions), you may need to move multiple pathnodes to see any change in the patch.
- You cloned your road and wanted to put a few of them next to each other, but you get an ugly seam because of texture differences? Add a brush, apply your texture onto it, scale it the way you want. Copy the texture from the brush and paste it onto the patches. Every patch you paste, should have identical texture alignment. This applies for road and grass textures.
- You get an ugly seam on the spot where two road module alphapatches meet? Put some decoration to hide it. Additional grass patch? Boulder, vegetation...
- Want a hill? Simply look at the side view orthoview, select all the patches, show the control points and move them. The alphapatches should move snugly with the other parts. If they do not, repeat the fine adjustment for the alphapatches.
