Creating textures from Ornate Photos: Difference between revisions
Nbohr1more (talk | contribs) |
Nbohr1more (talk | contribs) |
||
| (20 intermediate revisions by the same user not shown) | |||
| Line 147: | Line 147: | ||
[[File:Awesome_girard_preview.png|800px]] | [[File:Awesome_girard_preview.png|800px]] | ||
Update: Since the green color channel is where top-shading originates in AwesomeBump, it's probable best to only blend photo shading there. | |||
<br>Using the top shading from the photo source in place of the green channel will only work for very direct illumination, sunlight or other larger | |||
<br>diffuse sources will have natural ambient occlusion on top of protrusions which will foil the normal shader. Unless you want to manually paint the | |||
<br>AO artifacts away or the scene is simple enough to use erode and blur filters, you'll probably want to mix generated normals into the channel. | |||
<br>Blue represents steepness, and can be approximated by using shading from both red and green brightness in both standard and inverted modes overlapped | |||
==== '''AI Tools''' ==== | ==== '''AI Tools''' ==== | ||
| Line 154: | Line 160: | ||
<br> | <br> | ||
'''Note''': The liked AI site seems to go down periodically. You may need to check back in 6 to 12hrs if it's down. | '''Note''': The liked AI site seems to go down periodically. You may need to check back in 6 to 12hrs if it's down. | ||
'''WARNING!''' All the AI generated normalmaps have '''inverted Red and Green channels'''! ( see the [[#Invert_the_Green_Channel|section below]] for correction steps) | '''WARNING!''' All the AI generated normalmaps have '''inverted Red and Green channels'''! ( see the [[#Invert_the_Green_Channel|section below]] for correction steps)<br>Quick reference: Green = Bottom lit. Red = Right lit. | ||
<br>These tools tend to get more confused the larger the scene but usually get the macro scale details correct. | <br>These tools tend to get more confused the larger the scene but usually get the macro scale details correct. | ||
<br><br>One way to overcome | <br><br>Example: | ||
<br>[[File:AI_Girard.png|600px]] | |||
<br><br>Video: | |||
<br> | |||
[https://youtu.be/ky2UfFoLY0Y?si=FRu1lFY6j--HA8wz http://i3.ytimg.com/vi/ky2UfFoLY0Y/hqdefault.jpg] | |||
<br> | |||
<br><br>One way to overcome the details limitation is to crop to a detailed part of the image then upscale and export the crop | |||
<br>so the AI only needs to analyze the detail of the cropped portion. Then just scale the results back down and overlay | <br>so the AI only needs to analyze the detail of the cropped portion. Then just scale the results back down and overlay | ||
<br>it on the macro-scale AI generated normalmap. | <br>it on the macro-scale AI generated normalmap. | ||
<br><br>Just as with njob or AwesomeBump it's best to [[#De-Noise_the_Image|desaturate and de-noise the image]] prior to AI processing | <br><br>Just as with njob or AwesomeBump it's best to [[#De-Noise_the_Image|desaturate and de-noise the image]] prior to AI processing ( but not necessary ) | ||
<br><br>In many cases, this workflow can probably completely supplant the other methods outlined in this wiki and other similar references. | <br><br>In many cases, this workflow can probably completely supplant the other methods outlined in this wiki and other similar references. | ||
<br> | <br> | ||
| Line 180: | Line 192: | ||
# Preview the results in AwesomeBump, if it looks good invert the green channel and test in TDM | # Preview the results in AwesomeBump, if it looks good invert the green channel and test in TDM | ||
<br>A quicker / easier way to make use of the AI generated "macro scale" image is to use the addnormal material keyword in your material def: | <br> | ||
Results ( of everything basically: Awesomebump, Top shading, Mean Curvature Blur, Macro AI, Crop AI, and color channel inverts ) | |||
[[File:Girard_local_aimerge5.png|600px]] | |||
<br>A quicker / easier way to make use of the AI generated "macro scale" image is to use the addnormal material keyword in your [[#Material_Def_and_Paths|material def]]: | |||
( Make sure to inverted the red and green channels of the AI image! ) | ( Make sure to inverted the red and green channels of the AI image! ) | ||
| Line 217: | Line 234: | ||
<br> | <br> | ||
[[File:Girard_invert.png|600px]] | [[File:Girard_invert.png|600px]] | ||
<br><br>See also: [[Inverting_Normalmaps|Inverse Normalmaps]] | |||
{{clear}} | |||
<br> | |||
== '''Creating the Diffuse''' == | == '''Creating the Diffuse''' == | ||
Latest revision as of 19:17, 18 July 2024
(by nbohr1more)
There are a number of texture creation articles in the darkmod wiki with valuable advise regarding texture design.
This article serves to provide more detail about an improved workflow to generate high quality diffuse
and normalmaps from photos with lots of structural detail ( as compared to bricks, cobblestones, etc \ tileable textures).
Many modders who have created textures for the Doom 3 engine have fallen for the pitfalls trying to create or manipulate
normalmap images as they would with any other images which can lead to inverted geometry and other artifacts.
This workflow should help authors create normalmaps closer to the quality of those baked from model geometry.
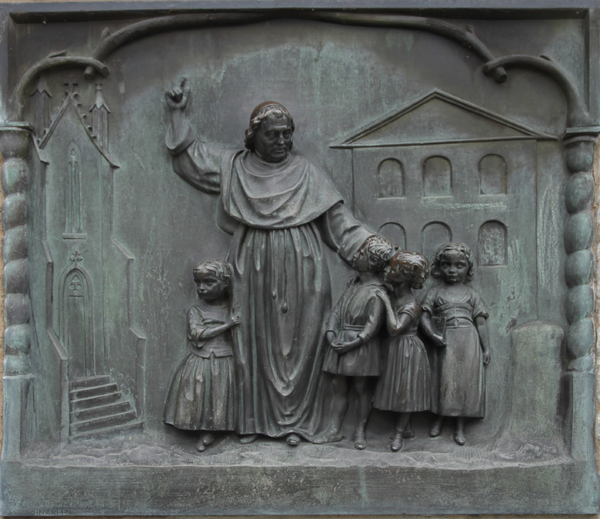
The Ornate Photo
This tutorial presumes that we are concerned about creating a texture that illustrates detailed carving or engraving.
The subject will typically be a single physical material such as stone or wood. The techniques can be extended
to complex multi-material sources but will be far more labor intensive.
As best as possible, try to ensure that the photo of the ornate carving is flat with respect to view perspective.
You can correct this a little via the use of rotation and shear translation operations but it is best to start
with a texture that is close to orthographic as possible with as little vanishing point distortion as possible.
Also, it is strongly recommended that the photo source be illuminated by a single light source.
Ideally it would be lit with uniform diffuse lighting but a moderate strength single
directional light also works as long as large portions aren't completely cast by black shadows.
That said, depending on the source photo one could possibly use the lit portions to reconstruct the shaded
areas on a larger scale than the technique offered later in this tutorial.
Tuning the photo for Height Map conversion
The dominant tool for generating normal maps from photo sources in the darkmod community is "njob" but other tools such as
"Crazy Bump", "Awesome Bump", "Materialize" all seem to use the same design where the heightmap extracted from a texture
is inferred by directional shading around features and overall brightness ( AO ) and some percentage of the shading
from the original source photo mixed in. There are plenty of ways that this heuristic can go wrong and decide to invert, flatten,
or emboss the wrong geometry in the texture. To reduce the chance of these issues, you can tune the image prior to feeding it
to njob for conversion to heightmap.
The tuning is done by selectively brightening or darkening areas of the photo so that protrusions are brighter and recesses are darker.
There are a number of ways this can be achieved ranging from painting \ airbrushing a transparent bright layer over the image and blurring
it, to painstakingly selecting small sections of the image and using the brightness \ contrast color tool to brighten or darken.
In my experience, for GIMP the easiest way to achieve good clean results is as follows.
Note: While editing, you should work on the fullsize images or ( even better ) upscale the images to above fullsize so that small
editing artifacts and discontinuities disappear when the final downscale operations are applied.
( Remember to keep an unaltered version of the original photo source. )
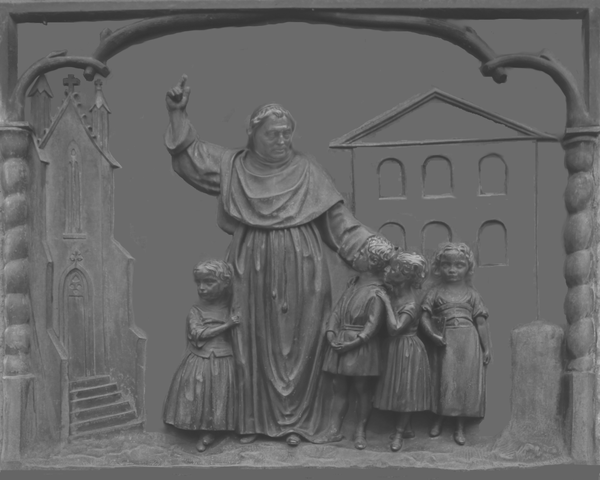
De-Noise the Image
The carved stone or wood will normally have natural color and brightness variations that have nothing to do with
the depth of the 3D structure. We need to create a new image that has as little of that "noise" as possible
so that the depth-map \ normal-map program doesn't try to turn those shades into 3D structures.
- Open the original image in GIMP
- Use the Layers "From Visible" to make 2 or more copies of the image into various layers
- Convert all the layers to grayscale
- Make the top layer a multiple layer ( make sure all layers except the bottom have an alpha channel)
- Use Brightness \ Contrast or Levels (etc) on the top layer to make the image mostly white with a few dark recesses
- Paint areas that are shaded incorrectly ( due to surface color rather than shadows ) white or gray depending on the proximity to shadows
- Make another low contrast using the Levels tool and reduce the contrast range ( less deep blacks and bright brights )
- Again paint away or airbrush shade variations that aren't due to shadowing
- If the contrast needed for the overall image destroys too much shadow detail in specific parts of the image,
use another layer from the original image and cut out the desired section then tune it's contrast and paint until only shading is visible. - Use the opacity sliders to adjust the relative strength of each layer then flatten the image
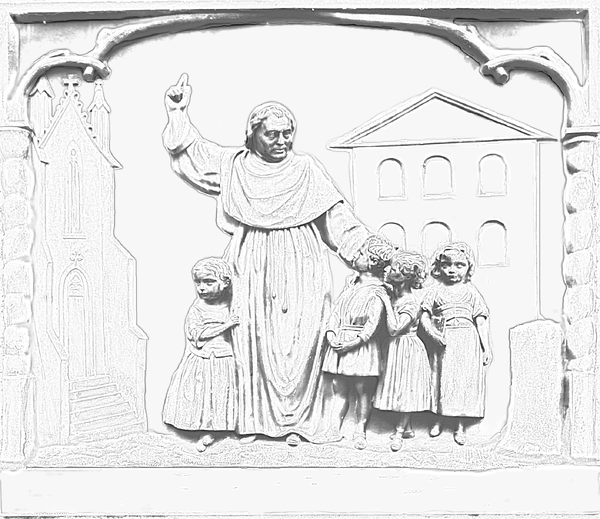
Result:
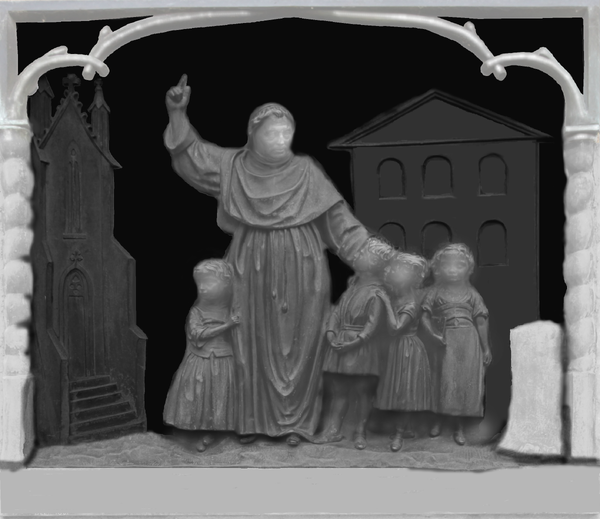
Split the image into Depth Levels
Njob, Awesomebump and other tools are supposed to examine the shading in the image and create the normal maps
but these tools also are used by texture artists to convert heightmaps \ ( depth images ) into normal maps
so they perform a hybrid action of partially interpreting the lighting an partially using depth brightness values.
Because of this, you can either do this step before or after conversion to heightmap ( or both )
depending on how much control you want. With Awesomebump, if you do this step first and import the resulting image
as the diffuse and let Awesomebump bake the other textures ( Normals, Heightmap, AO, etc) you can more easily tailor
depth of the normal map via the detail sliders in the Preview sub-section.
- Open the de-noised image in GIMP
- Make 4 (or more) layers from visible and label them like "Darkest", "Dark", "Medium", "Bright". ( Bottom darkest to Top brightest )
- Make sure all channels except the bottom have an alpha channel
- Use Brightness and Contrast to change all layers except "Medium" to a corresponding brightness level
- Hide the top 2 layers and use Intelligent Scissors to cut away the furthest part of the "Dark" layer to reveal the "Darkest" layer below it
(normally the fully flat area) - Use a small pencil or paint brush with the Eraser tool and zoom in to cleanup the rough cut operations
- Show the Medium layer and cut away both the furthest and 2nd furthest areas using the same method
- Show the Bright layer and cut away all but the closest parts of the geometry
- Use the airbrush tool or other methods such as gradients to selectively brighten the closest parts of the image. For heads make sure it's a circular gradient
- Flatten the image
Result:
Export to Heightmap and Normalmap
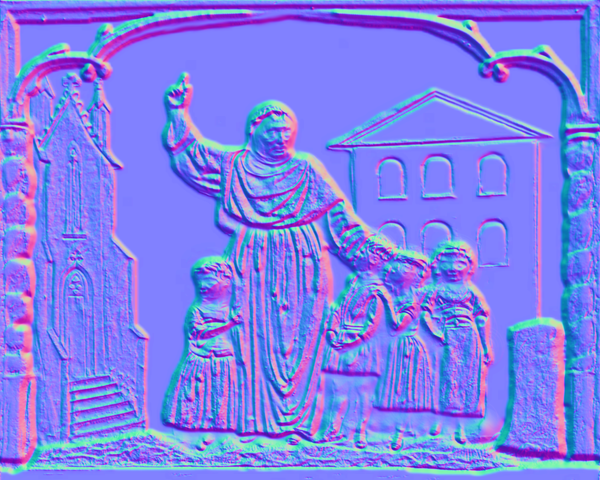
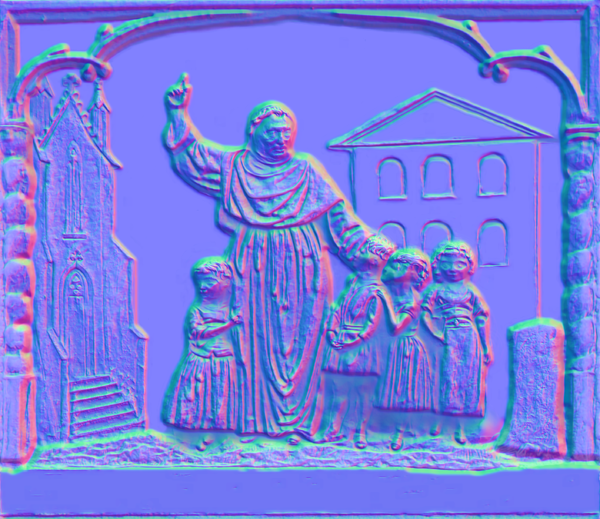
Now that your image is ready for conversion, you can choose two different ways to proceed.
I find that Heightmap and Normalmap results from AwesomeBump are better than Njob but Njob makes
a better AO image from a Normalmap.
In either workflow, feel free to edit the resultant images in GIMP to remove noise, breaks, or smooth color transitions
Njob workflow
- Open the edited file in Njob and choose the Diffuse to Height filter
- Tune the results so that the ratio of blur to detail is at your preference
- Save the results as a heighmap file in your preferred format ( png is probably best )
- Use the Heightmap to Normalmap filter and tune the sliders to produce the amount of detail preferred
- Save the results as a Normalmap file in TGA format
- Use the Normalmap to Ambient Occlusion filter and Save the results as png
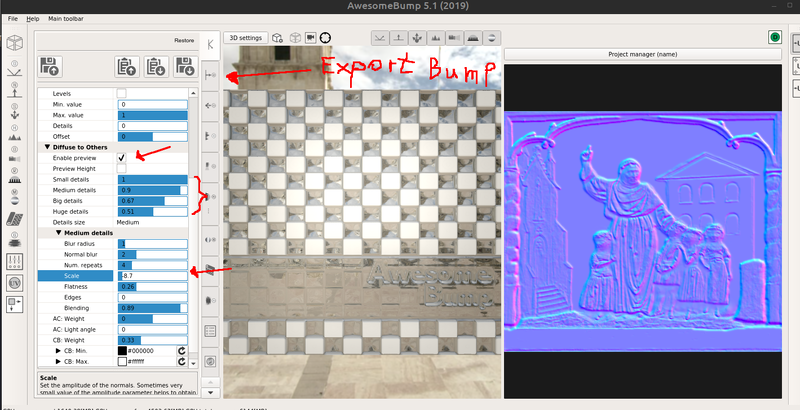
AwesomeBump Workflow
- Open the edited file in AwesomeBump in the diffuse tab ( top tile in the strip to the right of furthest menu left pane )
- Check the "Preview" checkbox
- Adjust the Small, Medium, Large, and Huge sliders as well as the Scale and Blur sliders until the Normalmap on the right looks good
- Scroll to the bottom and Click "Convert"
- Uncheck the Preview checkbox and then click the Normal Map tab ( 2nd tile down ) and Save the result
- Click the AO tile ( 3rd tile down ) and adjust the AO details and Save the result
Results:
Tips and Tricks
If the blur options in njob or AwesomeBump destroy too much detail or if you avoid blur and your normalmap is very noisy
with lots of little bump artifacts that represent isolated pixels that were brighter than their neighbors,
rather than using the smudge tool or other paint tools to painstakingly fix those issues there is an new blur mode
called "Mean Curvature Blur" which seems to do a great job of retaining the contour details but blurring the interior of shapes
in normal maps.
If the source image is lit from the top, convert the top-down lit portions to match the yellowish color of the normal map
then use this results as an overlay on the normal map to correct some of the generation artifacts
( likewise you can convert the dark shading under protrusions to the dark purple color of the normalmap and overlay that too).
Once you've applied these overlays you'll need to readjust the brightness and contrast to match the original normal map.
Results:
Preview in Awesomebump:
Update: Since the green color channel is where top-shading originates in AwesomeBump, it's probable best to only blend photo shading there.
Using the top shading from the photo source in place of the green channel will only work for very direct illumination, sunlight or other larger
diffuse sources will have natural ambient occlusion on top of protrusions which will foil the normal shader. Unless you want to manually paint the
AO artifacts away or the scene is simple enough to use erode and blur filters, you'll probably want to mix generated normals into the channel.
Blue represents steepness, and can be approximated by using shading from both red and green brightness in both standard and inverted modes overlapped
AI Tools
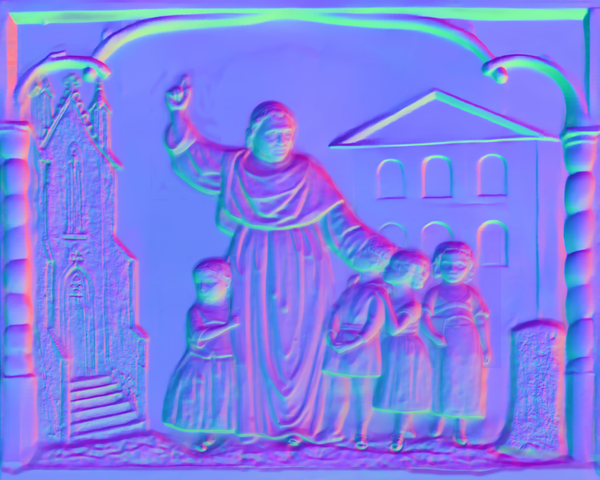
Shortly after creating this wiki, Arcturus ( team member ) demonstrated that there are several Stable Diffusion AI clients
that do a great job of estimating depth or normalmaps from photo sources.
Note: The liked AI site seems to go down periodically. You may need to check back in 6 to 12hrs if it's down.
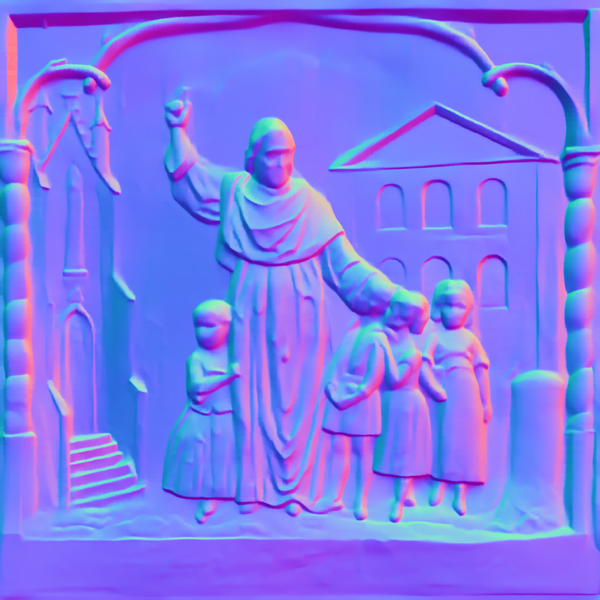
WARNING! All the AI generated normalmaps have inverted Red and Green channels! ( see the section below for correction steps)
Quick reference: Green = Bottom lit. Red = Right lit.
These tools tend to get more confused the larger the scene but usually get the macro scale details correct.
Example:
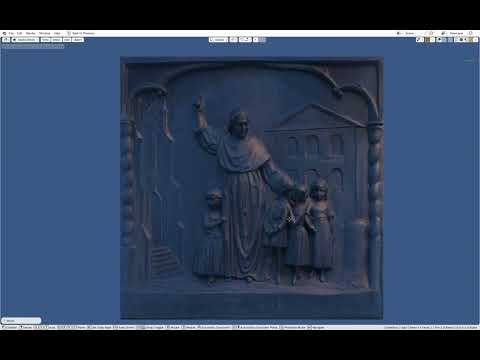
Video:
One way to overcome the details limitation is to crop to a detailed part of the image then upscale and export the crop
so the AI only needs to analyze the detail of the cropped portion. Then just scale the results back down and overlay
it on the macro-scale AI generated normalmap.
Just as with njob or AwesomeBump it's best to desaturate and de-noise the image prior to AI processing ( but not necessary )
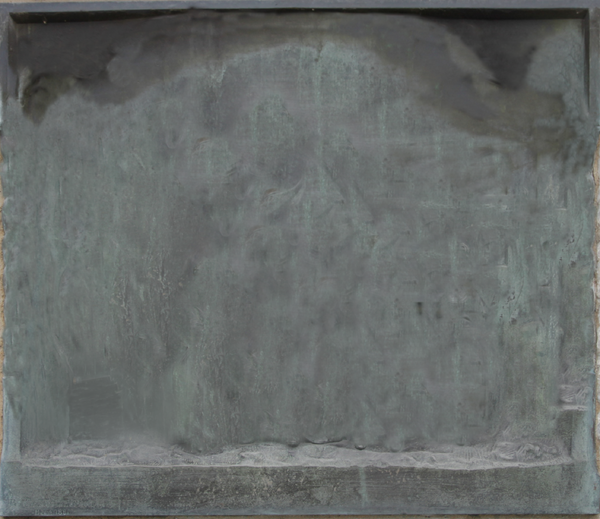
In many cases, this workflow can probably completely supplant the other methods outlined in this wiki and other similar references.
You can also blend AI generated normals with njob or AwesomeBump generated normals:
- Open the AwesomeBump normalmap in GIMP
- Open the AI generated normalmap as a layer and invert the red channel and clone it then hide the clone
- Reduce the opacity of the AI image and use the eraser tool to remove sections that are worse in than the AwesomeBump version
- Clone the edited AI layer and hide it
- Merge the visible layers
- Unhide the clone layer while hiding the others then use the bucket tool to fill all non-alpha areas black
- Overlay the black painted layer on the clone layer and merge visible, you should now have a black image with the "removed" parts of the AI image
- Select by color, click black and then cut
- Make the old merged image visible and ensure the clone layer is above it
- Slide the opacity of the clone layer and blend so that some of the macro-scale shading is restored.
- Use the eraser tool anywhere the clone layer has really bad AI artifacts or damages the Awesomebump details you tried to preserve
- Repeat as necessary using either the AI or Awesomebump images as overlays \ clone layers
- Merge the layers and export
- Preview the results in AwesomeBump, if it looks good invert the green channel and test in TDM
Results ( of everything basically: Awesomebump, Top shading, Mean Curvature Blur, Macro AI, Crop AI, and color channel inverts )
A quicker / easier way to make use of the AI generated "macro scale" image is to use the addnormal material keyword in your material def:
( Make sure to inverted the red and green channels of the AI image! )
textures/darkmod/stone/sculpted/girard_relief
{
    stone

    qer_editorimage     textures/darkmod/stone/sculpted/girard_relief_ed
    {
          blend bumpmap
          map addnormals(textures/darkmod/stone/sculpted/girard_local, textures/darkmod/stone/sculpted/girard_local_ai)
    }
    diffusemap          textures/darkmod/stone/sculpted/girard_relief
}
Invert the Green Channel
Most normalmap creation tools will generate green as the top color and that also has advantages for the above tricks section
but the final normalmap needs to have the green lighting inverted so it looks bottom-lit.
The easiest way for me is:
- Open the image in GIMP
- Go to Windows > Dockable Dialogs and open the "Channels" dockable
- Make all colors except green invisible ( toggle off the eye icons )
- Make sure that only the Green channel is selected ( dark band )
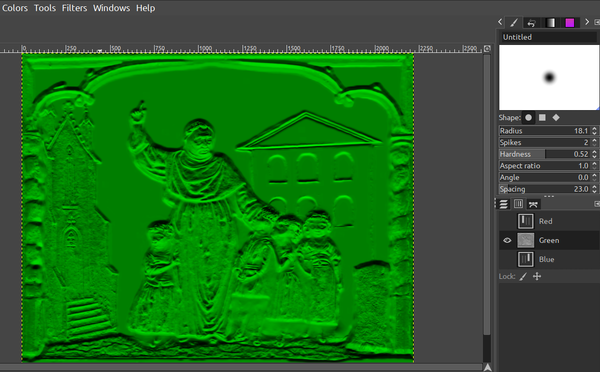
- Go to Colors then Click Invert
- Now make all colors visible again and the image should be correct
Results:
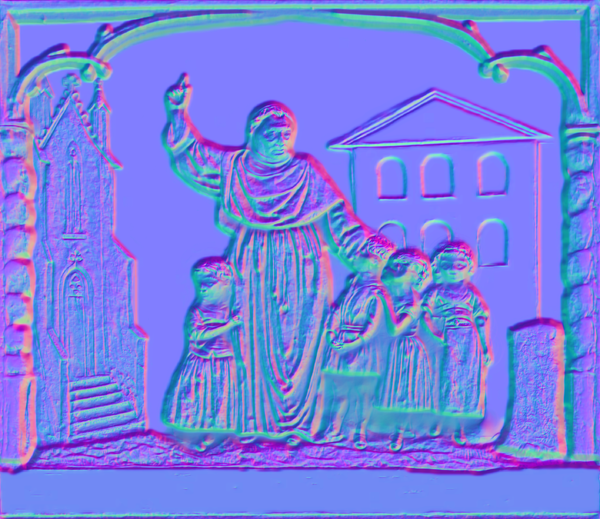
See also: Inverse Normalmaps
Creating the Diffuse
The objective of the diffuse image is the opposite of the objective of the Normalmap workflow.
We want to preserve color \ shade variation that is NOT due to geometry and shadows.
See also: Removing Shadows in Source Images for alternate techniques
- Open the original image in GIMP
- Make a new layer from visible and convert that layer to grayscale
- Crank the Brightness and Contrast so that only the darkest shadows are visible in the new layer
- Invert the colors of the new layer
- Set the layer mode to Brighten only and slide the opacity until most of the shadows areas are neutral
- Use the clone tool to copy the background stone areas over the top of the geometry areas to erase most of it
Results:
Add some Ambient Occlusion
The Normalmap often wont be sufficient to preserve all the lighting detail you want so you may wish to add
back some shading to the diffuse but mostly only direction neutral "Ambient Occlusion" shading that wont
look incorrect with directional lights in-game. AO also can give a texture a more "grimey" look.
- Open the AO image in GIMP
- Open the De-Noised image in GIMP as a new Layer
- Crank the Brightness and Contrast of the De-noised image until only the darkest shadows are visible
- Use the layer opacity slider to blend the two images and save the results.
Results:
Final Diffuse Tuning
You could use the resultant AO image above in it's own texture ( blend filter stage in a material def )
but it is probably easiest to bake it into the diffuse. We also should try to restore some of the lost
detail from the original image
- Open the diffuse image in GIMP
- Open the AO image as a layer and set the layer mode to multiply
- Add an alpha channel to the AO layer then use opacity to blend layers
- Open the original image as a layer and use opacity to blend it in making sure that the blend has minimal shadow detail
You may need to use the "invert high contrast image" trick from above to avoid deep shadows, or you may need to cut out only sections that you wish to enhance - Adjust the contrast range in levels so that none of the details add too much visual noise when illuminated
- Make sure you have the GIMP DDS plugin installed then Export to DDS and choose Compression DXT5, Make Mipmaps, and enable Gamma Correction then export
Result:
Brave verses Coward Diffuse Images
IdTech 4 was designed with the intention to make all lighting dynamic so artists who worked on Doom 3, Quake 4, ETQW,
and even early versions of Rage were instructed to avoid baking any shading into their textures including AO.
Other than the fact that such baked lighting would sometimes risk making movable objects stick out from static ones,
it was also suggested that future updates might improve the lighting model so baking any shading would conflict with that.
TDM originally tried to adhere to the same principles but players and mission authors complained about the
"clean and sterile" appearance of the project. Mission authors began adding textures with varying degrees of baked shading
until the more grungy appearance of TDM v1.08+ emerged.
The current guidelines for baked shading in diffuse images are now far less strict but we prefer that textures only include
non-direction ambient occlusion if any shading at all. That said, modern TDM versions are a little more friendly to diffuse
with shading for textures that are meant for vertical structures \ walls because both our ambient_world and ambient occlusion
shaders have a "light from above" bias to match moonlit outdoor scenes. If your diffuse is meant for a wall texture and
was lit from above you can include more shading in the final version.
A "brave" diffuse is one that includes as little baked shading as possible and will work well for moveable objects or in multiple orientations.
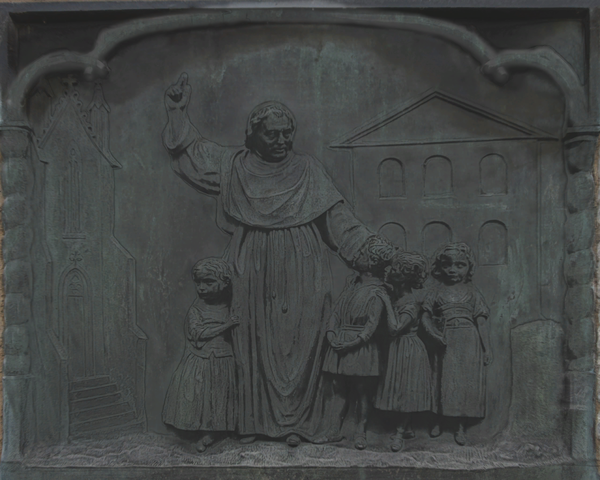
The initial result image under Creating the Diffuse would be a "brave" diffuse image.
A "coward" diffuse includes lots of shading as the author is not confident that the normalmap and lighting model will capture
the intended appearance of the original photo source or artist rendition. Again, top-lit coward diffuse images for vertical use are acceptable.
The result image under Final Diffuse Tuning is more of a "coward" diffuse image.
Take extra care to make a high quality normalmap and try to be "brave" with your diffuse!
Material Def and Paths
To ensure that the texture can be easily found in DarkRadiant we will use the folder and naming conventions used by other similar textures
Diffuse: /dds/textures/darkmod/stone/sculpted/girard_relief
Normalmap: /textures/darkmod/stone/sculpted/girard_local
Editor Image: /textures/darkmod/stone/sculpted/girard_relief_ed ( usually just a jpg of the original image )
Material Def:
textures/darkmod/stone/sculpted/girard_relief
{
    stone

    qer_editorimage     textures/darkmod/stone/sculpted/girard_relief_ed
    bumpmap             textures/darkmod/stone/sculpted/girard_local
    diffusemap          textures/darkmod/stone/sculpted/girard_relief
}
If you wanted to keep AO separate to allow for tuning or better light response (etc) here is an alternate design:
textures/darkmod/stone/sculpted/girard_relief
{
    stone

    qer_editorimage     textures/darkmod/stone/sculpted/girard_relief_ed
    bumpmap             textures/darkmod/stone/sculpted/girard_local
    diffusemap          textures/darkmod/stone/sculpted/girard_relief
    {
      blend filter
      map textures/darkmod/stone/sculpted/girard_relief_ao
    }
}
To adjust the AO strength, you can use an inverted stage and adjust the RGB value of that stage:
textures/darkmod/stone/sculpted/girard_relief
{
    stone

    qer_editorimage     textures/darkmod/stone/sculpted/girard_relief_ed
    bumpmap             textures/darkmod/stone/sculpted/girard_local
    diffusemap          textures/darkmod/stone/sculpted/girard_relief
    {
      blend gl_zero, gl_one_minus_src_color
      map invertColor(textures/darkmod/stone/sculpted/girard_relief_ao)
      rgb 0.7
    }

}
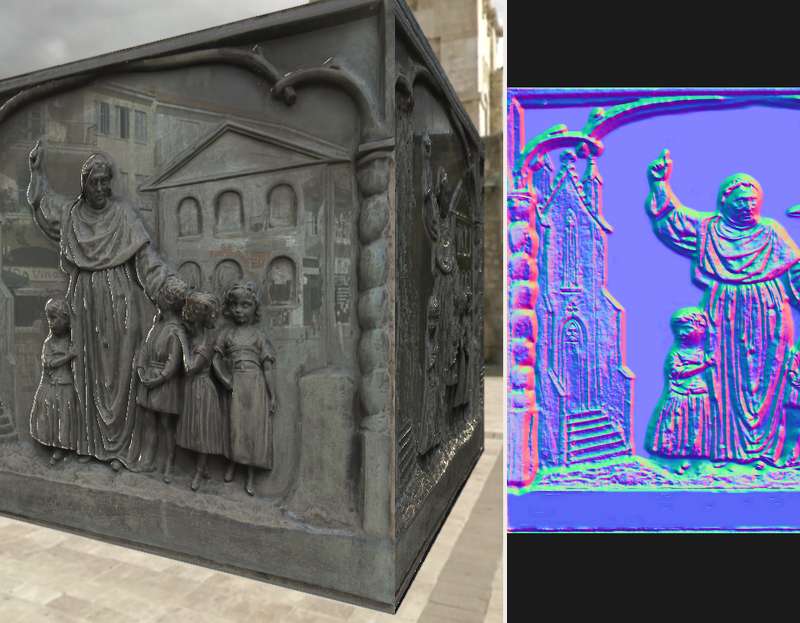
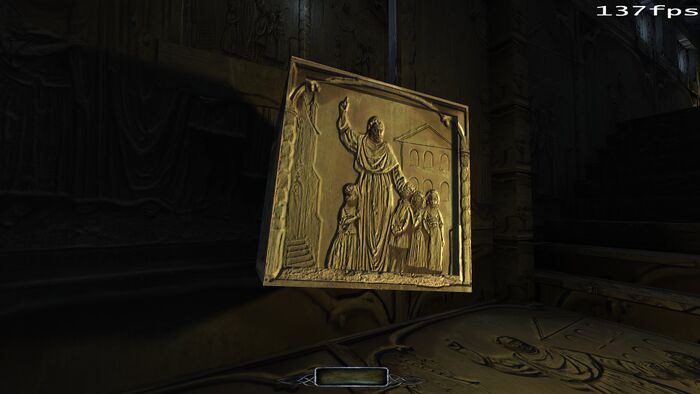
In-Game Review
After placing the material def and images in the correct folder paths for your mission or for the TDM project,
you can now easily test out their appearance in-game just by launching any mission and invoking:
r_materialOverride textures/darkmod/stone/sculpted/girard_relief
in the console. To avoid strange black particles, invoke r_skipParticles 1 as well.
If the in-game results are not satisfactory, figure out which part of the texture has deficiencies and go back to the
step that created the impacted feature and try adjusting to compensate for the in-game appearance ( darken, brighten, change normal strength, etc)
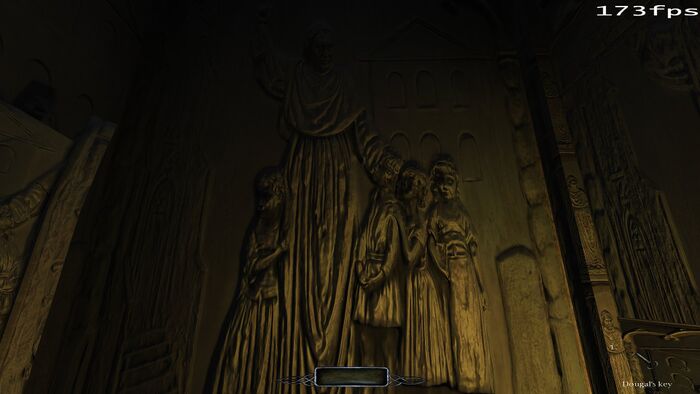
In-Game Results:
